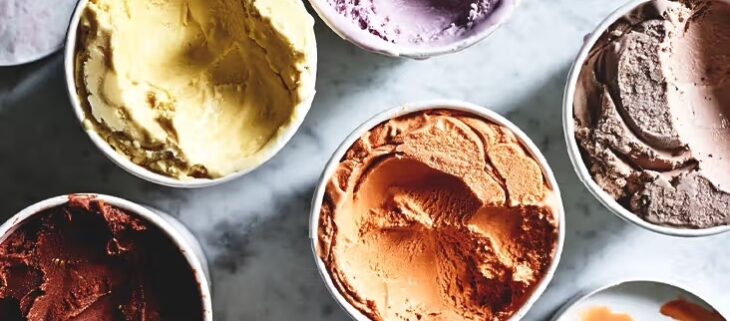
Ice cream is made up of six things, all happily playing together in harmony: ice crystals, fat, milk proteins, sugar, air, and some kind of texture or stabilizing agent.
What makes ice cream challenging to make well is that few people take the time to understand how these six things interact with each other…. Because they do! They interact in a multitude of ways and quite a few of these effects compound (meaning the sum is greater than the parts).

To make things even MORE interesting…. Finished Ice cream is a fairly complex colloid, a delicate substance that contains all six of the things I just listed in three states of matter at once:
- solids ( super tiny chunks of ice and fat, protein, and some kind of texture agent)
- liquid (a watery sugar solution that never freezes)
- and gas (super tiny air bubbles).

So if you wanted to get technical and impress your friends and family with your food science knowledge, (and you do, don’t you?), you might say ice cream is REALLY a colloid made up of particles of solid ice and fat that surround and support air bubbles in a thickened, sugar liquid solution.
How we control each of these elements determines the taste and quality of the finished product. So if you want to make GREAT ice cream, you have to have a working knowledge of how each of these pieces-parts interact.
We’re not going to be like someone reading a recipe and hoping they can follow the instructions and that it will “turn out okay.” Those people smell funny. We are going to UNDERSTAND what’s happening with the ingredients we are adding (and will be a lot less likely to screw up and make a frozen disaster).
So that’s what this post is all about: helping you to delve a little deeper into the six elements which make up ice cream so you can make something delicious! (Or at least know why your last batch turned out so bad).
“Ice Cream” is a food produced by freezing and includes a mixture of dairy ingredients such as milk and nonfat milk, include ingredients for sweetening and flavoring, such as fruits, nuts and chocolate chips as well as functional ingredients, such as stabilizers and emulsifiers, to promote proper texture and enhance the eating experience. By federal law, ice cream must contain at least 10% milkfat and must weigh a minimum of 4.5 pounds to the gallon. Food and Drug Administration (FDA)
Table of Contents
Ice

Ice crystals give ice cream its firmness. They give it body and solidity. That resistance to your spoon and your tongue when you’re trying to get a scoop of frozen goodness onto a waffle cone? That comes from ice crystals and they make up about 30% of ice cream.
Ice crystals are formed from the water in the mixture as it freezes. While we almost never add water directly to our ice cream recipes, don’t forget: milk and cream are mostly water. Milk is 90% water and heavy cream is around 60% water. So there is a LOT of water floating around in your base, ready to turn into ice crystals when the situation is right.
The size of the ice crystals we allow to form while churning our finished product is very, very important! Small ice crystals will make the ice cream smooth and seem less cold in the mouth. On the other hand, large ice crystals will make our ice cream taste cheap, with a coarse texture and an icy mouth-feel.
So how does the whole process work?
How ice crystals form (in general)
Polarity refers to a molecules’ ability to bond with other molecules like itself, by possessing both a positively charged end and a negatively charged end. Think of a chain of magnets – each positive end links to another. If you dumped a bunch of magnets in a bucket and gave it a good shake, when you dumped them out on the floor, almost all of the magnets would have stuck to another.
Water is like that: millions and millions of clear little liquid magnets, all with the same desire to pull together.

When water gets cold enough and the molecules start moving more slowly, the polarity effect goes into play and tiny ice crystals start to form. Then, as these seed crystals slide around in the semi-frozen base, they hook up with other ice crystals and stick together in larger and larger groups in a process called nucleation
Basically, the water in your ice cream “wants” to pull together and stick to other ice crystals really, really badly.
Churn your ice cream too slowly? Those ice crystals will have plenty of time to form into gigantic, crunchy cubes. Then, once you put the whole thing into a standard freezer, the hardening stage begins and those ice crystals will keep on growing. Professionals use one of those awesome blast chillers that can take a semi-frozen batch of gelato and harden it completely within 30 minutes to 2 hours.
A regular freezer? It will take 4-12 hours to freeze solid, giving those ice crystals many more hours to keep growing and growing and growing…..
The role of the dasher
Preventing your ice cream from turning into a crunchy, nasty mess all comes down to three things: your technique, the type of ice cream machine you’ve got, and the type of dasher you are using – the paddle spinning around inside the ice cream machine. This dasher- doohickey is doing more than just adding air, it is is also agitating the ice cream base while it the liquid freezes, keeping the crystals small, breaking up large crystals and distributing them through the base so it freezes evenly.
Remember: smoothness is the ultimate test of quality in ice cream. No matter what our other preferences, everyone wants smooth ice cream! And the single biggest influence on the smoothness of ice cream is the size of the ice crystals.
Now the size of ice crystals in commercial ice cream can vary in size between 1 and 150 μm, with the average being about 25 μm, about 1/4 the size of the average human hair!
“μm” is simply the abbreviation for a micrometer. Think about this: there are 1000 micrometers in 1 millimeter. So, yeah…. even 150 μm is pretty small!

When ice crystals are between 10 and 45 μm, we can’t detect them and we perceive the ice cream as smooth. But when those ice crystals start getting bigger, larger than 50 μm, we can start to feel them with our tongues and the ice cream becomes coarse.
So how do we keep those ice crystals between 10 and 45 μm? To find out, we need to understand exactly how ice crystals form and then grow when we’re making ice cream.
Fun fact: a single human hair is significantly larger than the biggest ice crystal in a quality ice cream: about 80 – 100 μm.
How do we keep those ice crystals small? It all comes down to speed.
Keeping the ice crystals small is all about freezing the mixture as fast as possible! Because the faster we freeze the mixture, the more small crystals will be created and the less time they’ll have to join up and form big crystals. There’s a number of things that will influence how fast the mixture freezes:

1. The temperature of the bowl and the temperature of the base
The colder the bowl, the faster tiny ice crystals start forming. This means more small crystals. Which in turn means the temperature will fall faster and the mixture will freeze sooner. Ideally the bowl should be between -9°F to -20°F BEFORE you add your base. And speaking of bases… you must have your ice cream base as COLD AS POSSIBLE before adding it to the machine.
2. The gap between the dasher blades and the sides of the bowl
Expensive, commercial ice cream makers use spring loaded dashers so that the blades are ALWAYS in direct contact with the sides of the bowl and can scrape off all of the frozen mixture. Our pricey Lello Musso Pola – with its strong motor and stainless steel dasher – doesn’t have this feature… there is a tiny gap between the blades of the dasher and the sides of the bowl.
Home units are even worse! There’s always a thin layer of frozen mixture on the sides of the bowl that the blades can’t reach!


3. The speed and power of the dasher
With a good machine, there is a strong compressor making the container super-cold and a metal dasher spinning like crazy. In an ice cream machine like that, ice crystals are quickly moved into the center of the bowl as the temperature drops.
The movement of the dasher also contributes to ice crystal size by cutting through the ice crystals and making them smaller. Powerful dashers with sharp metal blades are able to keep chopping through ice crystals even as the mixture thickens.
Home units? Not so much. They are typically made of plastic and the motors aren’t nearly strong enough to keep going when the mixture gets thick.
Fun fact: the same exact ice cream served at the same exact temperature (but with different sized ice crystals) will be experienced differently. Larger ice crystals require more heat to melt and since this takes heat away from your mouth, it makes the ice cream seem colder. The larger ice crystals will also register on the tongue as grainy or chunky. On the other hand, smaller ice crystals will melt more readily and the ice cream will seem “warmer.” Since your tongue can’t register any size crystal smaller than 20㎚, the second batch will seem infinitely creamier.

Fat

Fat contributes to ice cream in four important ways:
- it helps to stabilize the final structure by trapping air bubbles
- it gives that creamy texture and mouth-feel
- it delivers flavor
- it thickens the mixture which slows melting
The fat in ice cream comes from butterfat in milk and cream. Around 3.4% of whole milk is butterfat, and heavy cream contains between 30 and 48% butterfat, depending on what type you are working with. This fat exists as tiny, solid globules suspended in the milk and cream.
According to US law, at least 10% butterfat is absolutely necessary for a product to be ice cream. Most companies use a little more than 10% though… here are the basic guidelines along with some brand examples:
| Type | Fat Content | Brand Example |
|---|---|---|
| Economy | 10-12% | Blue Bell |
| Premium | 12-14% | Turkey Hill, Tillamook |
| Super-premium | 14-16% | Haagen Daas, Ben and Jerry’s |
Few ice cream pros use more than 16% butterfat in their recipes.
Between 17 and 19% butterfat, the fat would coat your tongue and it would taste like eating a scoop of sweet crisco . More than 20% butterfat? The whole mixture would freeze too hard to scoop, be weirdly “crumbly,” and quite frankly, taste seriously disgusting.
Fat is texture: it traps air
Before an ice cream mixture is churned, the fat globules in the milk and cream are very small and kept apart from each other. Fat isn’t polar (like water). It needs to be banged up a bit and be split into tinier globules to want to stick to other fat molecules.
This is where the dasher comes in: while the ice cream mixture is being churned, the fat globules are broken apart, revealing their sticky interiors. When those tiny, sticky bits are knocked about by the dasher and bang together, they join up to form long, pearl-like strings that wrap around air bubbles. These strings hold the air bubbles in place, keeping the “foam” stable. When the butterfat is completely frozen later on during the hardenings stage, the air is locked in place.

The exact same thing happens when you make whipped cream: you smack the fat globules with the whisk attachment of your mixer, they get sticky, and start creating tiny walls of connected fat around the air being forced in by the whisk. The same thing happens with air in ice cream: the fat protects tiny air bubbles creating a light texture, a soft consistency, and an increase in volume.
Fat is texture: it holds shape
Imagine a stick of butter in the freezer. Pretty hard, right? Now take that stick of butter and leave it on the counter for a day (or longer). It will get really soft, but never completely melt…. unless your kitchen is super hot!
The same butterfat that makes BUTTER hard at freezing temperature is what is giving our ice cream its firm texture and which allows us to eat a bowl of ice cream without the whole mess melting right away.
Fat is flavor

Here’s something you need to know: fat absorbs flavor. If you are making a delicious coffee ice cream, you can INFUSE the flavor into the base, strain out the solids, and be left with something rich and vibrant. This is one of the BEST POSSIBLE WAYS to flavor your ice cream – flavor the fat.
More importantly, the more butterfat in an ice cream, the longer it takes us to perceive the flavor. It kinda sneaks up on you. It lingers on the palate. The fats also give ice cream its creamy texture and richness. Higher fat ice creams are rich and creamy with a lingering (and hopefully delicious) after taste. Lower fat ice creams have a much lighter, cleaner flavor with a short-lived after taste.
Here is an example: in a higher fat, strawberry flavored ice cream, the taste will be delivered more slowly and subtly (but more long-lastingly). In a lower fat ice cream or sorbet, the EXACT SAME STRAWBERRY FLAVOR will seem more “clean,” be more clear and prominent (but will linger on your palate for just a few moment).
Fat preferences matter
Whether you prefer higher fat, rich and creamy ice creams or light and clean, lower fat ice creams is a matter of personal taste. American and French ice creams tend to be higher in fat. While Italian ice creams are usually a bit leaner.
You can alter the fat content of your own ice cream by playing around with the proportions of milk and cream in your base mixture. Higher fat ice creams have more cream, while lower fat ice creams have more milk. You need to be careful though: too much or too little fat will can ruin your ice cream…
Too much, will give an unpleasant, cloying flavor and a blobby, buttery texture from the crystallization of the fat particles.
Too little and there won’t be enough fat globules to form the strands that stabilize the air bubbles so the ice cream will be wet, coarse, and will melt easily.

Ever had a McDonald’s Vanilla cone and
wonder why it’s not listed on the menu as “ice cream?”
They CAN’T because it ISN’T.
(McDonald’s Soft Serve in only 4% butterfat).
Proteins
There are two primary proteins in cow’s milk we are interested in: Casein and whey protein. There are many more kinds of proteins floating around, but these two make up the vast majority – close to 95%! When we cook these two proteins for a few minutes, they denature (just a technical word for uncurl), and are major components of making a smooth and creamy final product.
Denaturing Proteins for Deliciousness
How proteins denature is worth a bit of explanation.
Normally, proteins are a mess of curled up strands – imagine a bunch of shoelaces, all tangled together. That’s a “normal” protein strand. If you get that strand of protein hot – about 180*F – it denatures, uncurling and becoming firm.

What is really important about this process is that the strands of protein have sitcky little knobs along their length which want to connect to water or to other protein strands. Once dairy proteins are denatured, these sticky knobs are looking for something to hook up with and THAT is how proteins form a web that appears as a solid.
Imagine an egg cooking.
As it gets hotter, the egg white (which is mostly protein), becomes more and more firm until it appears as a solid. That solid is actually millions of proteins which have cross-linked into a stable structure, trapping available water and creating texture where there was none.
The same exact thing happens to milk when you cook it long enough – the proteins denature, some sticking to other proteins and some sticking to available water – and it becomes nearly solid. Don’t believe me? Go buy a can of Dulce de Leche and try to drink it!

Now there is a problem… if you overcook your dairy, while prepping your ice cream base, you are going to end up with a slightly cooked, caramelized flavor due to the Maillard Reaction. This isn’t necessarily a bad thing! Sometimes, that slightl cooked flavor is delicious! However, most people agree that ce cream isn’t supposed to taste canned (and that’s what will happen if you overwarm your milk proteins or cook them for too long).
One last note: there isn’t a whole lot of protein in milk, so many ice cream professionals add some extra casein and whey protein by including milk powders in their recipes. This is certainly something you may want to try to increase the creaminess and reduce ice crystal formation!

Sugar
The amount and type of sugar you add to your ice cream does a lot more than just make it sweet – it has a huge impact on the texture and structure of what you are making. Sugar is crucial to the physical structure of ice cream. Not only does it add body but it also bonds to some of the available water in the ice cream base and acts like a natural antifreeze – actually keeping the base from completely turning into a block of ice, keeping the ice cream scoopably soft! You have a lot of choices when it comes to the sweetener you use, so you’ve got to have some knowledge under your belt before you get started.
The Wide World of Sugar (You Probably Didn’t Know About)
When you think of sugar, you probably think of white table sugar, like you put in your delicious afternoon coffee. There’s a bunch of market forms of white table sugar you can buy at Publix: powdered, brown, syrup, among several others. All of these sugars are the same – at least on a molecular level – and they are all called sucrose.

Sucrose is only ONE kind of sugar
(and not one commonly used in professional
ice cream making).
All sweeteners fit into two broad categories: monosaccharides (one molecule) and disaccharides (two monosaccharides joined together).

Table sugar (sucrose) is a disaccharide made up of fructose and glucose. Here’s what these sweetening molecules look like separately and then joined together to form sucrose.

Understanding how some of these different types of sweeteners work is really important if you want to get a grasp on how to make your ice cream fantastic instead of just …. bleh.
Sugar binds water, depressing the freeze point
Much like proteins have little “knobs” that attach to water and hold on for dear life, sugar does too! Imagine you are holding a water droplet in each hand. You’d be just like a monosaccharide, like glucose, neatly binding two molecules of water. Now imagine you and your best friend are holding hands together. Even though you have four hands between you, the two of you can still only hold two molecules of water. You and your BFF would be like a disaccharide, like sucrose.
What does this mean?
A cup of sucrose, a disaccharide) will bind HALF as much water as the exact same amount of glucose ( a monosaccharide). Since binding water in ice cream is one of the most important goals of ice cream making, using only table sugar to sweeten your ice cream is a really bad idea!
Here’s a crash course in how it all works: regular water freezes hard at 32 °F . But when we add sugar to water, the sugar causes the water to freeze at a temperature below that by bonding to water molecules. In other words, the more sugar you add, the COLDER the ice cream has to get to freeze solid. When we remove our ice cream from the ice cream machine, it’s not yet balanced: it’s still really soft because a lot of the water in the mixture hasn’t frozen yet. When we transfer the ice cream to the freezer, more of the water in the ice cream starts to freeze to ice.

But remember, the water in ice cream isn’t regular water, it’s a sugar-water solution: sweetened water with a much lower freezing point than regular water. As more and more of the water freezes to ice, the concentration of sugar in the remaining water increases, which reduces the freezing point of that water still further. Until at some point, the concentration of sugar is so great that no more water will turn to ice even at 0 °F (-18 °C).
This is why even at very low temperatures a proportion of ice cream always remains liquid. And it’s this liquid proportion of ice cream that keeps it soft!
Here is the thing to remember: different types of sugar lower the freezing point of water to different extents. So we can also vary the types of sugars we use to make our ice creams more or less soft!
The degree to which a sugar lowers the freezing point of water is called “Relative Freezing Point Depression” and is measured against Sucrose. So Sucrose has a relative freezing point depression of 1.0 and all other sugars have values relative to that.
Relative Sweetness: Some sugars really are sweeter than others
All sugars taste sweet, certainly. But different sugars have different levels of sweetness. This is really useful for ice cream makers as it allows them to adjust the sweetness of ice creams by using different types of sugar. For example, remember our friend glucose? Glucose tastes a good bit less sweet than sucrose, so using glucose instead of white sugar tames the sweetness in ice cream.

Levels of sweetness are measured against the sweetness of our good-old friend white table sugar “Sucrose” and are measured on a scale called “Relative Sweetness”. Sucrose has a relative sweetness of 100, and all other sugars have values relative to that.
Most amateur-made ice creams are far too sweet – in most of them, you can’t taste any of the dairy flavors. Just sugar. But by using different TYPES of sugars, we can reduce the sweetness of our ice cream to create something much more interesting and have a less, sickly-sweet, nasty flavor profile.
For more on the different Relative Sweetness of different sugars, check out the infographic which compares common sweeteners .
Different Sugars Used to Make Ice Cream
So, we know that sugars make ice cream sweet, give it body, and keep it soft. And we also know that different types of sugars do these things to different extents. Let’s have a look at what we can play with

Sucrose
Sucrose is table sugar. Granulated, caster, icing and brown sugar are all Sucrose. It’s the most familiar sugar and is available everywhere. And in terms of sweetness and freezing point depression it’s the base against which other sugars are measured.
Dextrose/ Glucose
Dextrose (sold as glucose) is ¾ as sweet as Sucrose… but it lowers the freezing point of water by almost twice as much. So by replacing some good ‘ol white sugar with Dextrose, we can make our ice creams less sweet and more soft. It’s often available in pharmacists, home brew shops and the baking isles of supermarkets.


Fructose
Fructose lowers the freezing point of water to the same degree as Dextrose. But it’s really, really sweet: much sweeter than Sucrose. For this reason, Fructose is rarely used in quality ice cream.
Maltodextrin
Maltodextrin is not very sweet and doesn’t have too much effect on the freezing point of water. It’s often used to bulk up mixtures that are otherwise low on solids. So it’s ideal in sorbets made with watery fruit (such as watermelon), where if we made up the solids with other sugars, they would be too sweet. It’s also useful in savory ice creams.


Invert Sugar
Invert sugar is a syrup widely used in professional cooking. It’s sweeter than Sucrose and depresses the freezing point of water to the same degree as Dextrose. It has a significant effect on the texture of ice cream, adding body and reducing ice crystals. Chefs buy it pre-prepared in big tubs from brands like Trimoline. But we can easily make it at home.
Karo Light Corn Syrup
Karo Light Corn Syrup behaves in a similar way to Invert Sugar. However it’s significantly less sweeter. It’s also much easier to get your hands on the Invert Sugar! However, it does have a slightly metallic taste so it needs to be used in moderation with lighter flavors.


Honey
Honey acts like a flavored invert sugar. Because basically, that’s what it is! It’s very sweet and often strongly flavored so we need to be careful how much we use. But it’s great fun to experiment with different types and flavors of honey in ice cream.
How learning about sugar and experimenting with different types benefits you (the wanna-be ice cream maker)
Using combinations of different sugars allows us to take complete control of the sweetness, body and softness of our ice creams. This is where the talented amateur and professional tend to part ways: the pros use carefully-experimented varieties of sugar to get the texture and sweetness level they want!
Ice cream usually contains between 14 and 24% sugar by weight. Hopefully, by now you realize that removing sugar from ice cream will create something fairly nasty: bland, thin and icy hard! Be careful with sugars that lower the freezing point of water more than Sucrose though, as if you use too much of these your ice creams won’t freeze properly!
| Sugar | Relative Sweetness | Total solids % | Relative Freezing Point Depression |
|---|---|---|---|
| Sucrose | 100 | 100 | 1.0 |
| Dextrose | 74 | 92 | 1.9 |
| Fructose | 173 | 100 | 1.9 |
| Lactose | 16 | 100 | 1.0 |
| Maltodextrin | 20 | 100 | 0.3 |
| Honey | 130 | 74 | 1.46 |
| Invert sugar | 125 | 77 | 1.9 |
| Karo light corn syrup | 33 | 80 | 1.9 |

AIR
In large part, the QUALITY of ice cream depends on the amount of air it contains and the size of the individual air bubbles.
Why do we care about air or bubble size? Air – in large part – determines taste, softness, and “scoopability.”

If you have ever had a bowl of ice cream melt, and then refroze it and tried to eat it later, it probably did not taste very good.
To grasp the effect of air on ice cream, think of whipped cream. If you whip air into cream, you get whipped cream. Whipped cream has a different texture and taste than plain cream. Plain cream tastes sweeter than whipped cream. Just like ice cream without air, pure cream has a sickly, overly sweet taste. This is because the structure of a substance can have a big effect on how it tastes, and that the structure often controls the rate at which flavor molecules interact with your taste buds. The larger the structure (ice cream, in this case), the longer it takes for the flavor molecules to be released and to be “tasted.”
Air also contributes greatly to texture and consistency. Ice creams with more air are lighter, fluffier and less “creamy”. While ice creams with less air are heavier, denser and more “creamy”.
So how does air get in your ice cream?
Air bubbles are added to the ice cream during churning by the dasher, the paddle spins through the ice cream base as it freezes. The faster the blades of the dasher move through the mixture, the more air they add. And different shaped dashers will also affect how much air is pushed into the mix.
Overrun
Air bubbles also give ice cream much of it’s volume. The amount of air in ice cream is measured by something called “overrun”. This is simply the increase in volume that the air contributes to the ice cream (measured as a percentage).

So, if you start off with 4 cups of liquid ice cream mix and once you churn it, you have 6 cups of frozen ice cream…. the volume increased by 50%, and we would say what you made “had an overrun of 50%.”
Different qualities of ice cream have different levels of overrun.The more “premium” an ice cream, the lower the overrun (around 25%); the cheaper the ice cream, the higher the overrun (100% or more). Why? Since air is free, high overrun is a very efficient way to increase the volume of your product without increasing the cost to make it!
Different types or varieties of ice cream also have different levels of overrun. Italian gelato typically has overrun as low as 20% whereas American Philadelphia style ice cream is always close to 50% and American Soft Serve is always in the 65-70% category.
How much air is in your favorite brand? Read this…
| Ice cream Brand | Overrun % |
| Winn Dixie “Vanilla Ice Cream” | 102 |
| Publix Premium “Vanilla Bean” | 97 |
| Breyer’s “Homemade Vanilla” | 98 |
| Turkey Hill “Vanilla Bean” | 104 |
| Haagen Dazs “All Natural Vanilla Ice Cream” | 31 |
| Stonyfield Farm “Gotta Have Vanilla” | 31 |
| Ronnybrook “Hudson Valley Vanilla” | 22 |
| “Artisan” gelato | 20-25 |
Is it best to have higher or lower overrun? Ultimately, it’s down to personal preference: if you like a light, fluffy ice cream, you’ll want to make it with a high overrun, if you prefer a dense, creamy ice cream you’ll be looking to make it with low over-run.

Texture Agents
Professionals making ice cream use a set of ingredients most amateur home cooks do not: texture agents. Below are the three major types of texture agents used by all the professionals. Let’s learn from what they are doing, alright? We can learn to make excellent ice cream by copying what the pros have already figured out.
Emulsifiers
Ever made a vinaigrette? You combined oil and vinegar and flavor ingredients like ffresh herbs or pepper or whatever. You shook it or whisked it or gave it hell with a food processor… and a couple minutes or hours or days later, it was completely separated again, right? Water and oil hate each other with a holy passion. If we are going to make them into a permanent emulsion, we are going to have to add something to make them “stick.”

The same thing can happen with the fat and water you are trying to combine in your ice cream. The will NATURALLY separate (unless we add ingredients which will slow or stop the separation process).
Emulsifiers hold fat in place and help prepare it to capture air when you churn the ice cream. The most popular emulsifier in custard-based ice cream is the same one used to make salad dressing: eggs!
Emulsifiers bond with both water and fat at the same time, which prevents them from drifting apart and “sticking” to each other. This is what is so great about using an emulsifier they bond the water and fat to each other instead of letting them drift in opposite directions and make little puddles of fat or ice in your ice cream. And you have to admit… biting into a frozen puddle of butterfat is sure to be nasty.
Here are the two most common types of emulsifier:
- Custard-based ice creams use egg yolks as emulsifiers.
- Philadelphia-style ice creams use milk powder in a 2% concentration. For more information on how milk proteins are used to stabilize fat and water, please see the section on Protein.
Destabilizers
While emulsifiers help BOND water and fat, destabilizers are only going after one thing: the big ‘ol fat globule that is floating around in your ice cream base. See, fat globules have a thin coating of nonstick proteins and we need to break up the chunk-o-fat so it can accept and protect a bunch of delicate air bubbles.
Yes, this process happens when the dasher spins around inside the ice cream machine… but by adding a destabilizer to the mix beforehand, we can get the party started early, so-to-speak. The destabilizer chomps away at the fat globules, breaking them up and helping the whole base to start accepting air more quickly, resulting in a smoother, more creamy final product.

Stabilizers
What is a stabilizer? Simply put, a stabilizer is a chemical ingredient that helps keep the five components of ice cream stable, supporting quality structure and texture by locking water in place, preventing it from shifting around and forming large ice crystals., which in turn makes the ice cream more satisfying and well, creamier. There are a couple of standard stabilizers in your kitchen pantry. Take a look right now. You will probably find a small container of corn starch and pectin somewhere in your kitchen.
The stabilizers we’re talking about though, are a bit more scary. These have strange names and sound like they were dreamed up by a crazy food scientist: agar agar, carrageenan, guar gum, xanthan gum…. you get the idea.
Don’t be scared. We are going to use micro-amounts of these ingredients (usually less than a full teaspoon or only a gram or two). Here’s what they will do to our ice cream:
- hydrate – meaning they will soak up a good bit of available water
- form a gel -meaning they will cross-link and bond with itself like proteins do when they denature
- disrupt the flow of water – meaning they will thicken then ice cream base
- slow the growth of ice crystals during the freeze/thaw cycle – meaning that as your freezer goes through its inevitable warmer/cooler zones, your ice cream won’t develop giant, crunchy ice crystals
Types of Stabilizers

Milk Powder
- Comes from dried and powdered, low-fat milk
- Use in 3% concentration (30g per 1 quart batch)
- Simmer for 30-60 minutes to denature proteins
- Measure finished product and replace water lost during cooking before moving the base to the fridge for aging
Tapioca Starch
- Comes from the root of the cassava plant
- Use in 0.5% concentration (5g per 1 quart batch)
- Make a slurry with the tapioca and two tablespoons of cold water
- Whisk into hot base once it has finished cooking and allow the residual heat to activate the starch


Locust Bean Gum (LBG)
- Comes from the Carob bean
- Adds a “velvety” texture to ice cream
- Use in 0.2% concentration (2 g per 1 quart batch)
- Mix LBG with sugar before adding it to cream blend, then use an immersion blender to make sure it is evenly distributed before cooking
- LBG must reach near boiling temperatures to be activated
Low-Methoxy Pectin
- Comes from the pith of citrus fruits
- Is NOT the same as standard Pectin (do not use the regular stuff you include in your jam and jelly recipe – it won’t work)
- Use in a concentration of 0.1% (1 g per 1 quart batch)
- Mix Low-Methoxy Pectin with sugar before adding it to the cream blend and cooking as usual


Guar Gum
- Comes from Guar plant
- Must add to finished and cooled ice cream base – do not cook!
- Use in concentration of 0.1% (1 g per 1 quart batch)
- Add to cooked, chilled ice cream base using a blender. Add base, start machine, then while it is going, sprinkle in powder. Turn speed to “high” for one minute. Age base for 24 hours to allow the guar to ripen and “do it’s thing”
Xanthan Gum
- Comes from the secretion of a bacteria, produced by fermented glucose
- Use in concentration of 0.1% (1 g per 1 quart batch)
- Add to cooked, chilled ice cream base using a blender. Add base, start machine, then while it is going, sprinkle in powder. Turn speed to “high” for one minute. Age base for 24 hours to allow the guar to ripen and “do it’s thing”


Iota Carrageenan
- Comes from seaweed
- Use at a concentration of 0.25% (2.5 g per 1 quart batch)
- Mix Iota Carrageenan with sugar before adding it to cream blend, then use an immersion blender to make sure it is evenly distributed before cooking
- Iota Carrageenan must reach near boiling temperatures to be activated
Cream Cheese
- Commercial cream cheese contains many of the stabilizers already listed – so when you add cream cheese, you are adding these as well (four for the price of one!)
- Use at a concentration of 5% (50 g per 1 quart batch), replacing 5% of the cream blend in your recipe
- whisk softened cream cheese into chilled ice cream base – do NOT cook it (otherwise the acidic cream cheese will curdle your base and you will be really sad).

Gerneral Rules for Using Texture Agents

In general, when adding texture agents follow these guidelines:
- Give the texture agents time to “age” after you combine them with the base, usually 24 hours – that’s when they do their work.
- Each agent has specific instructions associated with adding it to the recipe. Follow these instructions carefully! If you add some while the mix is hot, you can ruin the whole batch (while others need to be cooked). Each is unique. Know what you are doing before you begin!
- Keep in mind that most of these texture agents are added in VERY small quantities – make sure you are using an accurate scale. Few scales accurately read below 1 gram. Make sure yours does.
- There are a number of commercial ice cream stabilizer blends that are available – each of these are premixed and provide excellent results. Follow the manufacturer’s instructions exactly.
