
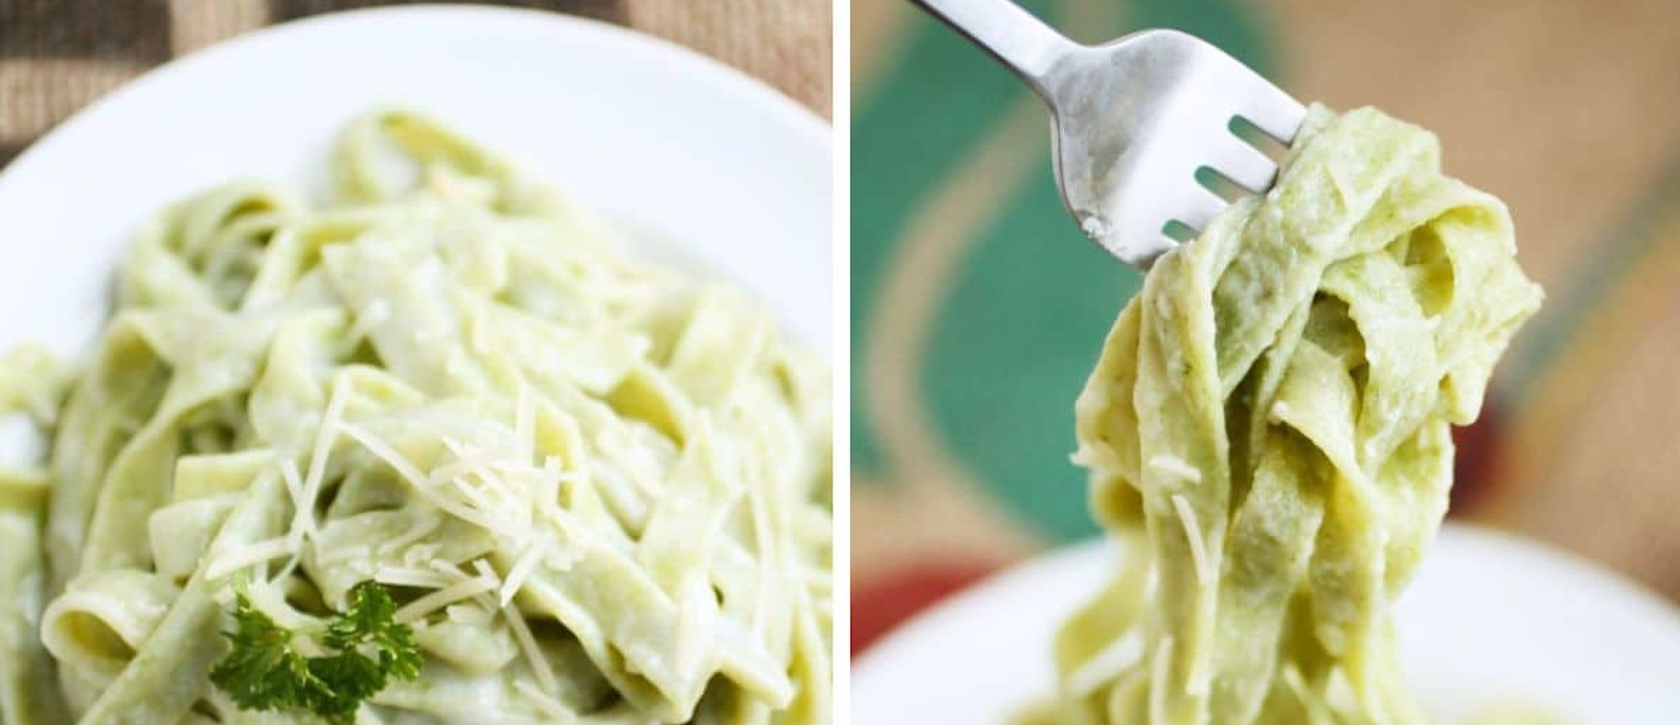
Everyone thinks they know Alfredo. They’re wrong. The dish sitting in front of American diners today — heavy cream, garlic, sometimes a fistful of add-ins — has almost nothing to do with what a Roman restaurant owner made for his sick wife in 1908. Real Alfredo has three ingredients: fettuccine, butter, and Parmesan. No cream. No garlic. Nothing to hide behind. That’s exactly why this is the dish that teaches you emulsion — there’s nowhere for a mistake to hide when the sauce is this simple.
In a similar way, lots of people have only tried store bought Fettuccine and have NEVER had a good spinach pasta. If this is you, this recipe double header is going to be game changer: Two great recipes, neither especially hard, amazing together, and doable by anyone with a bit of patience and dedication to the craft.
Because this post covers two ENTIRELY DIFFERENT recipes, it’s split into two parts:
History, background and science on both in Part 1, then cooking directions, tips and tricks, and how to bring it all together on the plate in Part 2.
PART 1: Backstory
A Sick Wife, a Golden Fork, and a Hollywood Honeymoon
In 1908, a Roman restaurant owner named Alfredo di Lelio was worried about his wife. Ines had just given birth to their son and lost her appetite entirely — she wasn’t eating, and nothing was working.
Di Lelio, working in his mother’s trattoria, came up with something simple: fresh egg fettuccine tossed with an almost absurd amount of butter and Parmesan, melted and worked together right in the bowl until it turned glossy and rich. It worked. Ines ate. The dish stuck around as a family favorite, and in 1914 di Lelio opened his own restaurant on Via della Scrofa to serve it properly, eventually doubling — some say tripling — the butter for extra richness. He called it, with characteristic modesty, fettuccine all’Alfredo.

It might have stayed a Roman house dish forever if not for two American movie stars on their honeymoon.

In 1920, Douglas Fairbanks and Mary Pickford — the biggest celebrity couple in the world at the time — ate at di Lelio’s restaurant and lost their minds over it. The story goes that they came back the next night and gifted Alfredo a golden fork and spoon, engraved for the occasion, in exchange for the recipe. They brought it home to Hollywood and had their favorite restaurant, Musso & Frank Grill, learn to make it. Word spread through the film industry, and by the time Alfredo sauce hit American home kitchens, it had picked up something the original never had: heavy cream, added by cooks trying to recreate the richness without di Lelio’s technique for building it from butter and cheese alone.
Here’s the part that surprises most people: in Italy today, fettuccine Alfredo barely exists. Outside of two restaurants in Rome — Alfredo alla Scrofa and Il Vero Alfredo, both run by di Lelio’s descendants, each claiming to be the “true” original — you won’t find it on Italian menus. It’s considered a dish you make at home when the fridge is nearly empty, not something worth ordering out. Meanwhile in America, it became one of the most popular pasta dishes in the country. Same name, same city of origin, two completely different reputations.


Here’s where we land on it, and it’s a deliberate choice, not an oversight: this unit teaches you the American version, cream included. That’s not us caving to what’s easy. It’s us acknowledging that cream-based Alfredo is what walks through the door expecting this dish, and there’s a version of “authentic” that matters more than historical accuracy — doing the popular version well.
Unfortunately, a lot of restaurant owners still think Alfredo means a bechamel with some parmesan dumped in, smothering sad pasta on a plate. Worse, they’re buying that horrible instant powder, following the example of cheap Italian restaurants, passing off chemical binders and flavorings as the real thing.
These people deserve their own level in Dante’s inferno.
Real cream, real butter, real cheese, built with real technique — that’s still miles ahead of what you’re eating in most restaurants, even if it’s not what di Lelio served his wife in 1908. Know the history. Make the version people actually want.
Fine Dining Spotlight — “From Rome to Hollywood, and Back to the Tasting Menu”
Musso & Frank Grill, the oldest restaurant in Hollywood, still serves the “Original Fettuccine Alfredo” on its menu today — the same recipe brought back from Rome by Fairbanks and Pickford almost a century ago, still made without cream, exactly as di Lelio intended.
Modern chefs are split on what to do with Alfredo. Some treat it as a dish that needs reinventing entirely. At the Los Angeles restaurant Donna, chef Casey Stagliano built a seasonal riff using Parmesan fonduta — a creamy, cheese-based dipping sauce with roots in the Piedmont region of Italy — folded with spring vegetables, deliberately avoiding what he’s called the lazy version: a splash of pasta water and heavy cream, dressed up and called Alfredo. Other chefs have pushed back on the idea that Alfredo needs cream at all, arguing that the original butter-and-cheese technique, done well, doesn’t need help from anything else. The dish that started as an act of care for one sick woman is still, over a hundred years later, something serious chefs argue about.
Hot Emulsions: the Science of Alfredo
Here’s the fight happening in your pan every time you make this sauce: butter is fat, pasta water is water, and fat and water do not want to be friends. Left alone, they’ll separate every time — the same way oil pools on top of vinegar in a salad dressing you forgot to shake. When an Alfredo sauce “breaks” — turns greasy and grainy instead of smooth and glossy — that’s not bad luck. That’s just fat and water finally winning their fight and going their separate ways.
So how does the sauce ever come together in the first place? Pasta water is the referee. It’s not just water — it’s loaded with starch dissolved off the pasta as it cooks, and that starch happens to be able to grab onto both fat and water at once, holding them together in suspension instead of letting them split apart. This is the exact same trick that makes carbonara possible, and it’s why saving your pasta water for this dish isn’t a nice-to-have. It’s the only thing standing between you and a broken sauce.
That referee has a breaking point, though, and it’s heat. Slam this sauce with high, aggressive heat and you’re not speeding anything up — you’re agitating the fat until it physically tears free of the starch holding it in place. That’s what “breaking” actually is, down at the molecular level: not the sauce failing randomly, but the emulsion getting knocked apart by more energy than it can absorb. Cheese has its own narrow window on top of that. Parmesan’s protein bonds start breaking down around 90°F, but the cheese doesn’t actually melt into that smooth, liquid consistency you want until closer to 180°F — and the second you go past that point, the story flips. Water starts cooking out of the cheese, the proteins that were loosening back up start coagulating again, and what was silky a minute ago turns tough and chewy. Pull it the moment it melts. Don’t wait around to admire it.
And here’s the part that explains why the dish split into two completely different traditions: the original butter-and-cheese version and the Americanized cream version aren’t the same sauce with an extra step. They’re built on two different systems entirely. Cream already comes with its own built-in fat-in-water emulsion — that’s literally what cream is — which makes a cream-based Alfredo naturally more forgiving and stable. Butter-and-cheese Alfredo has none of that help. It has to build its emulsion from scratch, using nothing but starchy pasta water as the glue. That’s exactly why the original is harder to pull off, and exactly why it breaks so much more easily than the version most people grew up eating.
Weird, Interesting, and Popular Variations
The dish has splintered into versions the original inventor would barely recognize:
- Cajun/Blackened Chicken Alfredo — a genuinely American invention, pairing spice-crusted, blackened chicken with a cream-based Alfredo. Widely popularized by chain restaurants like Red Lobster, this pairing shows up on menus across the country and has become its own recognized dish, distinct from either “Cajun food” or “Alfredo” alone.
- Olive Garden’s “Amazing Alfredo” lineup — the chain runs multiple Alfredo variations simultaneously, all built on a cream base, none resembling di Lelio’s original.
- Upscale chain versions (Maggiano’s, others) — built around roasted garlic and imported Pecorino Romano rather than plain Parmesan, aiming for a richer, more layered flavor than the basic chain version.
- Alfredo as a pizza sauce — “white pizza” built with Alfredo sauce instead of tomato, a purely American crossover that has nothing to do with the dish’s Roman roots.

SPINACH
Here’s something that surprises most people: spinach itself isn’t Italian. It originated in Persia — modern-day Iran — and didn’t reach China until the 7th century, where it was actually known as the “Persian green.” By the time it made its way into Italian and European kitchens centuries later, it had already been prized for its health benefits by physicians in the Arab world. Spinach’s association with Italy is a relatively late chapter in a much older story.
Worth knowing while you’re handling spinach: it’s not related to lettuce, and it’s not related to kale, even though “leafy green” makes them all sound like one big family. Spinach actually belongs to the amaranth family — the same plant family as Swiss chard and, oddly enough, beets. That’s why chard makes such a natural substitute for spinach in a pinch: they’re genuinely closer relatives than spinach is to kale or collards, which belong to an entirely different family, the same one that gives you cabbage and broccoli.
Two completely different plant families end up on the same “cooking greens” shelf in a grocery store, treated as interchangeable by most home cooks — and in a lot of kitchens, they actually are interchangeable, because texture and cooking behavior matter more to a chef than which family tree a vegetable climbed down from. That’s really how professional kitchens sort greens anyway: not by botany, but by how sturdy the leaf is. Spinach, chard, and beet greens are all tender enough to wilt fast and work raw in a salad. Kale, collards, and mustard greens are tougher, built to survive a long braise without turning to mush — which is exactly why you’ll never see kale in a delicate raw application the way you would spinach.
One more thing worth filing away: this same family shows up under different names around the world. Amaranth greens, common across Asian and African cooking, taste close enough to spinach that they’re often sold in ethnic markets simply as “Chinese spinach” or “Indian spinach.” Same rough flavor profile, different plant, different continent — one more example of how often a single culinary idea gets reinvented independently wherever the right ingredients happen to grow.
Fettuccine: Green and Otherwise
Plain egg fettuccine — flour, egg, nothing else — is old news in Rome and Tuscany, a rich, handmade ribbon pasta going back centuries. The green version is a newer idea layered on top of that same base: Italian home cooks started folding blanched, squeezed spinach directly into the dough, not for nutrition points but because it does three things at once — turns the pasta a genuine, vivid green, adds a subtle earthy flavor under the egg richness, and gives the finished dish real visual contrast on the plate, especially under a pale sauce like Alfredo.
You’ll see spinach fettuccine’s green color explained one way constantly: that it traces back to Catherine de’ Medici, the Florentine noblewoman who became Queen of France in 1533 and supposedly brought her love of spinach — and her own cooks — with her when she married into the French court. It’s a good story, and it’s genuinely why the French term “à la Florentine” means “served with spinach” to this day. But food historians think it’s basically a tall tale — there’s no solid evidence Catherine actually did any of this personally, and the connection between her and Italian spinach pasta specifically is even shakier than the French version of the myth.
What’s actually true is simpler and less romantic: coloring egg dough with vegetable purées is a long-standing, practical Italian tradition, spinach fettuccine specifically grew out of that practice in central and northern Italy, and it spread the way most good kitchen ideas do — through home cooks, then restaurants, then commercial dried-pasta production once the 20th century made colored, flavored pasta easy to mass-produce.
Consider this: there’s a classic Italian pairing built entirely around that contrast: paglia e fieno, literally “straw and hay.” Plain egg fettuccine (the straw) and spinach fettuccine (the hay) get cooked and tossed together in the same dish, usually with cream, butter, Parmesan, and something like peas or mushrooms. Two doughs, same technique, one visual trick — and it’s worth knowing even though today’s plate is spinach-only.

Silly, fun, stupid, and true: Popeye, The Sailor Man… Lied about spinach

If your grandparents grew up watching Popeye cartoons in the ’70s and ’80s, they saw this play out a hundred times: Popeye eats a can of spinach, and suddenly he’s strong enough to win the fight against the bad guys. It even came with a song.
That spinach thing they picked for the cartoon hero wasn’t random — it was built on something people genuinely believed at the time: that spinach was loaded with iron, way more than other vegetables, and iron makes you strong.
That “spinach has crazy amounts of iron” idea was wrong from the start — some early researchers overestimated it, and the cartoon propaganda machine had a huge amount of the population believing spinach was some kind of miracle veggie. NO ONE bothered to double-check. For decades. These days we know that the iron spinach DOES have isn’t especially useful to your body (it’s a plant-based iron that’s much harder to absorb than the iron in meat) and boiling and canning the spinach? Most of the good stuff is dead and gone.
Sad…. think of all those little kids forced to eat spinach “cause it’s good for you.” They suffered for nothing.
PART 2: LET’S COOK
Prepping your Spinach for the pasta
Here’s the practical decision you’re actually facing: fresh, frozen, or powdered spinach. All three work, but they behave differently in this dough, and it’s worth knowing why before you default to whatever’s on hand.
Fresh spinach needs to be washed thoroughly (it’s notoriously gritty), then wilted or blanched, then squeezed. Spinach powder is dehydrated down to almost nothing — no meaningful water content, so it barely affects your dough’s hydration at all, but you’re trading that convenience for a flatter, more muted color and flavor compared to using the real leaf. Frozen spinach — what you’re actually using for this recipe — is already blanched before it’s frozen, so you’re skipping that step entirely. Just thaw it fully and squeeze it.
That squeeze step matters more with frozen spinach than it does with fresh, not less. Freezing ruptures the plant’s cell walls — ice crystals physically tear them open — which means a thawed bag of spinach releases even more water than the same amount of fresh spinach would after cooking. And here’s the number that explains why this step can’t be skipped: spinach is more than 90% water to begin with. You’re not removing a splash of extra moisture — you’re removing the majority of the ingredient’s actual mass. Skip a thorough squeeze on thawed spinach and you’re not adding a little extra liquid to your dough, you’re adding a genuinely significant amount, which is exactly what throws off your flour-to-liquid ratio and leaves you with dough that won’t come together properly. Squeeze it in a clean kitchen towel or cheesecloth, twisting hard, until it stops releasing visible liquid — don’t stop at “mostly dry.”
Working the dough
Notice this dough isn’t built on straight Tipo 00, and it isn’t built on straight semolina — it’s a 50/50 blend of both. That’s not a compromise for lack of a better option, it’s deliberate. You already know the trade-off from the intro unit: semolina brings gluten strength, 00 rolls thin and stays tender. A shape like fettuccine gets cut, cooked, and tossed in a pan with real force behind the tossing — it needs more backbone than a delicate filled pasta does, but it still has to roll out thin and stay tender enough to pick up a light sauce. Splitting the flour down the middle gives you both, instead of picking one property and sacrificing the other.

The eggs and squeezed spinach don’t get kneaded in by hand here — they get pulsed together in a food processor first, before the flour ever gets involved. That’s a deliberate order of operations, not a shortcut. Spinach is fibrous, and hand-mixing whole leaves or chunks into wet egg rarely breaks them down evenly, no matter how long you work at it. A food processor shears the spinach into the egg in seconds, and you’re looking for one specific outcome: a uniform, evenly colored mixture with no visible pale streaks or dark flecks of unbroken leaf — what the recipe calls “no spots.”
That matters for more than looks. Any pocket of unblended spinach is a pocket of concentrated moisture sitting somewhere in your dough that the flour hasn’t accounted for, and it’ll show up later as an inconsistency in texture, not just color.
Spinach is just one option here, worth knowing as you go further: pasta doughs get colored with all kinds of purées beyond spinach — beet purée for a deep pink-red, squid ink for a striking black, carrot for orange. Different vegetable, same basic technique you’re learning right now: purée it, control its moisture, work it into the egg before the flour ever touches it.
Only once that spinach-egg mixture is fully uniform does it meet the flour and salt. Salt at this stage isn’t just seasoning — it’s doing the same job it does in any dough, tightening the gluten structure slightly as everything comes together.
Mixing, Kneading, and the Clock You’re Now On
This dough gets built using the well method: dry ingredients mounded on your work surface, a wide well pressed into the center — at least a half inch of flour left on the bottom of that well, not scraped down to bare countertop — and the wet ingredients poured in slowly while you stir from the middle outward. That half-inch floor and those careful walls aren’t fussy technique for its own sake. They’re what keeps the egg-and-spinach mixture contained while you gradually work flour into it, instead of it breaching the walls and running across your counter the second it hits the surface.

Once everything’s combined into one mass, expect it to look and feel dry — that’s normal, not a sign something went wrong. If there’s loose flour that won’t incorporate, damp hands or a light spritz of water will “glue” it into the dough rather than leaving it as scattered crumbs. This is a hydration-precision move: you’re adding the smallest amount of water necessary to bring stray flour into the mass, not loosening the whole dough. Trust what you’re feeling over what the recipe predicted: the dough itself tells you what it needs. Too wet and tacky, work in a little more flour. Too dry and crumbly, add a touch more liquid. That feedback loop matters more than hitting the exact gram counts perfectly — the numbers get you close, your hands get you the rest of the way.
Kneading here follows the same heel-of-the-hand push, quarter-turn, repeat rhythm you already know, run for 8 to 10 minutes. That time isn’t arbitrary — it’s what it actually takes to develop the gluten network from the intro unit’s science into something strong enough to roll thin without tearing. Shortchange the clock and you’re rolling dough that hasn’t finished building its own structure yet.
Once kneaded, the dough gets wrapped tightly in plastic and rested for at least 30 minutes at room temperature — the same resting science you already know, giving those tightened gluten strands time to relax before rolling. But there’s a clock running here that goes beyond just resting time: if you’re not using the dough within 30 minutes, it goes in the refrigerator, and it has to be used within 24 hours no matter what. That deadline connects directly back to the oxidation science from the intro unit — the same reaction that turns cut egg pasta dough gray-green over time. Refrigeration slows that reaction down, it doesn’t stop it. Past 24 hours, you’re not just risking a color shift; you’re risking the dough actually going bad.
Once it clears rest, the dough is ready to be shaped into whatever this recipe needs.
Spinach Fettuccine Dough: Troubleshooting
Dough won’t come together, stays crumbly? Not enough liquid reached the flour before you started kneading. Don’t dump in more spinach mixture at this point, it’ll throw off the color balance. Use the damp-hands or spritz-bottle trick from the mixing step instead, a little water at a time.
Egg-and-spinach mixture broke through the well wall? You built the wall too thin or poured too fast. Scrape it back together as best you can and keep going, this doesn’t ruin the dough, it just makes more of a mess on your counter than it needed to.
Dough tears instead of stretching when you roll it? Two possible causes: it didn’t rest long enough, or it’s cold, straight from the fridge. Gluten needs time to relax before it’ll stretch thin. Let it sit at room temperature and try again in ten minutes, don’t force it through the machine.
Dough turning gray-green? You’re past the 24-hour window, or close to it. This is oxidation, not spoilage, at the edge of that window, but don’t push your luck. If it smells off in addition to the color change, that’s your answer, throw it out.
Streaks of pale, unblended spinach in the finished dough? The food processor step got rushed. Those streaks are pockets of extra moisture the flour never accounted for, and they will show up as texture problems later, not just color. Worth redoing rather than pushing forward.
LETS COOK: Make the Alfredo Sauce
Everything that makes this sauce work happens in about four minutes, and every one of those minutes matters. There’s no long braise to hide behind here, just butter, cream, garlic, and cheese, built in the right order at the right heat.
Start the garlic low and slow in the butter, you’re perfuming the fat, not browning the clove. Add the cream once the garlic smells fragrant, not before, and hold it at a bare simmer. This is the moment most people rush, and it’s the moment that ruins the sauce: a hard boil here scorches the milk proteins on the bottom of the pan and gives you a grainy, faintly burnt sauce no amount of cheese can save.
Once the cream’s warmed through, pull the pan off direct heat before the cheese goes in. Add the Parmesan gradually, in small handfuls, whisking constantly. You already know why from the science section above, dump it all in at once over high heat and you’ll seize the proteins instead of melting them. Whisk until each addition disappears into the sauce before the next handful goes in.
Finish with the parsley, taste for salt, and get it onto pasta immediately. This sauce does not wait around gracefully, the longer it sits, the more it tightens, and by the time you plate a sauce that sat for ten minutes you’re serving something closer to paste.
Alfredo Sauce: Tips, Tricks, and Troubleshooting
Every mistake in this sauce comes down to the same two moments: how you handle the heat while the sauce is coming together, and what happens in the seconds right after your pasta hits the pan. Get those two moments right and the rest takes care of itself.
Start with heat, because it’s the single fastest way to ruin this dish. Once your butter and pasta are combined in the pan, keep the heat low to moderate the entire time, this is a patient sauce, not one you blast and walk away from. If it suddenly turns greasy and separated on you, that’s the emulsion breaking from too much heat too fast. Don’t panic and don’t dump it, pull it off the heat, whisk in a splash of cold pasta water, and it will often come back together, at least once.
Cheese is where that same heat problem shows up a second time. Dump a handful of cold, pre-shredded cheese into a hot pan all at once and the proteins seize before they get a real chance to melt in smoothly, you’ll end up with the same chewy, grainy failure covered in the science section above. Grate your own Parmesan fresh instead of buying pre-shredded, the anti-caking coating on bagged cheese actively fights a smooth melt, and add it gradually, in small handfuls, off direct high heat, stirring the whole time.
None of this works without pasta water, and this is the step people forget until it’s too late. Set a bowl by the pot before you even start boiling, not “if you remember,” every single time. Once that’s covered, actually getting the pasta into the sauce matters just as much as the sauce itself: pull it straight from the boiling water into the pan while it’s still dripping wet, using tongs or a spider rather than a colander, so it carries some of that starchy water in with it. Toss it directly in the sauce over low heat, adding more reserved water a splash at a time until everything comes together glossy and coats the noodles evenly.
Watch your pan size while you’re doing this. Cram too much pasta into too small a pan and you get uneven coating, some noodles drowning in sauce, others left bare, because there’s no room to actually toss anything. And once it’s all together, don’t let it sit. Alfredo keeps tightening the longer it waits, even off the heat, as the starch keeps pulling in moisture. Plate it and get it out within a few minutes of finishing, or you’ll be serving something stiff and gluey instead of the sauce you just built.
Alfredo Sauce: Sensory & Visual Indicators
- Visual: Finished sauce should look glossy and slightly translucent, clinging to the pasta in a thin, even coat, not a thick, opaque white blanket.
- Auditory: Listen for the sound of the sauce as you toss it in the pan, a smooth, wet, gentle sound. A sizzling or spitting sound means your heat is too high.
- Tactile: Finished sauce should coat the back of a spoon in a thin film without sliding off instantly (too thin) or sitting like paste (too thick, likely broken or over-reduced).
Bringing the Dish Together
Get your sauce finished and holding at a bare simmer before your pasta ever hits boiling water, fresh spinach fettuccine cooks in under two minutes, and you don’t have time to build a sauce from scratch once the pasta’s already floating.
Pull the pasta straight from the pot into the sauce pan, tongs or a spider, not a colander, so it carries some of that starchy water with it. Toss gently over low heat, adding reserved pasta water a splash at a time until the sauce turns glossy and clings evenly to every strand. Plate immediately. This dish does not hold.
Finishing the Plate
A few cracks of fresh black pepper and an extra pass of grated Parmesan at the table is genuinely all this dish needs, it’s not a canvas for garnish, it’s three ingredients executed correctly. If you want a nod to the color contrast this unit keeps coming back to, a few torn basil leaves work, but they’re optional and not traditional.
Recipes
Spinach Fettuccine Dough
Ingredients
Dry
- 180 g semolina flour 1 cup
- 180 g “00” flour 1 cup
- 5 g kosher salt 1 teaspoon
Wet
- 100 g whole eggs ½ cup, about 2 large eggs
- 5 oz frozen spinach thawed, rinsed, and squeezed dry
Instructions
Purée
- Pulse the squeezed spinach and whole eggs together in a food processor until evenly mixed, with no visible pale streaks or dark unbroken pieces of leaf.
Mix the Dough
- Place the dry ingredients on a clean work surface, forming a mound about 8 to 10 inches in diameter at its base.
- Using the bottom of a measuring cup, create a well 4 to 5 inches wide, with at least a half inch of flour on the bottom of the well.
- Using a fork to stir the middle of the well, slowly pour in the spinach-egg mixture, trying to keep the integrity of the walls during this first step.
- Combine the dry and liquid into one mass and knead until fully incorporated. The dough will be dry. If necessary, use damp hands or a spritz bottle to “glue” the loose flour to the mass.
Knead
- Drive the heel of your dominant hand into the dough. Push down and release, then use your other hand to pick up and rotate the dough on itself 45 degrees.
- Drive the heel of your hand back into the dough, rotate, and repeat for 8 to 10 minutes total.
Rest
- Wrap the dough tightly with plastic wrap. Let rest for at least 30 minutes at room temperature before using — up to 6 hours is fine.
- If not using within 6 hours, refrigerate. Egg dough must be used within 24 hours total to avoid discoloration as the egg yolks oxidize. If refrigerated, let the dough return toward room temperature (about 2 hours) before rolling.
- The dough is now ready to be shaped for use in this recipe.

Alfredo Sauce
Ingredients
- 1/4 cup butter
- 1 cup heavy cream
- 1 clove garlic crushed
- 1 1/2 cups freshly grated Parmesan cheese
- 1/4 cup chopped fresh parsley
- Salt and Pepper to Taste
Instructions
- Melt butter in a medium saucepan over medium low heat. Add cream and garlic and simmer for 5 minutes but do not allow to boil.
- Add cheese and whisk quickly, heating through. Stir in parsley, season to taste, and serve.