
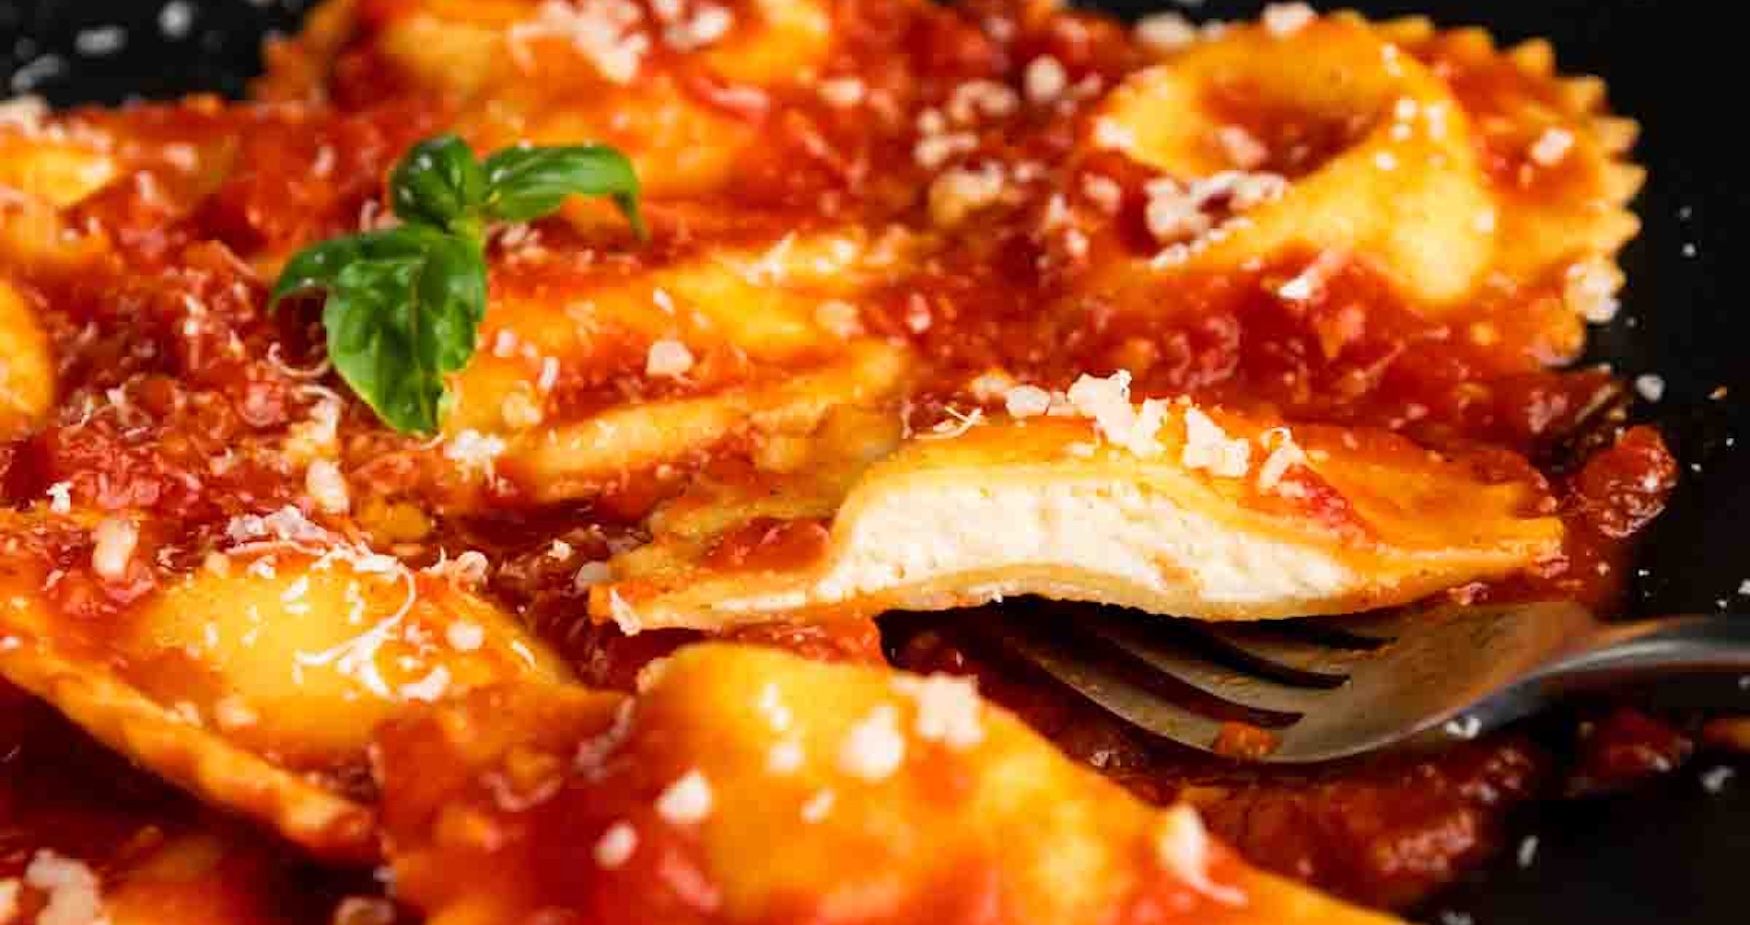
So you’re asking yourself: “Why should I spend three days of my life learning to make ravioli and pomodoro sauce?”

I don’t know how you’ve made it this long WITHOUT learning how to make it.
Nearly every culture on earth that has flour and something worth wrapping in it has invented its own version of a stuffed dumpling — pierogi, kreplach, gyoza, mandu, empanadas, momos. Ravioli is Italy’s answer to an idea humans clearly can’t stop reinventing. We’re making this one because it’s a real, foundational skill every cook should have in their hands — sealing dough around a filling without it falling apart — not because this particular shape is more important than the dozens of others out there. Learn it here, and you’ll recognize the same logic in a pierogi or a gyoza for the rest of your life.
This dish is really two separate skills sharing one plate: building and sealing the ravioli itself, and building the pomodoro sauce it gets served in. They get taught here as two complete, separate things — then we finish by putting it altogether on the plate. Ready? Let’s go.
PART ONE: RAVIOLI
Here’s a detail that surprises almost everyone: the earliest version of ravioli had no pasta around it at all. Medieval Italian cooks made small balls of seasoned herbs and cheese and boiled them directly in broth — no dough, no wrapper. Tuscans still make a version of this today and call it gnudi, literally “naked.” The pasta casing came later, wrapped around that same filling like what one food historian called “an elegant casket to protect the precious filling.” What we think of as the defining feature of ravioli — the dough — was actually the second idea, not the first.
Where Ravioli Actually Comes From
Nobody agrees on exactly where the name comes from, either. One theory ties it to riavvolgere, “to wrap” or “to enclose,” which fits the dish perfectly. Another traces it to rabiola, an old term for something of little value — the idea being that ravioli started as a way to use up scraps and leftovers, not as a luxury dish. A third points to a semi-legendary cook simply named Raviolo, working in the Ligurian town of Gavi. Nobody can prove any of these outright. What’s actually documented: a 1158 notarial deed from Prato mentions a baker preparing something like ravioli for pilgrims, and by the 1300s the dish was famous enough that Boccaccio wrote it into the Decameron — describing an imaginary land where people did nothing but boil ravioli and macaroni in capon broth and toss them by the handful onto a mountain of grated Parmesan for anyone who wanted some.
Regional Italy never agreed on one shape or one name for stuffed pasta, either — a variety worth knowing about even though it’s covered in more depth further down.
Eight hundred years after that 1158 deed from Prato, a public high school culinary program broke a record with this exact dish. In 2010, students at Woodcreek High School in California partnered with a local technical institute and built a single ravioli measuring 5 square feet and weighing an estimated 200 pounds — mixing the dough by hand, filling it with meat, spinach, and cheese, and boiling it in a custom-built pan a local sheet metal shop donated more than 30 hours to construct. It beat the previous world record, held at 37 pounds. If it sounds absurd, it’s supposed to — but it’s also proof that this exact skill, done at a genuinely massive scale, is something students your age have actually pulled off before.
Fine Dining Spotlight — One Raviolo, One Whole Egg Yolk
At Osteria Mozza in Los Angeles — opened by Mario Batali, Joe Bastianich, and baker Nancy Silverton — the signature dish isn’t a plate of small ravioli.

It’s one single, oversized raviolo, stuffed with ricotta and a whole, unbroken egg yolk sealed inside the cheese filling. Cut into it at the table and the yolk bursts, turning into a rich, golden sauce that coats the pasta on contact. It’s become one of the most copied “wow” techniques in modern Italian-American fine dining — a direct descendant of exactly the sealing skill you’re about to learn, just pushed to its most dramatic possible version.
That level of care is also exactly what separates a real kitchen from a shortcut. Fresh, handmade ravioli is genuinely labor-intensive, which is why some restaurants quietly buy pre-made ravioli from wholesale pasta companies and simply plate it as their own. Nothing about that is illegal or even unusual — but it’s also not what you’re learning to do here. Once you can make this dish from scratch, “fresh ravioli” on a menu is something you can actually judge honestly.
Food Science — Sealing and Filling
Everything you already know about rolling dough applies here, but this dish adds a new problem: the dough now has to bond to itself around a wet filling, hold that seal through a full boil, and not let anything escape. That bond is just gluten meeting gluten — press two edges of hydrated dough together and the gluten networks in each can actually fuse if there’s enough surface moisture to let them merge.

Dry edges won’t bond; that’s why sealing ravioli always starts with a light brush of water or egg wash along the edge before you close it. You’re not gluing two separate things together. You’re giving the gluten a wet enough surface to become one continuous sheet.
The filling has its own physics problem: moisture. Ricotta and cream cheese both carry real water content, and a filling that’s too wet doesn’t just make a mess — it works against the seal you just built, soaking the dough from the inside and weakening exactly the bond you need to hold. That’s why a well-built cheese filling gets blended firm, not loose, and why any watery ingredient folded in (like fresh herbs with high water content) gets used sparingly.
There’s a second failure mode hiding inside a raw ravioli that has nothing to do with moisture: trapped air. Every time you fold dough over a mound of filling, you risk sealing in a small air pocket along with it. That pocket heats up in the boiling water, the air inside expands exactly the way gas does under heat, and it has nowhere to go — until it finds the weakest point in your seal and blows through it. Pressing the air out before you seal isn’t a nice-to-have step. It’s the difference between a ravioli that survives the pot and one that explodes in it.
Regional Variations You Should Know
Ravioli is just Italy’s name for one specific approach to stuffed pasta. Every region built its own version, with its own shape, its own name, and its own traditional filling:
- Agnolotti (Piedmont) — small, pinched half-moon or rectangular parcels, traditionally filled with leftover roasted meat from a Sunday dinner, then served simply in the pan drippings from that same roast.
- Culurgiones (Sardinia) — an oval shape sealed along a distinctive braided, rope-like edge that takes real practice to pull off by hand, filled with a mix of potato, pecorino, and fresh mint.
- Tortelli (Emilia) — larger, often square-cut, filled seasonally, most famously with roasted pumpkin in the fall and served with butter and sage.
- Tortellini (Emilia) — the smallest of the family, folded and pinched into a distinctive ring shape, traditionally filled with a mix of meats and served in broth rather than a heavy sauce.
Same underlying idea in every case — dough wrapped around a filling — reinvented differently in nearly every region, the same pattern you’ve already seen play out with pasta shapes generally.
Iconic Iterations
- Toasted Ravioli (St. Louis) — a genuine only-in-America invention. Local legend says a cook at a St. Louis restaurant accidentally dropped a ravioli into hot oil instead of the pot in the 1940s, and the deep-fried, marinara-dunked result became a regional icon that’s still a St. Louis signature dish today.
- Lobster and Seafood Ravioli — a common American upscale-restaurant move, swapping the cheese filling for lobster or crab, usually paired with a cream or wine-based sauce instead of pomodoro.
- The Osteria Mozza Egg Yolk Raviolo — covered above, now widely imitated across modern Italian-American fine dining.
Making the Ravioli: Dough, Filling, and Sealing
The dough for ravioli isn’t the same formula you’ve used before. This one runs on what the recipe calls “Rav Dough” — all 00 flour instead of a semolina blend, built almost entirely on egg yolks rather than whole eggs, plus a touch of olive oil. That’s a deliberate choice, not a variation for its own sake: you already know from earlier in this program that yolks bring fat and rich color but weaken gluten development slightly, producing a more tender, more pliable dough. Ravioli needs exactly that. This dough has to fold, stretch, and seal around a filling without cracking, and a stiffer, higher-gluten dough (like the kind built for long noodles) would fight you at every step instead of cooperating.
The filling comes together simply — ricotta, softened cream cheese, shredded mozzarella and provolone, egg, and dried parsley, blended until smooth. That egg is doing real work here: it’s a binder, holding the cheese mixture together as a cohesive mass instead of a loose, crumbly one, the same basic role egg plays in countless other fillings and batters.
Sealing is where the real skill lives. Roll your dough thin, portion small mounds of filling with enough space between them — about a teaspoon of filling per ravioli for a standard 3-inch square, with at least a half-inch of clean, filling-free dough around every mound for the seal itself. That balance matters more than it sounds like it should: too little filling and you leave extra room for air to sneak in around it; too much and the edges won’t have anywhere clean left to actually bond. Brush the surrounding dough lightly with water or egg wash, then fold or top with a second sheet and press firmly around each mound — working from the center of each mound outward, pressing air toward the nearest open edge of dough rather than just vaguely “pushing it out.” Trapped air isn’t just a bursting risk, either — as it tries to escape during cooking, it can actually pull boiling water in behind it, diluting the filling from the inside before the seal even fails outright.

If you’re cutting round ravioli with a cookie cutter, rotate the blunt (non-cutting) side of the cutter around the filling once before your final cut — it nudges the filling toward the center and gives you a cleaner, more uniform round shape. However you seal the edge — fingers or the tines of a fork — use real pressure, not a light touch: fingers give you more control for pushing air out as you go, while a fork crimp seals a little tighter mechanically and leaves a more decorative edge. Cut cleanly once you’re confident every seam is closed. A ravioli that looks sealed and a ravioli that’s actually sealed aren’t always the same thing until you’ve done this enough times to feel the difference.
Fresh ravioli cooks fast — about 2½ minutes in gently boiling water, closer to 3½ if you’re cooking from frozen. Drop it in, stir gently so nothing sticks to itself or the bottom of the pot, and taste before you trust the clock.
Storing and Freezing Ravioli
Fresh ravioli doesn’t hold well at room temperature, but it’s genuinely easy to store correctly for later.

For same-day use, refrigerate the ravioli in a single layer on a sheet pan, layered between sheets of parchment paper or a dry towel if you’re stacking — never wrapped directly in plastic, which traps moisture against the dough and encourages sticking. Sources differ on exactly how long this holds: some recipes call it safe for only about 4 hours before the bottoms start turning soggy, while working restaurant kitchens report a full day is fine as long as it’s stored uncovered and properly separated. Treat 4 hours as the safe default for a classroom setting, where consistency matters more than squeezing out every extra hour.
For longer storage, freeze it. You’ve got two options, and the difference comes down to how much you care about the surface staying perfectly intact. The sturdier method: blanch the ravioli in boiling water for about 30 seconds first, transfer to a clean towel to air-dry for 15 minutes, then freeze in a single layer on a sheet pan until solid before bagging. That quick blanch is specifically what prevents the surface from cracking during freezing — a real problem on a piece of pasta this size. The faster method skips the blanch entirely: freeze the ravioli directly on the sheet pan until mostly solid, dust off any excess flour, then bag. It’s simpler, but more fragile. Either way, cook straight from frozen — don’t thaw first — and expect to use frozen ravioli within a couple of months for the best texture and flavor.
Ravioli Troubleshooting
- Bursting in the water? Trapped air or a weak seal. Press air out fully before sealing, check the full edge for a real bond, boil gently.
- Filling leaking out before it even hits the water? The seal edge had moisture or filling on it. Wipe it clean and dry before sealing.
- Filling too loose once cooked? The cheese mix was too wet going in. Drain excess liquid from ricotta first.
Ravioli Sensory & Visual Indicators
- Visual: Edges should look fully bonded and slightly translucent where the dough overlaps, with no visible gaps or air pockets under the surface.
- Auditory: A gentle boil should sound soft and steady, not violently rolling — you’re listening for control, not intensity.
- Tactile: Cooked ravioli should feel tender all the way through when pressed gently, with no raw, doughy resistance in the center where the dough is doubled over the filling.
PART TWO: THE POMODORO SAUCE
Where Pomodoro Actually Comes From
Tomatoes aren’t Italian at all, originally. They’re native to Mesoamerica and didn’t reach Europe until Spanish explorers brought them back in the early 1500s — and even then, Europeans mostly refused to eat them for the better part of two centuries. Tomatoes belong to the nightshade family, and some nightshade plants really are toxic, so the fear wasn’t entirely irrational at first. It also didn’t help that the plant’s leaves and stems genuinely are mildly toxic — it’s specifically the fruit that’s safe.
Here’s the popular version of how the tomato earned the nickname “poison apple”: wealthy 18th-century Europeans ate off pewter plates high in lead, and the tomato’s acidity was said to leach that lead out of the plate and into the food, causing real lead poisoning after meals that included tomatoes. It’s a great story, and it’s told constantly — but it’s worth knowing that at least one food-science historian has publicly cast doubt on whether the chemistry actually works the way the story claims. Treat this one the way you’ve treated every other “too good to check” food legend in this program: repeat it as the popular explanation, not as settled fact.
What’s not in dispute: tomatoes didn’t become a real staple of Italian cooking until the 1700s and 1800s, and the pairing of tomato sauce with pasta specifically took off in 19th-century Naples before spreading across the rest of Italy and eventually the world. “Pomodoro” itself literally translates to “golden apple” — a name that only makes sense once you know that some of the earliest tomatoes cultivated in Italy were yellow, not red.
INGREDIENT NOTE: The San Marzano Tomato

One tomato variety gets singled out constantly for pomodoro sauce specifically: San Marzano.
The legend says the first seeds arrived in 1770 as a gift from the Viceroyalty of Peru to the Kingdom of Naples, and they ended up planted in exactly the right place — the mineral-rich volcanic soil at the base of Mount Vesuvius. That soil is genuinely the reason these tomatoes are different: it’s high in potassium and phosphorous, and it produces a plum tomato with thinner skin, firmer flesh, far fewer seeds, and noticeably less water than a standard grocery-store tomato — which means less time spent simmering off liquid and a sauce that’s naturally sweeter and less sharply acidic before you’ve adjusted anything.
San Marzanos are protected under Italy’s DOP status (Denominazione di Origine Protetta) — the same kind of legal protection that covers real Parmigiano-Reggiano — meaning only tomatoes actually grown in that specific stretch of Italy can legally use the name. Most of what you’ll find labeled “San Marzano” outside Italy is really “San Marzano-style”: a similar variety grown elsewhere, decent, but not the real thing.
Pomodoro Food Science — Balance, Not Just Heat
Pomodoro sauce runs on a completely different kind of chemistry than the ravioli you built: balance. Tomatoes are naturally acidic, which is exactly what gives the sauce its brightness, but too much acid unbalanced by anything else reads as sharp or thin.
Sautéing the onion and garlic in oil before the tomatoes ever go in isn’t just building flavor for its own sake — it’s a real Maillard browning reaction, the same one that browns a steak, and it lays down a base of deep, savory flavor compounds the raw tomato alone doesn’t have.
Tomatoes are also naturally loaded with glutamates, the same class of compound behind savory, umami-forward flavor in things like Parmesan or soy sauce — which is exactly why pomodoro tastes so much richer than “cooked tomatoes” alone would suggest, and exactly why finishing the sauce with real Parmesan doesn’t just add saltiness, it stacks a second glutamate source on top of the first.
Making the Pomodoro Sauce
The technique follows directly from the science above. Aromatics — onion and garlic — go in first, browned in olive oil before anything acidic touches the pan, giving the Maillard reaction time to actually happen instead of getting drowned out immediately by tomato liquid. The tomatoes go in next along with balsamic vinegar and chicken stock, simmered until the sauce reduces and thickens rather than staying loose and watery. Fresh basil and shaved Parmesan get folded in right at the very end, off or near the end of the heat — cooking them longer than that just burns off the bright, fresh flavor you added them for in the first place.
Pomodoro Troubleshooting
- Tastes flat or sharp? Aromatics weren’t browned enough, or acid isn’t balanced. Fix with a touch of olive oil or a pinch of sugar.
- Sauce too watery? Simmered too fast, or not reduced long enough. Give it more time at a lower heat.
Pomodoro Sensory & Visual Indicators
- Visual: Sauce should look glossy, deep red-orange, and slightly thickened, clinging to a spoon rather than running off it thin.
- Tactile: Finished sauce should coat pasta evenly without pooling in a thin, watery layer at the bottom of the bowl.
Bringing the Dish Together
You’ve now built two separate things — the ravioli and the sauce — and this is the one step that actually makes them one dish instead of two things sitting near each other on a plate.
Get your pomodoro sauce hot and ready in a pan before your ravioli ever goes in the boiling water. Ravioli is far more fragile than a plain noodle, so it doesn’t get the aggressive toss you’d give fettuccine — treat it gently from here on. Pull the ravioli from the pot with a spider or slotted spoon rather than dumping it through a colander, carrying a little clinging water with it into the sauce pan.
Add the ravioli directly to the sauce, along with a small splash of the pasta’s cooking water if the sauce needs loosening. Fold gently rather than tossing hard — you’re coating each piece in sauce without applying the kind of force that could split a seam you just spent this whole lesson learning to build correctly. A minute or so of gentle folding over low heat is usually enough for the ravioli to pick up the sauce and finish warming through.
Plate immediately once combined, same rule as every other pasta dish in this program: sauced pasta doesn’t hold. Finish with a little extra shaved Parmesan or torn basil at the table if you want, but don’t let the plated dish sit around waiting once it’s together.
Cheese Ravioli
Ingredients
Rav Dough
- 360 g “00” flour 2 well-packed cups, unsifted
- 5 g kosher salt 1 teaspoon
- 100 g whole eggs ½ cup — about 2 large eggs
- 90 g egg yolks ⅓ cup — 5 to 6 yolks
- 6 g EVO 1½ teaspoons
Four Cheese Filling
- 8 oz ricotta cheese
- 4 oz cream cheese softened
- ½ cup shredded mozzarella cheese
- ½ cup shredded provolone cheese
- 1 egg
- 1 ½ teaspoons dried parsley
Instructions
Make the Filling
- Add all filling ingredients to a bowl and blend well until smooth and evenly combined. Set aside.
Mix the Dough
- Place the dry ingredients on a clean work surface, forming a mound about 8 to 10 inches in diameter at its base.
- Using the bottom of a measuring cup, create a well 4 to 5 inches wide, with at least a half inch of flour on the bottom of the well.
- Using a fork to stir the middle of the well, slowly pour in the liquid ingredients, trying to keep the integrity of the walls during this first step.
- Combine the dry and liquid into one mass and knead until fully incorporated. The dough will be dry. If necessary, use damp hands or a spritz bottle to “glue” the loose flour to the mass.
Knead and Rest
- Drive the heel of your dominant hand into the dough. Push down and release, then use your other hand to pick up and rotate the dough on itself 45 degrees. Repeat for 8 to 10 minutes total.
- Wrap the dough tightly with plastic wrap. Let rest for at least 30 minutes at room temperature before using. Egg dough must be used within 24 hours to avoid discoloration as the egg yolks oxidize.
Roll and Fill
- Cut off a portion of the dough and re-wrap the remainder immediately. Roll the dough through a pasta machine, progressing through each setting until thin enough to see your hand through it.
- Lay the pasta sheet on a lightly floured work surface. Portion small mounds of filling (about 1 teaspoon each) across half the sheet, spaced with at least a half-inch of clean dough between each mound and the edges.
- Brush the surrounding dough lightly with water or egg wash.
Seal and Cut
- Fold the other half of the sheet over the filling, or lay a second sheet on top. Press firmly around each mound of filling, working from the center outward and pressing air toward the nearest open edge of dough.
- Seal the full edge with real pressure using your fingers or the tines of a fork. Cut into individual ravioli using a knife, fluted cutter, or cookie cutter.
- Arrange the finished ravioli in a single layer on a semolina-dusted sheet pan.
Cook
- Bring a large pot of well-salted water to a gentle boil (not a hard rolling boil).
- Drop the ravioli in and stir gently. Cook for about 2½ minutes (closer to 3½ minutes if cooking from frozen), until tender.
- Remove with a spider or slotted spoon directly into hot pomodoro sauce. Fold gently to coat and serve immediately.
Notes
Refrigerate uncovered ravioli in a single layer for same-day use (about 4 hours); for longer storage, freeze — see the full post for blanch vs. no-blanch freezing methods.

Pasta Pomodoro Sauce
Ingredients
- 1/4 cup olive oil
- 1/2 medium onion, chopped
- 4 cloves garlic, minced
- 28 oz roma plum tomatoes peeled, seeded, and diced
- 2 tablespoons balsamic vinegar
- 10 oz chicken stock
- crushed red pepper to taste
- freshly ground black pepper to taste
- 1/2 cup hand-torn fresh basil
- 1/4 cup Parmesan cheese peeled into thin curls
Instructions
- Heat olive oil in a large deep sauce pan over high heat. Saute onions and garlic until lightly browned. Reduce heat to medium-high and add tomatoes, vinegar and chicken stock; simmer for about 8 minutes.
- Stir in red and black peppers. Simmer until slightly thickened. Toss pasta (either noodles or filled pasta) gently, then slide onto the plate. Garnish with torn basil and serve peels of parmesan or asiago cheese.