
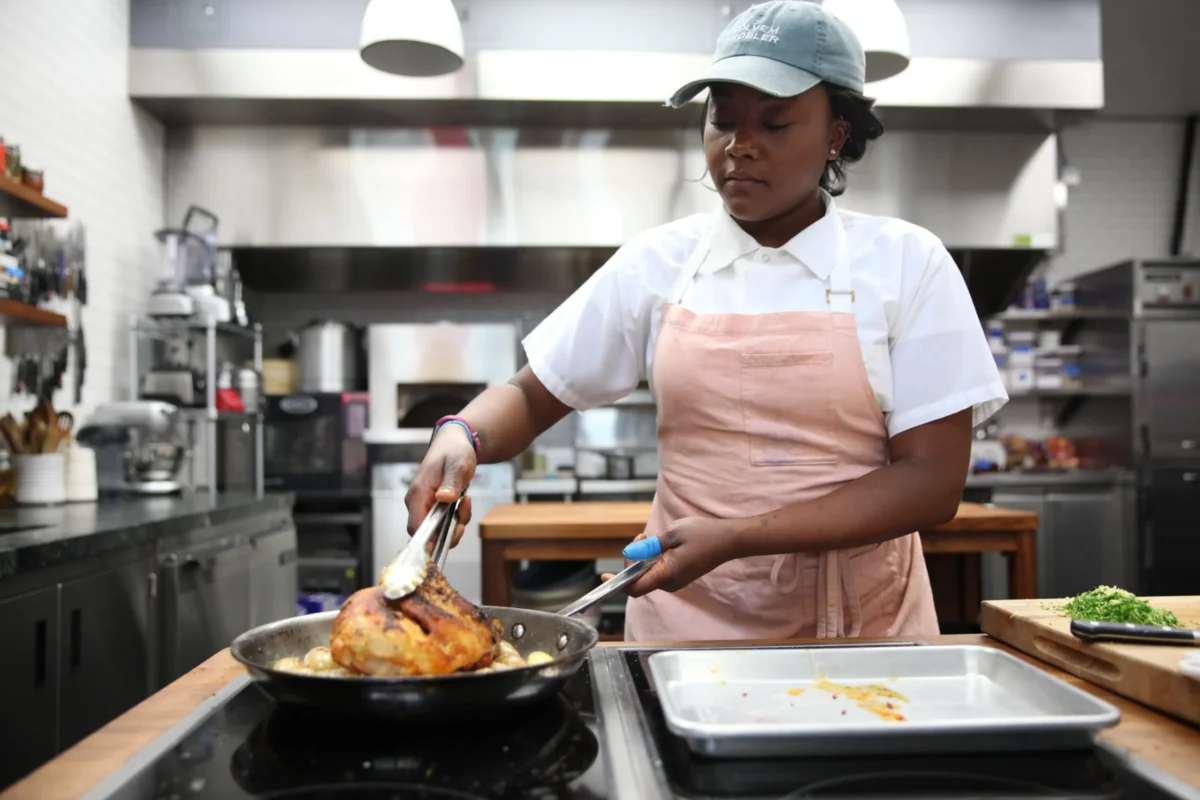
Somebody in your family has a rule for knowing when chicken is done. Maybe it’s your grandmother poking the thigh with a fork and watching the juice. Maybe it’s your uncle at the grill, slicing into a breast and squinting at it. “When the juices run clear, it’s done.” Everybody knows that. Cooks have been passing it down from generation to generation for years. There’s just one problem: it’s wrong.
America’s Test Kitchen put it to the test. They roasted a chicken until the juices ran perfectly clear, then stuck a thermometer in the breast. It read 145°F, twenty degrees short of safe. Then they roasted another bird until it was dry as cardboard, and it was STILL leaking pink juice. So the rule fails in both directions. It’ll tell you a raw chicken is done, and it’ll tell you an overcooked chicken needs more time. A lot of chicken folklore works like that, and this post replaces family lore with what actually happens when a bird meets heat.
Here’s the good news: poultry works with every cooking method there is, including dry heat, dry heat with fat or oil, moist heat, and combination cooking. The trick is matching the method to the bird and the cut. A young broiler can take anything you throw at it. A tough old hen needs time and liquid. And a lean breast and a hard-working thigh, sitting right next to each other on the same bird, want completely different things from the same oven. Before you pick a method, you need to know three things: how tender the piece is, how much fat and connective tissue it has, and how you’re going to know when it’s done.
The Number That Matters: 165°F

To know when chicken is done, you need a probe thermometer. The number you’re aiming for is 165°F, but that’s where the chicken needs to end up after it rests, not when you pull it. That’s the part that trips people up. Meat doesn’t stop cooking when it comes off the heat. Heat stored in the outside of the meat keeps moving toward the center, so the inside keeps climbing while it sits. A single breast might rise a few degrees, and a whole roasted bird can rise 10 degrees or more. Pull a breast at 165°F and carryover will push it right past that into dry territory, and every degree past 165°F is moisture you’re never getting back.
So pull the breast early, around 155–160°F, and let carryover finish the job while it rests. A roast chicken rests about 20 minutes before you carve it, and smaller pieces need less. On a whole bird, check the thickest part of the breast, the innermost part of the thigh, and the wing joint. At each one of these locations, be sure and keep the probe off the bone!
Two Finish Lines
Here’s the annoying thing about chicken: the breast and the thigh are done at completely different temperatures. Breast meat has almost no connective tissue, so once it passes 165°F, it just gets drier and drier. Dark meat is the opposite, and it needs a lot MORE heat to taste good. Remember all that collagen in the thighs and drumsticks? It doesn’t even start melting into gelatin until somewhere above 160°F, and even then it takes its time. Pull a thigh at 165°F and it’s safe, but it’s chewy and rubbery. Take it to 175–180°F, let it rest, and it turns tender, juicy, and rich.
On a whole bird, that means protecting the breast while the legs catch up. Truss it, baste or butter the breast, and let the thighs run hotter than the breast. When you’re cooking the pieces separately, it’s easy: give each one its own finish line.
Dry Heat: Roasting, Grilling, and Broiling
Dry heat means hot air or direct heat with no liquid added, and young, tender birds are built for it. Roasting is the classic way to cook a whole bird. Truss it, set it on a rack so the hot air can get all the way around it, and leave it uncovered so the skin can crisp. The Roast Chicken card below puts the whole thing together, from brine to rest.
Grilling and broiling blast the surface with intense heat, which is great as long as the piece is the same thickness all the way across. A chicken breast usually isn’t. It’s thick at one end and thin at the other, so the thin end turns to jerky while the thick end is still raw. Pound it or butterfly it to an even thickness first. And go easy on the char. The grill should add flavor to the chicken, not cover it up.
Why Crisp Skin Takes Time

Chicken skin is mostly water, fat, and protein, and it won’t crisp until the water’s gone. As long as there’s water on the surface, the skin can’t get any hotter than 212°F, the boiling point of water, because all the oven’s energy is busy turning that water into steam. Only once the surface dries out can the skin climb past 212°F, render its fat, brown, and crisp. That’s the reason behind every drying step in this unit. It’s also why a wet bird crammed into a crowded pan steams instead of roasting.
Dry Heat With Fat and Oil: Sautéing, Stir-Frying, Pan-Frying, and Deep-Frying
These methods are fast, so they need tender, portion-size pieces. Sautéing uses a little fat in a hot pan, and Chicken Piccata is the model: thin cutlets pounded to the same thickness, a light coat of flour, a quick sear on each side, then a pan sauce built on the browned bits left in the pan. Stir-frying is the same idea, only faster, with small pieces kept moving in a very hot pan.

Pan-frying and deep-frying use a lot more fat, and the coating does two jobs: it gets brown and crunchy, and it protects the meat inside. Oil temperature is EVERYTHING. Too cool and the coating soaks up oil and turns greasy. Too hot and the outside burns before the inside is cooked. That’s why the Southern Fried Chicken card holds its oil at 325°F, and why it drains the chicken on a rack instead of paper towels. Paper towels trap steam under the chicken and turn the bottom crust soggy.
Moist Heat: Steaming, Poaching, and Simmering

Moist heat cooks with hot liquid or steam and adds no fat. Poaching and simmering use the same pot at different temperatures. Poaching liquid sits around 160–180°F and barely moves. A simmer runs about 185–205°F, with small bubbles breaking the surface. Poaching is gentle enough for lean breast meat, which is how the Chicken Pot Pie card cooks its chicken before it goes into the filling. Simmering is for older birds and for broth, and a simmered hen gives you tender meat and rich stock at the same time. Two for one. Steamed chicken follows the same temperature rules as everything else. You’ll know it’s close when the meat looks evenly opaque and doesn’t push back much when you press it.
Combination Cooking: Braising and Stewing

Combination methods start with dry heat and finish with moist heat. You brown the chicken first for flavor, then cook it slowly in a flavorful liquid. Braising uses bigger pieces and just enough liquid to come partway up the sides; stewing uses smaller pieces, fully covered. This is where dark meat and older birds really shine. Long, gentle cooking in liquid gives collagen the time it needs to turn into gelatin, which is why a braised thigh turns silky and a braised breast just turns dry. It’s also how cooks have always dealt with tough birds. The classic French coq au vin was built for an old rooster, and Mexico’s chicken mole is cooked in a rich sauce of chiles, spices, and chocolate. The Braised Chicken all’Arrabbiata card follows the same pattern: brown the legs, build the sauce in the same pan, put the chicken back in, and finish it in the oven.
Match the Method to the Bird
| Bird and class | Best methods |
|---|---|
| Chicken: Rock Cornish game hen | Dry heat: roast, broil, or grillBest methods |
| Chicken: broiler or fryer | Any methodBest methods |
| Chicken: roaster | Any method; usually roasted wholeBest methods |
| Chicken: stewing hen, cock, or rooster | Moist heat or combination: simmer, stew, braiseBest methods |
| Duck: duckling | Dry heat: roastBest methods |
| Duck: mature duck | Combination: braiseBest methods |
| Goose | Combination: braise or stewBest methods |
| Turkey: young turkey | Dry heat: roast; or cut up and sauté or stewBest methods |
When Things Go Wrong
| Problem | Usual cause | Fix |
|---|---|---|
| Dry, stringy breast | Pulled at 165°F instead of before it, or one end thinner than the otherUsual cause | Pull at 155–160°F and let carryover finish it. Pound to an even thickness. Brine.Fix |
| Pale, rubbery skin | Wet skin, a crowded pan, or a covered bird. The heat went into making steam.Usual cause | Dry the skin uncovered in the refrigerator first. Roast on a rack, uncovered, with room around it.Fix |
| Tough, chewy thighs | Dark meat came off too early, before the collagen meltedUsual cause | Take dark meat to 175–180°F and rest it, or braise it.Fix |
| Breast done, legs not | Lean breast cooks faster than thick legsUsual cause | Truss and protect the breast, or cook breasts and legs separately.Fix |
| Pink meat near the bone, but it reads 165°F | Normal, especially in young birdsUsual cause | It’s safe. Trust the thermometer, not the color.Fix |
| Greasy fried coating | Oil too cool, or too much chicken in the pan at onceUsual cause | Hold the oil temperature, fry in batches, and drain on a rack.Fix |
| Dark crust, raw center | Oil too hotUsual cause | Lower the heat and check the oil temperature every few minutes.Fix |
| Soggy crust after frying | Drained on paper towels or held in a warm ovenUsual cause | Drain on a rack over a sheet pan and hold loosely covered.Fix |
| Chicken sticks, no browning | Pan not hot enough, or chicken still wetUsual cause | Preheat the pan, pat the chicken dry, and leave it alone until it releases.Fix |
| Stuffing under 165°F | Stuffed a bird that’s too bigUsual cause | Bake the stuffing in its own pan. For small birds, keep cooking until the stuffing hits 165°F (see The Fool Leaves It There: Fabricating and Preparing Poultry).Fix |
Recipes
Roast Chicken

Thomas Keller is one of the most decorated chefs in America, and his restaurants The French Laundry and Per Se are about as fancy as dining gets. So what does he consider the ultimate test of a restaurant? Roast chicken. Not a soufflé, not a tasting menu. A chicken. On the other side of the country sits The Inn at Little Washington, one of the most famous restaurants in the US. At the Inn, Chef Patrick O’Connell has a test for new cooks: roast a chicken.
I would understand if you think two famous chefs using roast chicken as a benchmark for skill sounds over the top. But hold on. Remember everything in this unit. The breast on a roast chicken wants to come out at 155–160°F, the thighs want 175–180°F, and the skin won’t crisp until every bit of surface water is gone, all on the same bird, in the same oven, at the same time. Anybody can turn out a roast chicken that looks gorgeous and golden (and most of the time, the breast is drying out or the legs need twenty more minutes).
The recipe you’re learning here is adapted from Ina Garten’s roast chicken: lemon, garlic, thyme, butter, and vegetables under the bird. With ingredients that simple, your technique has nowhere to hide. Brining seasons the meat, drying sets the skin up to crisp, and the vegetables give the chicken something to sit on so it roasts instead of sitting in a puddle. Let’s do it.
Roast Chicken
Ingredients
- 1 Roaster 5-7 pounds
- Kosher salt
- Freshly ground black pepper
- 1 large bunch fresh thyme plus 20 sprigs
- 1 lemon halved
- 1 head garlic cut in half crosswise
- 2 tablespoons butter melted
- 1 large yellow onion thickly sliced
- 4 carrots cut into 2-inch chunks
- 1 bulb of fennel tops removed, and cut into wedges
- Olive oil
Instructions
- Preheat the oven to 425 degrees F.
- Remove the chicken giblets. Rinse the chicken inside and out. Remove any excess fat and leftover pin feathers and brine for 8 – 24 hours.
- Remove from brine and rinse. Pat dry. Salt and pepper the inside of the chicken. Stuff the cavity with the bunch of thyme, both halves of lemon, and all the garlic. Truss.
- Brush the outside of the chicken with the butter and sprinkle again with salt and pepper.
- Place the onions, carrots, and fennel in a roasting pan. Toss with salt, pepper, 20 sprigs of thyme, and olive oil. Spread around the bottom of the roasting pan and place the chicken on top.
- Roast the chicken for about 1 1/2 hours, until an instant-read thermometer reads 165°F in the thickest part of the breast and at least 175°F in the thickest part of the thigh. Keep the probe off the bone.
- Remove the chicken and vegetables to a platter and cover with aluminum foil for about 20 minutes. Slice the chicken onto a platter and serve with roasted vegetables.
Chicken Piccata
A Brief (and Tasty) History of Chicken Piccata

Chicken Piccata is one of those dishes that feels fancy enough to order at a restaurant but simple enough to make at home, especially if you enjoy anything involving lemon, butter, and the phrase “just one more bite.” It usually gets labeled “classic Italian,” but the real story is a little more… international. And it starts with the fact that piccata isn’t a meat at all. It’s a method. The name is usually traced to the Italian for meat that’s been pounded thin, and that’s the whole idea: thin slices of meat, lightly floured, sautéed fast, and finished with a bright lemon-caper sauce. Any protein that can take that treatment can be a piccata, and that’s exactly how chicken got into the act.
In Italy, the classic version is veal, and you’re more likely to see it on a menu as scaloppine al limone. The Italian approach is elegant and minimalist: veal, lemon, capers, olive oil or butter, and not much else. No heavy sauce, no giant pile of pasta, no drama. Then, in the late 1800s and early 1900s, Italian immigrants came to the United States and brought their recipes with them, and they ran into a problem. Veal was pricey and hard to find. Chicken was everywhere and a lot easier on the wallet. So they swapped the veal for chicken, decided “Yeah, this works,” and Chicken Piccata was born.
Once it settled into American kitchens, it didn’t stay modest for long. Italian-American cooking leans richer and heartier, so the dish got more sauce (because why not?), butter and white wine for extra flavor, and bigger portions. It came to the table with pasta, rice, or mashed potatoes, sometimes all three, depending on ambition. Is that how they serve it in Italy? Not really. Is it delicious? Absolutely.
Today it’s a staple at Italian-American restaurants and a favorite of home cooks, and it’s easy to see why. Lemon keeps it bright, capers bring that salty pop, butter makes everything better, and the chicken happily soaks it all up. It’s fast, it’s comforting, and it makes people think you tried a lot harder than you actually did. It may not have come straight out of an Italian nonna’s kitchen, but it’s a great example of cooks making the most of what they’ve got.

Chicken Piccata
Ingredients
- 2 skinless and boneless chicken breasts butterflied and then cut in half
- Sea salt and freshly ground black pepper
- All-purpose flour for dredging
- 6 tablespoons unsalted butter
- 5 tablespoons extra-virgin olive oil
- 1/3 cup fresh lemon juice
- 1/2 cup chicken stock
- 1/2 cup unsweetened white grape juice
- 1/4 cup brined capers rinsed
- 1/3 cup fresh parsley chopped
Instructions
- Season chicken with salt and pepper. Dredge chicken in flour and shake off excess.
- In a large skillet over medium high heat, melt 2 tablespoons of butter with 3 tablespoons olive oil. When butter and oil start to sizzle, add 2 pieces of chicken and cook for 3 minutes. When chicken is browned, flip and cook other side for 3 minutes. Remove and transfer to plate. Melt 2 more tablespoons butter and add another 2 tablespoons olive oil. When butter and oil start to sizzle, add the other 2 pieces of chicken and brown both sides in same manner. Remove pan from heat and add chicken to the plate.
- Into the pan add the lemon juice, white grape juice, stock and capers. Return to stove and bring to boil, scraping up brown bits from the pan for extra flavor. Reduce by one third. Check for seasoning. Return all the chicken to the pan and simmer for 5 minutes. Remove chicken to platter. Add remaining 2 tablespoons butter to sauce and whisk vigorously. Pour sauce over chicken and garnish with parsley.
- Serve with fresh pasta, roast or mashed potatoes, or rice pilaf
Southern Fried Chicken
“My Mother Paid for This Place With Chicken Legs” — Bella Winston

Picture a little railroad town in Virginia in the years after the Civil War. A passenger train hisses into the Gordonsville station, and before it even stops moving, a crowd of Black women is already waiting on the platform. They carry trays and baskets balanced on their heads and arms, piled with fried chicken, biscuits, pies, and hot coffee. Passenger trains didn’t have dining cars yet, so if you were hungry, this was dinner. The women walked the length of the train, handing food up through the open windows, collecting coins, and racing to sell everything before the conductor called “All aboard.” They were called waiter carriers, and their fried chicken got so famous that travelers planned their trips around that stop. Gordonsville ended up with a nickname: the fried chicken capital of the world.

That chicken wasn’t a side hustle. It built a community. The money paid for houses, sent kids to school, and helped build churches. Years later, a former waiter carrier named Bella Winston explained her family’s home in one line: “My mother paid for this place with chicken legs.” Historian Psyche Williams-Forson took that line for the title of her book about these women, Building Houses Out of Chicken Legs. The trade lasted until the first half of the 1900s, when dining cars showed up on the trains and new regulations pushed the trackside vendors off the platforms.
Fast-forward to the 1930s, when a former steamboat operator, lawyer, and gas station owner named Harland Sanders started selling fried chicken to hungry travelers at his roadside café in Corbin, Kentucky. Sound familiar? Sanders’ big idea was speed. Frying chicken in an iron skillet took forever, so he started cooking it in pressure cookers, which did the job in a fraction of the time. The governor made him an honorary Kentucky colonel, and Sanders ran with it, right down to the white suit and string tie. In 1952, a Salt Lake City restaurant owner named Pete Harman became the first to sell Sanders’ chicken under a name Harman came up with himself: “Kentucky Fried Chicken.” Twelve years later, Sanders sold the company for $2 million, with more than 600 franchises selling his chicken. Today you can buy a bucket of it almost anywhere on Earth, under the face of a Southern gentleman in a white suit.
Southern Fried Chicken
Ingredients
- 1 broiler/fryer chicken
- 1 cups low fat buttermilk
- 2 tablespoons kosher salt
- 2 tablespoons Paprika
- 2 teaspoons garlic powder
- 1 teaspoon cayenne pepper
- 1 cup AP Flour for dredging chicken
- Vegetable shortening for frying
Instructions
- Fabricate chicken into 8 pieces (legs, thighs, wings, and breasts).
- Place chicken into a plastic bag and cover with buttermilk. Seal and refrigerate for 15 minutes and up to 24 hours
- Pour just enough frying oil into a heavy frying pan so that it comes ⅓ up the side.
- Warm oil over medium heat to 325*F. To avoid burning, do NOT allow oil to go over 325*F.
- Drain chicken well. Combine salt, paprika, garlic powder, and cayenne pepper. Liberally season chicken with this mixture. Dredge chicken in flour and shake off excess.
- Place chicken skin side down into the pan. The oil should come half way up the pan. Cook chicken until golden brown on each side, approximately 10 to 12 minutes per side.
- Remove the breast when the internal temperature is between 155-165 degrees. Remove wings, thighs, and drumsticks when they reach 170-180 degrees. In both cases, be careful to monitor shortening temperature every few minutes.
- Drain chicken on a rack over a sheet pan. Don't drain by setting chicken directly on paper towels.
- If you need to hold the chicken before serving, cover loosely with foil but avoid holding in a warm oven.
Chicken Pot Pie
For a long time, the crust on a meat pie wasn’t food. It was a pan.

Medieval cooks packed meat into a thick, hard shell of flour-and-water pastry called a “coffin,” baked it, and customers treated the crust like a partially-edible to go container. Centuries later, Americans decided the crust should actually taste good, and chicken pie was born. In 1951, Swanson put chicken pot pie in the freezer case, and that was it. For a lot of people, that little foil pan with the molten-lava filling that burned the roof of your mouth IS pot pie.
Ours is better than that, and there’s a secret to it: a pot pie is really two separate recipes that have to get along. The filling is basically a chicken stew. You gently poach the chicken, save the liquid, and turn it into a rich, roux-thickened sauce. The crust is pastry, and pastry is all about cold fat. Little pieces of cold butter and shortening melt in the oven, release steam, and puff the dough into flaky layers.
If you put those two together the wrong way? The stew wins. Hot filling melts the fat in the dough before it ever sees the oven, and you get the most famous disaster in baking: the soggy bottom, a beautiful golden lid sitting on top of wet, gummy, raw-tasting paste. So let the filling cool before it goes in the crust. By the time the pie hits the oven, the chicken’s already cooked, so the oven only has to bake the pastry and heat everything through. Do it right and the bottom crust comes out just as crisp as the top. When your friends and family try THIS kind of pot pie, they will rightfully crown you King. Or Queen.
Whatever.

Sam’s Classic Chicken Pot Pie
Ingredients
Poached Chicken and Chicken Stock
- 1 whole chicken about 4 pounds, cut into 8 pieces
- 2 celery stalks cut into 4-inch pieces
- 2 medium carrots peeled and cut into 4-inch pieces
- 1 medium onion quartered
- 6 sprigs fresh flat-leaf parsley
- ¼ teaspoon whole black peppercorns
- 1 teaspoon coarse salt
- 1 teaspoon chicken stock paste as needed
Crust
- 2 ½ cups AP Flour
- 1 teaspoon salt
- 6 Tablespoons unsalted butter chilled and cubed
- ¾ cup vegetable shortening chilled
- ½ cup ice water more or less as needed
Filling
- 2 tablespoons butter
- 1 cup diced peeled baking potatoes
- 1 cup 1-inch pieces fresh green beans
- ¼ cup fresh or thawed frozen corn kernels
- ½ cup chopped carrot
- ½ cup chopped onion
- ½ cup chopped celery
- 1 ¼ cups chicken broth
- 1 cup half-and-half
- ½ cup all-purpose flour
- 1 tablespoon chopped fresh parsley
- 1 ½ teaspoons divided, salt
- ½ teaspoon ground black pepper
- ½ teaspoon dried thyme
- 3 cups chopped cooked chicken
- 1 egg beaten
Instructions
Poach chicken
- Place chicken in a large stockpot. Add mirepoix and enough water to cover chicken. Bring to a boil over high, then immediately reduce heat to a bare simmer (190*F).
- Continue to simmer until chicken has just cooked through, about 25 minutes, skimming any foam that rises to the top.
- Transfer chicken to a plate without discarding the broth or the mirepoix in the stock pot. Allow chicken to cool slightly. Remove and discard all skin and fat. Remove meat from bones, tear into bite sized pieces and reserve.
Make Stock
- Add bones back to stock pot and continue to simmer for an additional 2 hours. Strain stock through a fine sieve into container and refrigerate; discard solids.
- Skim solidified fat from refrigerated stock. Taste and add stock paste base as necessary to intensify flavor.
Crust
- Mix the flour and salt together in a large bowl. Add the butter and shortening.
- Using a pastry cutter, cut the butter and shortening into the mixture until it resembles coarse meal (pea-sized bits with a few larger bits of fat is OK).
- Drizzle cold water in, 1 Tablespoon at a time, and stir with a rubber spatula or wooden spoon. Stop adding water when the dough begins to form large clumps.
- Transfer the pie dough to a floured work surface. Using floured hands, fold the dough into itself until the flour is fully incorporated into the fats. Form it into a ball. Divide dough in half. Flatten each half into 1-inch thick discs using your hands.
- Wrap each tightly in plastic wrap. Refrigerate for at least 2 hours (and up to 5 days).
- When rolling out the chilled pie dough, use gentle force, starting from the center and working outwards in all directions, turning the dough with your hands as you go.
- Refrigerate the pie crust between sheets of parchment paper while making the filling.
Filling
- In a large skillet, melt butter over medium heat. Add potatoes, beans, corn, carrot, onion, and celery; cook, stirring occasionally, until vegetables begin to soften, about 7 minutes. Reserve.
- In a small bowl, stir together broth and half-and-half; whisk in flour until mixture is smooth. Bring half-and-half mixture to a simmer in a large, wide pan and cook, stirring frequently, until thickened, about 20 minutes. Add parsley, salt, pepper, and thyme. Taste and Adjust seasonings. Add cooked vegetables then remove from heat, and gently fold in chilled chicken. Pour mixture into prepared pan.
- Lay dough over the top of the chicken mixture. Fold edges of dough under, and crimp as desired. Cut 6 slits in top of dough to release steam. Brush beaten egg onto dough, and sprinkle with salt. Place pot pie on a rimmed baking sheet.
- Bake until crust is golden brown and filling is hot and bubbly, about 40 minutes. Let stand for 10 minutes before serving.
Braised Chicken all’Arrabbiata
Italians have a name for food so spicy it makes you mad: all’arrabbiata, “angry style.” It comes from Rome, where penne all’arrabbiata is basically a dare on a plate: pasta in a tomato sauce loaded with garlic and hot pepper. But angry doesn’t mean dumb. A good arrabbiata isn’t just hot. It’s hot AND it tastes like something, with the heat sitting on top of sweet tomatoes, garlic, and herbs instead of drowning them out. We’re taking that same angry sauce off the pasta and into a braising pan, then adding bell pepper, poblano, and marjoram and letting chicken legs simmer in it until they’re falling-apart tender.
Legs are perfect here because they’ve got the fat and connective tissue to get better the longer they sit in the sauce. A breast would turn to sawdust. Brown the legs hard first, then cook the vegetables in the same pan and scrape up every browned bit into the sauce. That’s free flavor. When the chicken goes back in, keep the skin facing UP so it doesn’t drown. Instead of wine, the recipe uses grape juice for sweetness and fruit and vinegar for the acid. And taste the sauce at the end before you add anything, because it’s been cooking down and concentrating the whole time the chicken was in the oven. It may already be exactly as angry as you want it.
Braised Chicken all’Arrabbiata
Ingredients
- 6 whole chicken legs split into drumsticks and thighs
- Salt and freshly ground black pepper
- 3 tablespoons extra-virgin olive oil
- 1 large red onion diced
- 6 large garlic cloves minced
- 1 ½ teaspoons crushed red pepper
- 1 bay leaf
- 1 large yellow bell pepper diced
- 1 poblano pepper diced
- 1 tablespoon tomato paste
- 1 cup unsweetened red grape juice
- ¼ cup red wine vinegar
- 28 ounce canned whole peeled tomatoes chopped and juices reserved
- 2 marjoram sprigs plus 1 tablespoon chopped marjoram leaves
Instructions
- Preheat the oven to 400°.
- Season the chicken with salt and pepper.
- In a large ovenproof skillet, heat the oil until shimmering. Add the chicken skin side down and cook over moderately high heat, turning once, until browned all over, 7 minutes. Transfer the chicken to a platter skin side up.
- Pour off all but 2 tablespoons of fat from the saute pan. Add the onion, garlic, crushed red pepper and bay leaf and cook over moderate heat, stirring, until the onion is softened.
- Add the bell pepper and poblano and cook until softened. Stir in the tomato paste and cook for 1 minute.
- Add the grape juice and boil for 2 minutes, scraping up any browned bits from the bottom of the skillet.
- Add the tomatoes and their juices, the vinegar and marjoram sprigs and bring to a simmer. Add the chicken legs back to the pan, skin side up.
- Bake in the upper third of the oven for 35 minutes, until the chicken is cooked through.
- Discard the marjoram and season the sauce with salt and pepper.
- Garnish with the chopped marjoram and serve.
Key Terms
Carryover cooking
The temperature rise after food leaves the heat, as heat moves from the hotter outside toward the cooler center.
Rendering
Melting fat out of fatty tissue during cooking.
Poaching
Cooking gently in liquid that barely moves, below a simmer.
Simmering
Cooking in liquid with small bubbles breaking the surface, below a full boil.
Braising
Browning food first, then cooking it slowly with liquid coming partway up the pieces.
Stewing
Cooking smaller pieces slowly in enough liquid to cover them.
Dredging
Coating food lightly with a dry ingredient, such as flour, before cooking.
Pan sauce
A sauce made in the cooking pan, using the browned bits left behind to build flavor.