
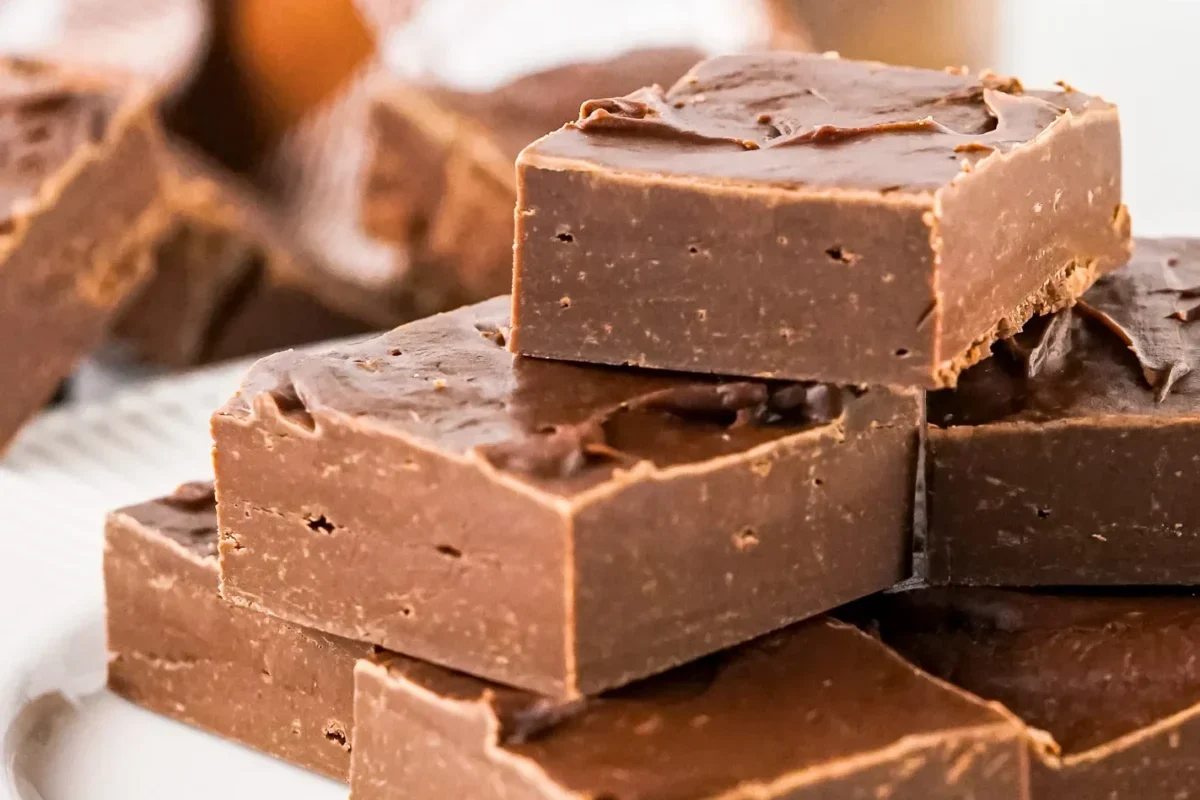
There’s a gianormous gas station between Orlando and the Florida-Georgia line. I make a point of visiting every time I drive to see my son. It’s very, very popular. It’s got a Beaver for a mascot (you probably know the one I’m talking about). Here’s the thing: I only stop there for the fudge. They have this amazing display – ten feet of glass-enclosed cathedral worship dedicated to America’s original candy – And I’ve been known to stand in front of that altar to chocolaty goodness for 20 minutes deciding what to take home, then freakin’ spend $50 of my hard-earned money, stagger back to my truck carrying pounds of the stuff, and be in a sugar coma long before I get where I’m headed. Why is a chef buying fudge from a gas station? Fudge is hard.
Storytime! Last Christmas break, I decided I was finally going to figure it out. My students were pestering me for a fudge lesson and I was convinced the internet was the answer. I read up, bought a ton of ingredients, and headed to my best friend’s house armed and ready. And I was CAREFUL! I weighed the sugar, measured the cream, watched the thermometer, and poured one beautiful chocolate mixture after another into pans to rest. They smelled wonderful. I even cleaned Leslie’s counters while we waited for our future deliciousness to set, which ought to count for something.
Then we took a bite. First batch: Chocolate-flavored beach sand. Second batch: something you could spread on toast. Third batch: Thick, tough, and chewy? I could have used it to level a wobbly table. Same ingredients. Different problems. And here’s what made me so frustrated: I couldn’t tell you why.
Here’s what has frustrated me for years: fudge looks easy. There is no dough to develop, no cake to keep from collapsing, no delicate shell to mold. Mostly, you’re just boiling sugar and dairy, letting the mixture cool, and stirring. Unfortunately, those simple actions control something that ISN’T simple: managing the size and number of the sugar crystals inside the candy.
QUESTIONS WE’LL ANSWER
- How can fudge be full of sugar crystals and still feel smooth on your tongue?
- Why do large sugar crystals make fudge grainy?
- What happens to sugar as we heat it, cool it, and start stirring?
- Why do we add glucose syrup and invert sugar instead of using ordinary sugar alone?
- What makes fondant different from fudge?
- Why does cooking temperature determine whether fudge turns out soft, creamy, or crumbly?
- When fudge goes wrong, how can we figure out what happened?
A COLLEGE CANDY HABIT
In 1888, a young woman named Emelyn Battersby Hartridge brought a fudge recipe to Vassar in Poughkeepsie, New York – an all-women’s college. She didn’t know it at the time, but she was about to launch one of America’s great candy obsessions.
Emelyn played around with the recipe for a while, eventually making thirty pounds for Vassar’s senior auction. Thirty pounds! And consider what making fudge in Emelyn’s dormitory meant in 1888. There was no electricity, for one: she had to sneak spirit lamps from the school’s chemistry laboratory or cook over gaslights. She boiled sugar syrup to temperatures hot enough to remove skin. In a cramped dorm room. In the middle of the night. It’s a miracle the college didn’t burn to the ground.
Fudge became a sensation at Vassar. Students made it in secret, shared it with friends, and developed their own recipes. Soon, the obsession spread to other women’s colleges, including Smith and Wellesley, where students created even MORE variations. Before long, fudge had traveled well beyond the college dormitory and become an American favorite.

Making fudge was easy to attempt – the recipe looked so simple! – and surprisingly difficult to get right. One student’s beautiful, creamy batch could become another student’s gritty disaster. Without accurate thermometers or dependable instructions, success depended on an experienced eye knowing exactly when to stop cooking, when to start beating, and when to leave the mixture alone.
More than a century later, those are still the decisions that mean the difference between success and a sad, depressing failure.
SAME SUGAR, DIFFERENT CANDY
Before we put chocolate into anything, consider rock candy. A stick covered in enormous sugar crystals doesn’t look remotely like a piece of creamy fudge. But both products depend on sugar leaving a concentrated solution and organizing itself into crystals.
For rock candy, the cook gives crystals time to grow. He dips a wet lollipop stick into sugar, then suspends it in concentrated syrup with very little disturbance. Sugar collects on the existing crystals, growing larger and larger until they look like they came from some magical cave. Those big, crunchy structures are the point.
Those enormous crystals would be a disaster in fudge – obviously. Instead of allowing a few crystals to grow to sugar dinosaur rocks, we encourage millions of tiny crystals to form all spread out. And what about a clear lollipop? That’s another approach entirely. If you want to make a lolly, you have to prevent sugar from crystallizing at all; instead, you’re creating an amorphous solid—a hard, glassy structure without crystals. Same sugar, three very different candies.
FONDANT: THE CANDY HIDING INSIDE OTHER CANDIES
The word fondant probably makes you think of the thick, sugary covering on wedding cakes. That’s rolled fondant. Confectionery fondant is something quite different. It’s a smooth, creamy mixture made from cooked sugar syrup. It looks a little like thick white frosting, but its texture comes from millions of tiny sugar crystals rather than whipped-in air.
Chocolatiers use fondant to make soft, sweet centers for chocolates and other filled candies. They can flavor it with vanilla, coffee, maple, or fruit, then use it as a filling or combine it with other ingredients. It’s one of those preparations that most people have eaten without knowing what it was called.
Making it is surprisingly simple. Cook sugar, glucose syrup, and water together, let the syrup cool, then work it back and forth across a stainless-steel worktable (or even better, a big marble table – if you’ve got one). As the sugar begins to crystallize, the clear syrup turns cloudy, then white and creamy. Eventually, it becomes thick enough to hold its shape. The ingredients haven’t changed. The arrangement of the sugar has.
And here’s why we’re making it: those tiny sugar crystals give us a head start when we make fudge. By adding some prepared fondant to our fudge mixture, we introduce millions of tiny crystals that help the sugar crystallize into the smooth, creamy texture we’re after. This is called seeding, and it’s one of the most useful tricks in a confectioner’s kitchen.
WHAT’S HAPPENING IN THE SAUCEPAN?
FIRST, DISSOLVE THE SUGAR
Granulated sugar is sucrose. Each grain contains molecules arranged in a repeating crystalline structure. When sugar dissolves in water, sucrose molecules separate from that structure and become dispersed through the liquid. The sugar hasn’t disappeared. Take a sip if you don’t believe me.
A given amount of water can dissolve only so much sucrose at a given temperature. When the solution reaches that limit, it is saturated. Heating allows more sugar to dissolve in the water. As we cook away water and then let the syrup cool, we create a supersaturated solution—one holding more dissolved sugar than it normally could at that temperature. That’s useful in candy making because we’re about to remove a great deal of the water while keeping the sugar in solution.
THE THERMOMETER IS TELLING YOU ABOUT WATER
Water boils when it gets hot enough to turn into steam, right? At sea level, that’s about 212°F. Keep heating it, and you’ll make more steam, but the boiling water won’t get any hotter.
But dissolve sugar in that water, and the rules change. Sugar molecules don’t evaporate with the water. Instead, they make it harder for water molecules to create steam and escape into the air. The more concentrated the sugar molecules, the harder the water works to become vapor, the higher the temperature to boil.
As we keep cooking, the boiling point keeps climbing. Here’s what you need to understand: When you are boiling a sugar syrup, the thermometer is actually telling you how concentrated the syrup has become.
That’s why we’re cooking our chocolate fudge to 239°F (115°C). We’re not trying to make the sugar hot for the sake of making it hot. We’re removing enough water to give our fudge the right consistency. Stop too early, and the fudge may be too soft to hold its shape. Cook too far, and it may become hard, dry, or crumbly.
Our fondant follows the same rule but cooks to 243°F (117°C) instead. Different candy, different formula, different target. Candy science! Ooooo.
TWO DIFFERENT QUESTIONSIs it smooth? Investigate the sugar crystals: their size, how crystallization began, and how the mixture was worked.
Does it hold its shape? Investigate moisture and how much crystallization developed, along with the balance of sugars and fat.
Firmness and smoothness affect the same bite, but they aren’t the same property. A firm piece of fudge can be gritty. A smooth piece can be too soft.
DON’T MAKE CRYSTALS. YET.
We’ve just spent all that time dissolving sugar and boiling away water. Now we’ve got a concentrated syrup that will become supersaturated as it cools. And that means we’ve got a problem: sugar crystals can start forming before we’re ready for them.
Crystals need somewhere to begin. Sometimes that’s another sugar crystal. A single grain of undissolved sugar, or a few crystals stuck to the side of the saucepan, even a tiny bit of leftover rice not quite cleaned out of a pan, some dust. A piece of bacon. All kinds of things can give dissolved sugar molecules a place to gather. And once a crystal starts growing, more sugar will join it.
Stirring, scraping, or shaking the syrup will encourage crystallization. Don’t do that.
So here’s how we avoid starting something we can’t stop. Begin with a spotlessly clean saucepan and stir while the sugar dissolves so you don’t scorch any on the bottom of the pan. Once the syrup boils, stop stirring. If you see sugar crystals on the walls of the saucepan, wash them down with a clean pastry brush dipped in water. And for god’s sake, don’t scrape them into the syrup! When it’s time to pour the syrup out, leave any crusty sugar stuck to the saucepan behind. It’s trash now.
COOL IT UNDISTURBED
Once the syrup reaches 243°F (117°C), carefully pour it onto your prepared worktable, leaving any crusty residue behind in the saucepan. Lightly sprinkle the surface of the syrup with cold water to prevent a dry crust from forming. Then leave it alone. Walk away. Just Walk. Away.
We want the syrup to cool to 120°F (50°C) before we deliberately start crystallization. At that temperature, agitation will encourage millions of tiny crystals to form instead of a handful of large ones.
THE BUILDING BLOCKS OF FUDGE: CANDY CRYSTALS
We’ve spent all this time telling you not to stir, scrape, shake, or otherwise disturb your sugar syrup. Now that it’s cooled to 120°F (50°C), we’re going to do exactly the opposite. We’re going to beat the heck out of it.
This is called tabling. Traditionally, confectioners use metal scrapers on a marble slab. That’s a great setup if you have one. If you don’t, rigid plastic scrapers on a stainless-steel worktable will do the trick. Just don’t use metal scrapers on stainless steel. You’ll gouge the metal, get shavings into your candy, and be SOOOO sad.
Remember those Vassar students making fudge in their dorm rooms? If they could make fudge by candlelight next to their bunk beds without a fancy marble table, we can muddle through in our well-lit kitchen. Stop whining.
Once the syrup has cooled to 120°F (50°C), use the scrapers to push it across the table, spread it out, scrape it back together, and repeat. You’re deliberately disturbing the syrup, over and over again. And something remarkable begins to happen. The syrup starts out clear and glossy. As you work it, tiny sugar crystals begin forming throughout the mixture. Those crystals scatter light, so the syrup gradually becomes cloudy, then white and opaque. It thickens as more sugar leaves the solution and joins the growing crystals.
Remember those enormous rock candy crystals? We’re trying to do the opposite. Instead of letting a few crystals grow into monsters, all this agitation encourages enormous numbers of tiny crystals to form. They’re so small that your tongue can’t distinguish one from another. That’s what gives properly crystallized fondant its smooth, creamy texture.
Keep working the fondant as it thickens. It will become increasingly difficult to move, eventually forming a firm, white mass rather than a flowing syrup. At this point, we’ve accomplished what we set out to do: we’ve turned concentrated sugar syrup into a mass of extremely fine sugar crystals surrounded by a little remaining syrup.
Pack the finished fondant into an airtight, food-safe container and leave it to ripen overnight at a cool room temperature. Do not refrigerate. Why’d we do all that? We now have a supply of millions upon millions of tiny sugar crystals, ready to help us control crystallization in another candy.
WHAT MAKES FUDGE FUDGE?
We’ve just made fondant. Sugar, water, a little glucose syrup, and a whole lot of scraping. The result is a smooth, white candy made from millions of tiny sugar crystals surrounded by concentrated syrup. It’s sweet. It’s creamy. And… it’s not fudge.
So what happens when we take a bit of that fondant and ADD chocolate, cream, and a few other ingredients? You guessed it. FUDGE.
Fondant gets most of its texture from sugar crystals. Fudge does, too, but fudge has something else going on. We’re building a candy that contains sugar crystals, water, fat, and other ingredients, all working together. The sugar crystals give fudge its structure, while the fat and remaining syrup help make it tender and creamy instead of hard and crunchy.
Think about a piece of great fudge. You can cut it cleanly with a knife, but when you bite into it, it yields almost immediately. It doesn’t stretch like caramel, shatter like brittle, or crunch like rock candy. It practically melts away on your tongue.
Cream gives our fudge richness, but it also brings water, milk proteins, and fat. Those ingredients change the way the candy cooks and how it feels when we eat it. Replace cream with milk, and you’ve changed the balance of water and fat. You haven’t just made a less expensive fudge.
Chocolate brings cocoa flavor, cocoa solids, and cocoa butter. Those solids and fats become part of the finished candy, giving chocolate fudge a different texture from plain vanilla fudge. And unlike a chocolate bar, we aren’t relying on tempered cocoa butter crystals to make our fudge set. Sugar is doing most of that work.
Glucose syrup and invert sugar help keep sucrose crystals from growing too large. That might sound strange after all the trouble we’ve gone through to make crystals, but remember: we want millions of tiny ones, not a few enormous ones. These other sugars help us control that growth. They also influence how soft the finished fudge stays.
And then there’s our prepared fondant. Remember all that scraping? All those millions of tiny sugar crystals we worked so hard to create? We’re going to put some of them into our chocolate fudge. This is seeding. Instead of waiting for sugar crystals to begin forming on their own, we’re introducing a huge population of tiny crystals that can help guide crystallization in the new batch.
That doesn’t mean every fudge recipe needs prepared fondant. Some recipes use marshmallow creme. Others use sweetened condensed milk or different combinations of sugars. They can all produce fudge, but they don’t necessarily get there the same way. Our recipe uses fondant because it gives us a particularly useful way to control the process. We’ve already learned how to make tiny sugar crystals. Now we’re going to put them to work.
WHY TWO DIFFERENT SUGAR SYRUPS?
Our recipe calls for both glucose syrup and invert sugar. Why not just use more granulated sugar?Because ordinary sugar (sucrose) really likes to form crystals with other sucrose molecules. Glucose syrup and invert sugar don’t. They interfere with that process, helping prevent the crystals from becoming large enough to feel gritty.
Glucose syrup is made by breaking down starch. It contains a mixture of sugars and longer carbohydrate chains that help control crystallization and give the fudge body. Invert sugar is made by splitting sucrose into two smaller sugars: glucose and fructose. It also interferes with crystallization, but it’s especially useful for retaining moisture and helping the fudge stay soft during storage.
We use both because we’re trying to achieve two things at once: a fudge that sets firmly enough to cut, but stays tender enough to melt in your mouth.
PAYOFF: LET’S MAKE IT
We’ve made fondant. We’ve learned how to control sugar crystals, and we’ve got a container full of millions of the little things. Now we’re going to put them to work.
Our chocolate fudge starts with sugar, milk, cream, glucose syrup, and invert sugar. We’re going to cook those ingredients together, just as we cooked our fondant syrup. But there’s an important difference: this mixture contains dairy. Milk and cream can scorch against the bottom of a hot saucepan, so this time we’re going to stir continuously, making sure our scraper reaches the bottom and corners. We still need to keep dried sugar crystals from falling off the sides of the pan, but we can’t simply walk away and leave the mixture boiling.
We’re cooking to 239°F (115°C). Remember what the thermometer is telling us? How much water remains in the mixture. Fondant went to 243°F. Our fudge stops a little earlier because we’re building a different candy, with a different balance of sugar, water, and fat.
When the fudge base reaches its target, carefully pour it onto our clean stainless-steel worktable. Leave any crusty residue in the saucepan. Now comes the interesting part. Place our prepared fondant, melted cocoa mass, and vanilla on top of the hot mixture. Don’t stir them in yet. We’re going to let everything cool undisturbed to 120°F (50°C), just as we did with our fondant.
Once we’ve reached that temperature, the rules change again.
Grab your scrapers and start working the mixture back and forth across the table. The fondant begins mixing into the syrup, bringing millions of tiny sugar crystals along with it. Those seed crystals provide starting points for the dissolved sugar in our fudge to crystallize. Meanwhile, the cocoa mass and vanilla become incorporated throughout the mixture.
Watch what happens. The fudge begins to lose its glossy appearance. It becomes thicker, creamier, and increasingly opaque. You’re building the crystal structure that will give the finished candy its texture.
And this is where fudge and fondant part company.
When we made fondant, we kept working until it became a firm mass. Don’t do that with fudge.
Fudge needs to leave the table while it’s still soft enough to spread. Once it begins thickening and holds together rather than flowing like syrup, it’s time to move. Keep scraping until it’s completely firm, and you’ll have a beautiful batch of fudge stuck to your stainless-steel table. Transfer it immediately into the prepared confectionery frame. Spread it evenly, and if you want a flat surface, cover it with lightly oiled parchment and gently level it with a rolling pin. Then leave it alone. Walk away. Doom-scroll on Instagram for thirty minutes or whatever. The fudge will continue crystallizing as it rests in the frame. Once it’s firm enough to cut cleanly, then and ONLY then, remove the frame and cut it into squares.
Pick one up. It should hold its shape, but yield easily when you bite it. It shouldn’t crunch, stretch like caramel, or leave an oily film on your fingers. The sugar crystals should be so small that you can’t feel them individually. Ahhhh, success!
TIPS, TRICKS, AND TROUBLESHOOTING
Get It Right the First Time
Use a bigger saucepan than you think you need. Dairy-based sugar mixtures can foam and rise dramatically as they boil. Give the mixture plenty of room.
Know where your thermometer measures. Keep the probe in the candy without touching the bottom of the saucepan. A probe resting against hot metal can give you a misleading reading.
Prepare your landing zone. The worktable must be spotless, the plastic bowl scrapers ready, and the frame assembled before cooking begins. Once crystallization starts, there isn’t time to hunt for equipment.
Don’t scrape the saucepan clean. Sugar crystals stuck to the sides can introduce unwanted large crystals into the batch. Leave them behind.
Keep the fudge moving when tabling. Spread it, scrape it back together, and repeat. Don’t leave thin layers sitting on the table long enough to dry into a crust. Those hardened bits can make your finished fudge gritty.
Watch the candy, not the clock. Eight minutes is an estimate. The changing appearance and consistency tell you when it’s ready.
Don’t refrigerate fudge to force it to set. Cold can make the fat firmer and disguise an undercrystallized batch. Judge the finished texture at room temperature.
RECIPES
Make the fondant first. It needs to rest overnight before you use it to seed the chocolate fudge.
For the fudge, set a 12 × 12-inch confectionery frame on parchment paper. This open-bottomed mold holds the candy in place while it sets into a ½-inch-thick slab. Get it ready before you start cooking. When the fudge is ready to leave the table, you won’t have time to hunt for equipment.
Confectionery Fondant
Ingredients
- 1000 g granulated sugar
- 200 g glucose syrup
- 200 g water
- 100 g prepared confectionery fondant optional, for seeding
Instructions
- Prepare a clean stainless-steel worktable by lightly dampening it with cold water. Have rigid plastic bowl scrapers and an airtight storage container ready.
- Combine the granulated sugar, glucose syrup, and water in a saucepan. Stir while heating until the mixture comes to a boil and the sugar has dissolved.
- Stop stirring and continue cooking until the syrup reaches 243°F (117°C). Keep stray sugar crystals from accumulating on the sides of the saucepan.
- Carefully pour the syrup onto the prepared worktable, leaving any crusted material behind in the saucepan. Lightly sprinkle the surface of the syrup with cold water to prevent a dry crust from forming. Let it cool undisturbed to 120°F (50°C).
- If using prepared fondant as seed, place it on the cooled syrup immediately before beginning agitation.
- Work the syrup continuously with the scrapers. It will become opaque, creamy, and eventually form a firm, short-textured mass. Allow approximately 8 minutes with seed or 20 minutes without seed. Judge completion by texture rather than the clock.
- Pack the finished fondant into an airtight, food-safe container and leave it to ripen overnight at a cool room temperature. Do not refrigerate.
Notes
Approximate finished yield with seed: 1,300 g. For the chocolate fudge recipe: Reserve 300 g of smooth, finished fondant. Check your work: The fondant should feel smooth, not sandy. It will be firm when freshly made and easier to handle after ripening.
If the batch is gritty, review your cooling and agitation technique before making another batch. Don’t use gritty fondant to seed your fudge.
Handmade Chocolate Fudge
Ingredients
- 830 g granulated sugar
- 260 g whole milk
- 190 g glucose syrup
- 120 g invert sugar
- 120 g heavy cream
- 300 g prepared confectionery fondant
- 180 g cocoa mass chocolate liquor or unsweetened chocolate, melted
- 10 g vanilla extract approximately 2 teaspoons
Instructions
- Set a 12 × 12 × ½-inch confectionery frame on lightly oiled parchment. Prepare a second sheet of lightly oiled parchment and a rolling pin if you want a smooth top. Have a clean stainless-steel worktable and rigid plastic bowl scrapers ready.
- Combine the granulated sugar, milk, glucose syrup, invert sugar, and heavy cream in a heavy saucepan. Cook to 239°F (115°C), stirring continuously and scraping the bottom and corners to prevent the dairy from scorching.
- Carefully pour the cooked mixture onto the prepared worktable without scraping any crusted residue from the saucepan into the syrup. Place the prepared fondant, melted cocoa mass, and vanilla extract on top of the hot mixture. Do not mix them in yet.
- Allow the mixture to cool undisturbed to 120°F (50°C). Use a thermometer rather than estimating the cooling time.
- Work the mixture continuously with the plastic scrapers, incorporating the fondant, cocoa mass, and vanilla. The fudge will become thicker, creamier, and increasingly opaque. This takes approximately 8 minutes, but the changing texture determines when to stop.
- Transfer the fudge to the prepared frame while it is still soft enough to spread. Do not continue tabling until the mixture becomes completely firm.
- Spread the fudge evenly inside the frame. For a smooth top, cover with the second sheet of lightly oiled parchment and level gently with a rolling pin. Alternatively, leave the surface rippled.
- Allow the fudge to finish crystallizing before removing the top parchment and cutting, approximately 30 minutes. Wait longer if it is not firm enough to cut cleanly.
- Cut into approximately 1-inch squares. Package promptly to prevent the exposed surfaces from drying out.
PROTECT THE FUDGE!
Let the fudge finish setting before cutting it. Wrap it or close it in an airtight container promptly after portioning. Its exposed surfaces can lose moisture and become dry and crumbly even when the original batch was correct. Fudge containing a whipped preparation needs particular protection because its aerated structure can dry more readily.
Sugar content alone doesn’t establish a product’s shelf life. Water activity, sanitation, ingredients, packaging, and storage conditions all matter. Water activity describes how available water is for microbial growth and other changes; it isn’t simply the percentage of water in the recipe. Follow the approved storage plan for the finished product. A good-looking square is not a shelf-life test.
TROUBLESHOOTING (CAUTIONARY TALES)
On the line, most times you might see something going wrong and be able to fix it. A little more salt, a little more heat, a splash of acid to balance a sauce. Most dishes give you a chance to make adjustments along the way.
Fudge isn’t like that. You mess up fudge, it STAYS messed up.
Most fudge disasters come down to two things: the sugar wasn’t cooked to the right concentration, or the mixture wasn’t crystallized properly. Maybe you stirred too soon, didn’t stir enough, or kept working it long after you should have stopped. Whatever the reason, once the fudge has set, there’s usually no going back. You can’t stir away large sugar crystals or put water back into an overcooked batch and expect everything to turn out perfectly.
So think of the following problems as cautionary tales. We’ll explain what went wrong, what you might still be able to do, and what to change the next time you make fudge.
MY FUDGE IS GRAINY
You can feel individual sugar crystals against your tongue. The crystals grew too large, possibly because the mixture was disturbed too early, crystals from the saucepan entered the batch, or agitation wasn’t consistent.
What now? Not realistically once it has set. Next time, pay attention to cooling and keep the agitation continuous once you begin.
MY FUDGE IS TOO SOFT
It won’t hold a clean square, even after you’ve given it time to set. The mixture may contain too much moisture because it wasn’t cooked far enough, or it may not have developed enough crystals. Excess invert sugar can also contribute.
What now? If it’s still on the table and hasn’t crystallized sufficiently, continued agitation might help. Once it has set, refrigeration will only disguise the problem. If it tastes good, you may have a dessert filling instead of fudge.
MY FUDGE IS HARD AND CRUMBLY
It breaks instead of yielding when you bite it. Too much water may have evaporated during cooking, or the mixture may have crystallized excessively.
What now? Not easily. If it tastes good, crumble it over ice cream or incorporate it into another dessert. Next time, check the cooking endpoint and stop tabling while the mixture is still spreadable.
MY FUDGE IS STRETCHY AND GUMMY
Instead of breaking cleanly, it pulls like an unusually thick caramel. Too much glucose syrup or insufficient crystallization can produce this texture.
What now? If it’s still being worked and hasn’t developed enough crystals, keep tabling. If the problem comes from an incorrect ingredient balance, additional scraping won’t fix it. Check your weights before making another batch.
THERE’S OIL SEEPING OUT OF MY FUDGE
You notice greasy spots on the parchment or droplets of fat on the surface. The formula may contain too much fat, or the mixture may have lost too much moisture during cooking.
What now? Once the finished fudge is separating, there’s no dependable quick repair. Review the ingredient weights and cooking temperature before trying again.
MY FUDGE SET BEFORE I COULD SPREAD IT
It looked perfect on the table, then suddenly became a stiff mass that wouldn’t go into the frame.
What now? If it’s still workable, move it immediately. Once it’s hardened, the transfer window has closed. Next time, stop tabling earlier. Remember that crystallization continues after the fudge leaves the table.
MY FUDGE IS DRYING OUT
It was creamy when you made it, but the exposed surfaces have become dry or crumbly.
What now? Protect the remaining pieces immediately. You can’t reliably restore the original texture of the dried surfaces. Wrap freshly cut fudge promptly next time, and consider whether the formula retains enough moisture.
MY FUDGE TASTES BURNT
The dairy scorched during cooking. It may have happened because the heat was too aggressive or the bottom of the saucepan wasn’t scraped thoroughly.
What now? No. More vanilla or chocolate won’t remove the burnt flavor. Start again.
THERE’S MOLD ON MY FUDGE
The fudge has developed visible mold during storage. Contamination, poor sanitation, or excessive available water may be responsible.
What now? Absolutely not. Discard it. Review the handling, packaging, and storage conditions before making another batch.
TERMS TO KNOW
Agitation
Moving a mixture by stirring, folding, scraping, or beating. In cooled fudge syrup, controlled agitation promotes and distributes small sugar crystals.
Amorphous
Without an organized crystalline structure. A glassy hard candy is an example of an amorphous sugar confection.
Cocoa butter
The natural fat in cacao. Its crystal structure affects how chocolate sets, contracts, shines, and melts.
Cocoa mass / chocolate liquor
Ground cacao containing cocoa solids and cocoa butter. Unsweetened and alcohol-free; different from chocolate liqueur.
Contraction
Shrinking as a material sets. Properly tempered chocolate contracts, helping it release from a mold.
Crystalline confection
A candy whose intended texture includes sugar crystals. Fudge, fondant, and rock candy are examples.
Crystallization
The formation of an ordered, repeating solid structure. Fudge depends on controlled crystallization of sucrose.
Crystal growth
The enlargement of an existing crystal as more molecules join its structure. Different from nucleation, which starts new crystals.
Doctoring agent
An ingredient used to modify or control sugar crystallization. Glucose syrup and invert sugar help keep fudge’s crystals small when used in appropriate amounts.
Emulsion
A mixture in which droplets of one liquid are dispersed in another liquid that would normally separate from it. Fudge’s fat must remain dispersed in its water- based syrup.
Endpoint
The specified condition at which a cooking stage is complete. For these syrups, the cooking endpoint is a particular temperature.
Equilibrium
A balance between opposing processes. In a saturated sugar solution, sugar joins and leaves crystals at equal rates, with no net change in the amounts dissolved and crystalline.
Fondant
For this lesson, a confectionery preparation of minute sugar crystals surrounded by concentrated syrup. It can supply seed crystals for fudge.
Form V
The cocoa-butter crystal form developed as the practical target of chocolate tempering. It supports desirable setting, contraction, gloss, and snap.
Frappé
A whipped sugar preparation used in some confections to add air, lighten texture, and help control crystallization.
Fructose
A simple sugar found in fruit and honey. It is one of the two sugars released when sucrose is inverted.
Glucose
A simple sugar, also called dextrose. It is one of the two sugars that make up sucrose and one component of glucose syrup.
Glucose syrup
A mixture of sugars and longer carbohydrate chains made by breaking down starch. Used in fudge to control sucrose crystallization and influence texture.
Humectant
An ingredient that helps retain moisture. Invert sugar helps slow the drying of fudge.
Invert sugar
A mixture of glucose and fructose produced by splitting sucrose. Used to influence crystallization, sweetness, moisture retention, and water activity.
Inversion
The splitting of sucrose into glucose and fructose. Different from simply dissolving sugar in water.
Nucleation
The formation of the first tiny crystals from which a larger crystalline structure can develop.
Polymorphism
The ability of a substance to crystallize in different structural forms. Cocoa butter’s polymorphism makes tempering necessary for many chocolate applications.
Residence time
The time chocolate spends at a temperature that allows crystals to form or unwanted crystals to melt during tempering.
Ripening
The rest given to freshly made fondant so its crystals and surrounding syrup can move toward equilibrium and its texture becomes easier to handle.