
SOURDOUGH
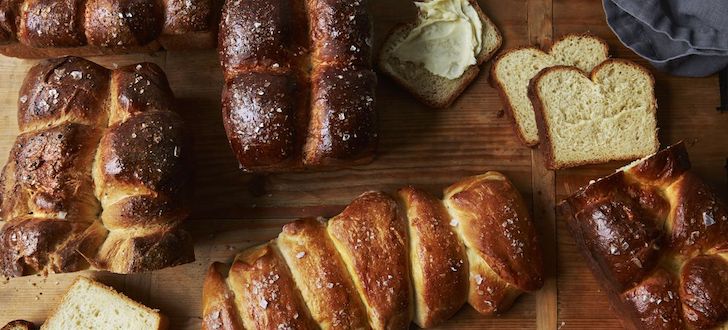
Sourdough Sandwich Bread
Ingredients
Levain
- 1 cup + 1 tablespoon 128g Unbleached All-Purpose Flour
- 1/2 cup + 1 tablespoon 128g cool water (60° to 70°F)
- 3 tablespoons 44g ripe (fed) sourdough starter
Dough
- 5 1/4 cups 631g Unbleached Bread Flour
- scant 6 tablespoons 50g Baker’s Special Dry Milk or nonfat dry milk
- 1/4 cup 50g sugar
- 2 1/2 teaspoons salt
- 2 teaspoons instant yeast
- 1/4 cup 4 tablespoons, 57g unsalted butter, room temperature
- 1 1/2 cups 340g water (70° to 80°F)
- all of the ripe levain
Instructions
- To make the levain: Mix all of the levain ingredients together and place in a covered container with room for the levain to grow. It will almost double in size, and will take about 12 hours to ripen (ferment) at room temperature (70°F). When perfectly ripened, there’ll be large bubbles (mostly below the surface) creating a somewhat rippled effect. It’ll appear almost fluffy. If the levain is covered with a froth of tiny bubbles, it’s a bit over-ripened; but don’t worry, you can still use it.
- To make the dough: Mix and then knead together all of the dough ingredients, including the levain, to make a smooth, supple, and not overly sticky dough.
- Place the kneaded dough in a lightly greased bowl, cover tightly, and refrigerate for 2 days and up to 7 days. The longer the cold ferment, the more tangy the dough becomes.
- Remove from refrigerator and allow to come to room temperature – about two hours.
- Divide the dough in half, and shape each half into 8″ logs. Place the logs in two lightly greased 8 1/2″ x 4 1/2″ bread pans. Cover the pans with lightly greased plastic wrap (or a couple of plastic shower caps), and let the loaves rise until they’ve crowned about 1″ over the rim of the pan, about 1 to 2 hours.
- Towards the end of the rising time, preheat the oven to 375°F.
- Bake the bread for 30 to 35 minutes, until the crust is golden brown and the sides of the loaf feel firm. Remove the loaves from the oven, and turn them out of the pans onto a rack to cool. Let them cool completely before slicing.
Sourdough Starter
Whether it conjures up a crusty, flavorful loaf of bread or a bubbling crock of flour/water starter, sourdough is a treasured part of many bakers’ kitchens. But where does the path to sourdough bread begin? Right in your own kitchen, with your own homemade sourdough starter.
Sourdough baking is as much art as science.
Ingredients
To begin your starter
- 1 cup 113g whole rye (pumpernickel) or whole wheat flour
- 1/2 cup 113g cool water*
- *See “tips ” below
To feed your starter
- scant 1 cup 113g Unbleached All-Purpose Flour
- 1/2 cup 113g cool water (if your kitchen is warm), or lukewarm water (if your kitchen is cool)
Instructions
- Day 1:
- Combine the pumpernickel or whole wheat flour with the cool water in a non-reactive container. Glass, crockery, stainless steel, or food-grade plastic all work fine for this. Make sure the container is large enough to hold your starter as it grows; we recommend at least 1-quart capacity.
- Stir everything together thoroughly; make sure there's no dry flour anywhere. Cover the container loosely and let the mixture sit at warm room temperature (about 70°F) for 24 hours.
- Day 2:
- You may see no activity at all in the first 24 hours, or you may see a bit of growth or bubbling. Either way, discard half the starter (113 grams, about 1/2 cup), and
- FEED: add to the remainder a scant 1 cup (113 grams) Unbleached All-Purpose Flour, and 1/2 cup (113 grams) cool water (if your house is warm); or lukewarm water (if it's cold).
- Mix well, cover, and let the mixture rest at room temperature for 24 hours.
- Day 3:
- By the third day, you’ll likely see some activity — bubbling; a fresh, fruity aroma, and some evidence of expansion. It’s now time to begin two feedings daily, as evenly spaced as your schedule allows. For each feeding, weigh out 113 grams starter; this will be a generous 1/2 cup, once it’s thoroughly stirred down. Discard any remaining starter.
- FEED: Add a scant 1 cup (113 grams) Unbleached All-Purpose Flour, and 1/2 cup (113 grams) water to the 113 grams starter. Mix the starter, flour, and water, cover, and let the mixture rest at room temperature for approximately 12 hours before repeating.
- Days 4 – 8
- Continue to weigh out, discard, and feed starter until you begin to see significant yeast activity
- Days 5 – 9
- Begin checking on the startera couple of hours after feeding. Has it doubled in volume? Do you see LOTS of bubbles? Does the starter have a tangy aroma — pleasingly acidic, but not overpowering? If your starter hasn't risen much and isn't showing lots of bubbles, repeat discarding and feeding every 12 hours on day 6, and day 7… as long as it takes to create a vigorous (risen, bubbly) starter.
- Once the starter is ready, give it one last feeding. Discard all but 113 grams (a generous 1/2 cup). Feed as usual. Let the starter rest at room temperature for 6 to 8 hours; it should be active, with bubbles breaking the surface.
- Remove however much starter you need for your recipe — typically no more than 227 grams, about 1 cup. If your recipe calls for more than 1 cup of starter, give it a couple of feedings without discarding, until you’ve made enough for your recipe plus 113 grams to keep and feed again.
- Transfer the remaining 113 grams of starter to its permanent home: a crock, jar, or whatever you’d like to store it in long-term. Feed this reserved starter with 1 scant cup (113 grams) of flour and 1/2 cup (113 grams) water, and let it rest at room temperature for several hours, to get going, before covering it. If you’re storing starter in a screw-top jar, screw the top on loosely rather than airtight.
- Store this starter in the refrigerator, and feed it regularly; we recommend feeding it with a scant 1 cup (113 grams) flour and 1/2 cup (113 grams) water once a week.
Notes
- Why do you need to discard half the starter? It seems so wasteful… But unless you discard starter at some point, eventually you’ll end up with a very large container of starter. Also, keeping the volume down offers the yeast more food to eat each time you feed it; it’s not fighting with quite so many other little yeast cells to get enough to eat. You don’t have to actually discard it if you don’t want to, either; you can give it to a friend, or use it to bake. There are quite a few recipes on our site using “discard” starter, including pizza crust, pretzels, and waffles, and even chocolate cake. If you’re still uncomfortable dealing with discard, though, try maintaining a smaller starter: the smaller the starter, the smaller the amount of discard.
- Why does this starter begin with whole-grain flour? Because the wild yeast that gives sourdough starter its life is more likely to be found in the flora- and fauna-rich environment of a whole-grain flour than in all-purpose flour. What if all you have is all-purpose flour, no whole wheat? Go ahead and use all-purpose; you may find the starter simply takes a little longer to get going. Also, if you feed your starter on a long-term basis with anything other than the all-purpose flour called for here, it will probably look different (thicker or thinner, a different color) and act differently as well. Not to say you can’t feed your starter with alternate flours; just that the results may not be what you expect.
Want to put your starter on hold for the summer, or as you go on vacation? Here’s how: Drying your sourdough starter.
Should you use bottled water? Unless your tap water is so heavily treated that you can smell the chemicals, there’s no need to use bottled water; tap water is fine. - A note about room temperature: the colder the environment, the more slowly your starter will grow. If the normal temperature in your home is below 68°F, we suggest finding a smaller, warmer spot to develop your starter. For instance, try setting the starter atop your water heater, refrigerator, or another appliance that might generate ambient heat. Your turned-off oven — with the light turned on — is also a good choice.
- “Conditions vary so widely that 7 days can be far too little. I’ve learned the key is to watch for a dramatic and consistent rise in the jar — at least doubling between 1 and 4 hours after feeding. This could be 7 days or less after you begin, or it could be three weeks (for me it has gone as long as 12 – 14 days). Watch for this phenomenon, rather than watch the calendar.”

ENRICHED DOUGHS
Brioche
Brioche is a sweet, buttery bread very popular in France. It is consumed at all hours of the day by both children and adults: breakfast, afternoon tea, in sandwiches for lunch.
Ingredients
- 2 3/4 cups 326g Unbleached All-Purpose Flour
- 1/4 cup 35g Baker’s Special Dry Milk or 1/2 cup (35g) nonfat dry milk
- 3 tablespoons 35g sugar
- 1 1/4 teaspoons salt
- 1 tablespoon instant yeast
- 3 large eggs cold from the refrigerator
- 1/4 cup 57g cool water
- 5/8 cup 10 tablespoons, 142g unsalted butter, at cool room temperature
Instructions
- In a stand mixer or bread machine (programmed for dough), mix together all of the ingredients to form a smooth, shiny dough. Don’t worry; what starts out as a sticky mess becomes beautifully satiny as it kneads. This dough takes longer than most to develop, so be prepared to let the dough knead for up to 15 to 20 minutes in a stand mixer. Also, we don’t recommend trying to knead it by hand. If you’re using a bread machine, let it complete its kneading cycle, then continue as directed below.
- Form the dough into a ball (it’ll be very soft), place it in a greased bowl, cover the bowl, and it let rise for 1 hour. Then refrigerate the dough for several hours, or overnight. This will slow the fermentation and chill the butter, making the dough easier to shape.
- Divide the chilled dough into 12 pieces to make mini-brioche (brioche buns); leave it whole for one large round brioche; or divide it in half for two 8 1/2″ x 4 1/2″ loaves – split each portion of dough into three equal pieces, roll into long snakes, and braid, tucking the ends under.
- Place the dough into the greased pan(s) of your choice, cover lightly, and let rise for 2 1/2 to 3 hours, until it’s doubled and looks very puffy.
BAKING INSTRUCTIONS:
- To bake a large, round brioche: Place the pan into a preheated 400°F oven. After 10 minutes, reduce the oven heat to 350°F and bake for about 30 to 35 minutes more. Check the brioche after 15 minutes; tent with aluminum foil if it appears to be browning too quickly. Brioche should be a deep brown when done, should sound hollow when tapped, and will read 190°F at the center using an instant-read thermometer. (It’s easy to underbake, since it browns so quickly!) Remove the brioche from the oven, and after 10 minutes remove it from the pan to cool completely on a rack.
- To bake the mini brioches: Place the pan(s) onto a baking sheet for easy handling, as shown; then nestle that baking sheet into another baking sheet, to protect the buns’ bottoms from over-browning. Bake the buns in a preheated 375°F oven for 25 to 30 minutes (tent after 10 minutes if they’re browning too quickly). Remove them from the oven, let stand for 5 minutes, then turn them out onto a rack.
- To bake the loaves: Allow the loaves to rise until they’ve nearly reached the rim of the pan, about 3 hours. Set the loaf pans on a baking sheet, for easy handling. Bake in a preheated 350°F oven for 30 to 35 minutes, tenting with foil after 15 to 20 minutes.
Notes
- Remember how Mary Antoinette supposedly said “let them eat cake?” The word translated as “cake” was “Brioche.”
- Brioche appeared in the Middle Ages in Normandy (North-West of France) and would be a derivative of a tighter bread made until then.
- Among the cities formerly very famous for the quality of their brioches are Gisors and Gournay, probably because of the excellence of the butter in this region (Normandy).

Cinnamon rolls (Like Cinnabon – just better)
Master recipe for making gourmet cinnamon rolls; these are similar to Cinnabon – more like the Austrian version than the less-sweet, more breadlike French version and without the trademark pearl sugar of the Swedish Kanellbule.
Servings 12 Rolls
Ingredients
- 1 cup scalded milk cooled to warm 90-100 ℉
- 2 eggs room temperature
- ½ cup butter softened
- 4 ½ cups AP Flour
- 1 teaspoon salt
- ⅓ cup white sugar
- 2 ½ teaspoons yeast
- ½ C Heavy Cream warmed to approximately 90* F and drizzled over risen dough right before baking
Filling
- 1 cup brown sugar packed
- 2 ½ tablespoons ground cinnamon
- ½ teaspoon nutmeg
- ½ cup butter softened
Topping
- ½ C cream cheese softened
- ½ C cup butter softened
- 1 ½ – 2 cups powdered sugar
- ½ teaspoon vanilla extract
- ⅛ teaspoon salt
Instructions
DAY 1: Dough
- Set the butter, eggs and cream cheese out to warm to room temperature. Place the milk in a small saucepan. Bring to a boil. The moment it reaches a boil, remove from heat. Allow to cool to 90-100 ℉.
- Pour the warm milk into the bowl of an electric mixer, add sugar and ½ C flour.
- Stir in the yeast and proof until foaming – approximately 10 minutes.
- Add about 2 cups of flour. Place the hook attachment on the mixer and turn on low. Once it is combined, add the softened butter and salt. Mix until combined.
- Add the eggs, one at a time, adding in just enough additional flour to help the dough come together. Let the machine run for 10 minutes. It should be soft, pliable, and just a little bit sticky.
- Cover with plastic wrap and refrigerate overnight.
DAY 2: Construction
- Remove from refrigerator 2 hours before you intend to proceed and allow to come to room temperature/ double in size (if it did not do so in the refrigerator).
- After the dough is doubled in size and has warmed to room temperature, punch down, turn it out onto a lightly floured surface, cover and let rest for 10 minutes. In a small bowl, combine brown sugar, cinnamon, nutmeg, and softened butter.
- Roll dough into a 16×21-inch rectangle. Spread top three quarters of dough with 1/3 cup butter and sprinkle evenly with sugar/cinnamon mixture. Make sure to leave a strip of dough with no topping to seal the rolls. Roll up dough and cut into 12 pieces. Place rolls in a lightly greased baking pan.
- Cover and let rise until nearly doubled, about 30 minutes.
- Drizzle heavy cream over tops of rolls and allow to absorb.
- Preheat oven to 400*F / 375*F for convection ovens.
- Bake rolls in preheated oven until golden brown, about 15 minutes.
- In stand mixer with whisk attachment, beat together cream cheese, 1/4 cup butter, confectioners’ sugar, vanilla extract and salt.
- Spread ⅔ of the frosting all over rolls while still hot. Drizzle remaining frosting in streaks over the top of the icing after they have cooled and been separated.

BAGUETTES
French Baguette
Ingredients
Poolish
- 1/2 cup 113g water, cool
- 1 Tablespoon sourdough starter
- 1 cup 120g Unbleached All-Purpose Flour
Dough
- 1 1/2 teaspoons active dry yeast or instant yeast
- 1 cup + 2 tablespoons 255g water, lukewarm
- All of the Poolish
- 3 1/2 cups 418g Unbleached All-Purpose Flour
- 2 teaspoons 12g salt
Instructions
To make the starter:
- Mix everything together to make a soft dough. Cover and let rest at room temperature overnight. The starter should have expanded and become bubbly.
To make the dough
- Mix and knead everything together by hand to make a soft, somewhat smooth dough; it should be cohesive, but the surface may still be a bit rough. If you're using a stand mixer, knead for about 4 minutes on medium-low speed (speed 2 on a KitchenAid); the finished dough should stick a bit at the bottom of the bowl.
- Place the dough in a lightly greased medium-sized bowl, cover the bowl, and let the dough rest and rise for 45 minutes. Gently deflate the dough and fold its edges into the center, then turn it over in the bowl before letting it rise for an additional 45 minutes, until it’s noticeably puffy. Turn the dough out onto a lightly greased work surface. Gently deflate it, and divide it into three equal pieces.
Shape the dough
- Round each piece of dough into a rough ball by pulling the edges into the center. Cover with greased plastic wrap, and let rest for 15 minutes; or for up to 1 hour, if that works better with your schedule.
- Working with one piece at a time, flatten the dough slightly then fold it nearly (but not quite) in half, sealing the edges with the heel of your hand.
- Turn the dough around 180° and repeat: fold, then flatten. Repeat this whole process again; the dough should have started to elongate itself.
- With the seam side down, cup your fingers and gently roll the dough into a 16″ log. Your goal is a 15″ baguette, so 16″ allows for the slight shrinkage you’ll see once you’re done rolling. Taper each end of the log slightly to create the baguette’s typical “pointy” end.
- Place the logs seam-side down onto a lightly greased or parchment-lined sheet pan or pans; or into the folds of a heavily floured cotton dish towel (or couche). Cover them with lightly greased plastic wrap, and allow the loaves to rise until they’re slightly puffy. The loaves should certainly look lighter and less dense than when you first shaped them, but won’t be anywhere near doubled in bulk. This should take about 45 minutes to an hour at room temperature (about 68°F).
Bake the dough
- Towards the end of the rising time, preheat your oven to 450°F. Heat 1 1/2 cups water to boiling.
- If your baguettes have risen in a dish towel or couche, gently roll them (seam side down) onto baguette pan.
- Using a baker’s lame (a special curved blade) or a very sharp knife held at about a 45° angle, make three to five long lengthwise slashes in each baguette.
- Load the baguettes into the oven. If you’re baking on a stone, use a baker’s peel to transfer the baguettes, parchment and all, onto the hot stone. Carefully place pot of boiling water on the bottom of the oven, and quickly shut the door. The billowing steam created by the boiling water will help the baguettes rise, and give them a lovely, shiny crust.
- Bake the baguettes for 24 to 28 minutes, or until they’re a very deep golden brown. Remove them from the oven and cool them on a rack. Or, for the very crispiest baguettes, turn off the oven, crack it open about 2″, and allow the baguettes to cool completely in the oven, until both baguettes and oven are at room temperature.
Notes
-
A long, slow rise is an excellent way to develop flavor in simple breads like this epis loaf. As yeast grows it releases organic acids and alcohol, both of which are flavor carriers. If desired, reduce the yeast in the dough to 1 teaspoon and allow the dough to rise for 3 hours (rather than 90 minutes) at cool room temperature (around 68°F). Gently deflate the dough, fold it into the center, and turn it over after 1 hour, and again after 2 hours.

Sandwich Breads

Julia Child’s White Sandwich Bread
From the incomparable Julia Child….
Ingredients
- 2 1/2 cups warm water
- 1 Tbsp active dry or instant yeast
- 1 Tbsp sugar
- 6 – 6 1/2 cups all-purpose flour
- 2 tsp salt
- 1/4 cup butter softened
Instructions
- Pour 1/2 cup of the water into the bowl of a stand mixer fitted with a dough hook. Stir in the yeast and sugar. Let sit for 5 minutes, until it dissolves and begins to foam. (If the yeast doesn't do anything, toss it out and buy fresh yeast.)
- Add the rest of the water and about half of the flour. Stir until well blended. Add the rest of the flour, the salt and butter and stir with the dough hook until well combined and shaggy. Continue to knead for between 5-10 minutes until it's smooth and elastic. Turn the dough out onto the countertop and knead a few times to make sure it's evenly smooth.
- Shape it into a ball and put it back into the bowl. Cover with a plastic and let it sit for 1 – 1 1/2 hours, until it's doubled in size.
- Butter two 9×5-inch loaf pans, or line them with parchment. Punch the dough down and pat each piece into a rectangle that's about 9×12 inches.
- Starting at a short end, fold it in thirds, like a letter. Place seam side down in the loaf pans, tucking the ends in. Cover and leave them for an hour, until they puff right up out of the pan. As it rises, preheat a conventional oven to 375°F, with the rack in the middle of the oven. (350*F in a convection oven).
- Brush the tops of the loaves with milk before baking. Bake for 30-35 minutes, until the loaves are honey brown. Immediately turn the loaves out of their pans and onto a rack to cool.
Bread Bowls
Ingredients
- 447 g AP Flour
- 11.5 g salt
- 57 g Whole Wheat Flour
- 25 g olive oil
- 340 g 100`F water
- 35 g Baker’s Dry Milk
- 4.25 g instant yeast if using active, proof in warm water before adding
- 1 tablespoon cornmeal
- 1 egg white
- 1 tablespoon water
Instructions
- Mix and knead together all of the ingredients till you’ve created a smooth dough.
- Allow the dough to rise, covered, for 45 minutes or until doubled in size
- Divide the dough into 5 pieces.
- Roll each piece into a ball.
- Place on a lightly greased or parchment covered baking sheet and sprinkle the tops with cornmeal.
- Cover the bread bowls with greased plastic wrap.
- Refrigerate 24 hours
- Three hours before serving, remove the bread bowls from the refrigerator. Uncover, and let them come to room temperature. Preheat the oven to 425°F 30 minutes before baking.
- Just before baking, slash the top surface of the bowls several times to allow them to expand.
- In a small bowl, beat together egg white and 1 tablespoon water; lightly brush the loaves with half of this egg wash.
- Bake in preheated oven for 15 minutes. Brush with remaining egg mixture, and bake 10 to 15 more minutes or until golden. Cool on wire racks.
- Bake for a total of 22 to 28 minutes, until the bowls are deep brown, and sound hollow when thumped on the bottom.
- Remove from the oven and cool on a rack.
Further Reading on Preferments
https://www.kingarthurbaking.com/blog/2020/02/05/baking-with-preferments