
A cook checks a batch of chicken thighs with the kitchen’s bimetallic thermometer. 165°F. Safe. Onto the plate they go.

What nobody mentions is that the same thermometer got knocked off the prep table that morning, picked up, and put right back on the rail without a second thought. It’s now reading about 15 degrees hotter than the food actually is, which means the chicken that showed “165°F” was really sitting around 150°F — undercooked, and served with total confidence.
That’s the danger this whole lesson is built around. A thermometer that’s wrong doesn’t look wrong. It gives you a clean, specific, official-looking number, and that number can be a complete lie. A cook with no thermometer at all is at least aware they’re guessing. A cook with an inaccurate one thinks they know — which is worse.
The Tools: Not All Thermometers Do the Same Job

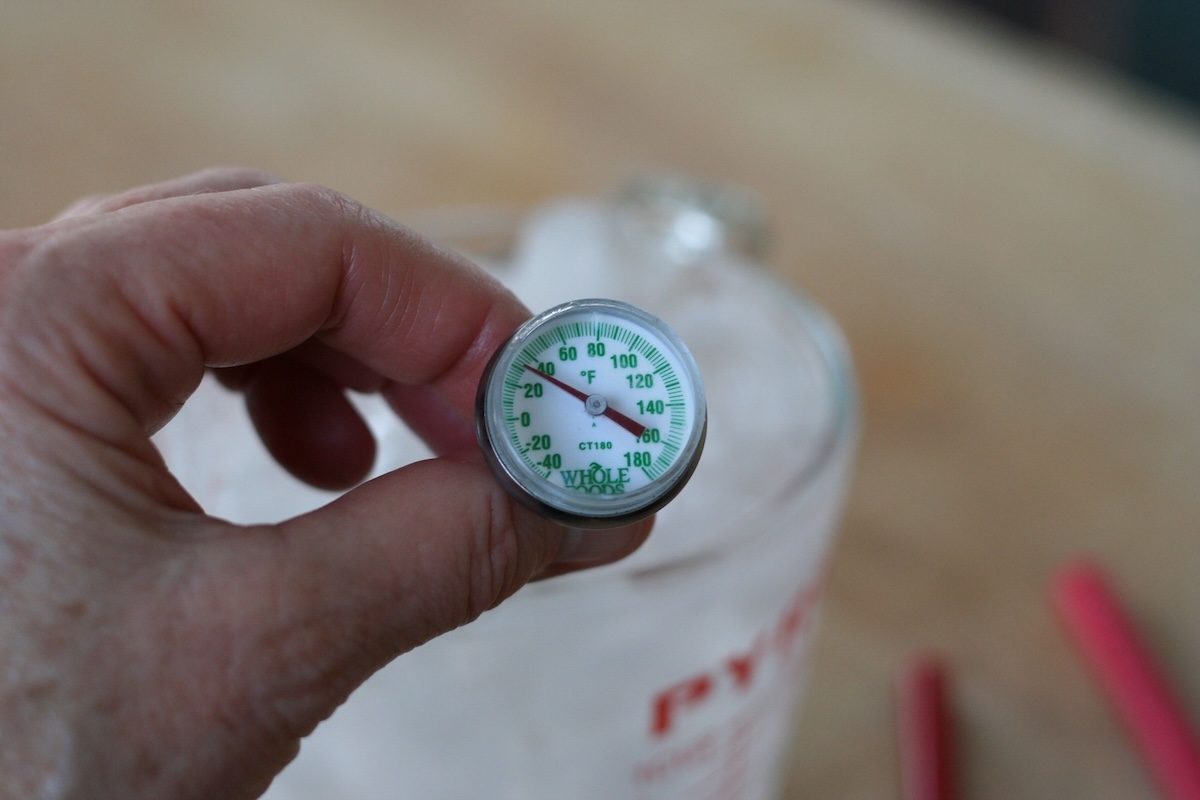
Bimetallic stemmed thermometers are the classic dial-face thermometers most kitchens already have. They measure temperature through a metal stem, with the sensing area running several inches up from the tip and ending at a small dimple partway up the stem. That whole sensing area has to be inside the food for an accurate reading, not just the tip. They typically read from 0°F to 220°F, and they’re easy to calibrate by hand using the calibration nut beneath the dial. They’re good for larger, thicker foods, but not a great fit for anything thin because the sensing area needs more depth than a thin cut can offer.
Thermocouples and thermistors are the two types of digital probe thermometers ServSafe talks about. This is almost certainly the thermometer you already picture when someone says “digital thermometer” — the handheld instant-read probe with an LCD screen that gives you a temperature in a second or two.
Thermocouples and thermistors use different sensing technology inside, but from a cook’s point of view they do essentially the same job: put the tip into the food and get a fast digital temperature reading. Thermocouples DO have some nifty attachments that your everyday digital thermometer doesn’t. But essentially they are the same.

There are four standard attachments that you can get for your thermocouple. Here they are with what they are specifically designed to measure:
| Probe type | What it’s for |
|---|---|
| Penetration | Internal food temperature — the standard, everyday probe |
| Immersion | Liquids |
| Surface | Flat cooking equipment — griddles, grill tops |
| Air | Inside coolers and ovens |
The important difference is where Thermocouple and Thermistor measure. Instead of having a long sensing area like a bimetallic thermometer, thermocouples and thermistors measure at or very near the tip of the probe. That’s why they’re much better for thin foods like hamburger patties, fish fillets, or a chicken breast pounded flat — foods where a bimetallic thermometer’s longer sensing area can’t get completely inside.

The standard digital thermometer most kitchens actually own has a fixed penetration probe for checking internal food temperature, and that’s usually all you need. ServSafe also talks about other probe types because the same basic thermometer technology can be built for different jobs, and some professional meters allow different probes to be attached.
This is the Javelin – my preferred thermometer. I’ve got one in every color.
Infrared thermometers — often called laser thermometers — read surface temperature without ever touching the food. That’s genuinely useful for a fast first check, and because there’s no probe going into the food, there’s one less opportunity to carry contamination from one food to another. That convenience comes with a hard limit, though: an infrared thermometer cannot tell you a food’s internal temperature. It only reads the surface. It can’t verify that chicken actually reached 165°F all the way through; it can only tell you what the outside temperature is, which isn’t the same claim at all.

BUT WHAT IF you just want a quick check without touching anything? That’s exactly what infrared is good for — a fast surface scan during receiving, or a quick pass down a buffet line to spot something that’s clearly drifted cold. What it can’t do is replace a real internal-temperature check. Use infrared to flag a possible problem fast; use a penetration probe when you actually need to know what’s happening inside the food.

Maximum registering thermometers show up less often, mostly for checking the sanitizing-rinse temperature inside a high-temperature dish machine. That’s a specialized job, not something you’re likely to grab when you want to know whether a chicken breast is done.
Time-Temperature Indicators
Not every temperature-monitoring tool looks like a thermometer.
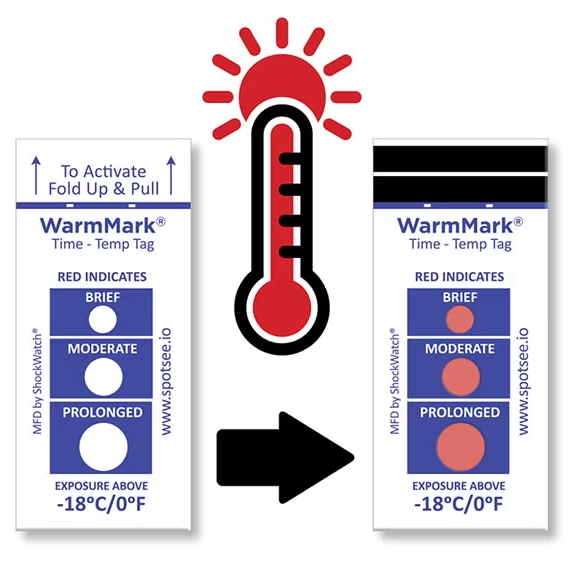
A time-temperature indicator (TTI) is a device attached to or included with food shipments that shows whether the food has been exposed to unsafe temperatures over time. Instead of telling you only what the temperature is right now, it can tell you that the product got too warm somewhere along the way.
You’ll sometimes see these on packaged or shipped food where maintaining the cold chain matters.
OFFICIAL TERM: Time-temperature indicator (TTI) — a device that monitors both time and temperature and provides an indication when a product has experienced time-temperature abuse.
One more equipment rule: only use a glass thermometer with food if it is enclosed in a shatterproof casing. If an unprotected glass thermometer breaks, you’ve just turned a temperature check into a physical-contamination problem.

Calibration: How You Know the Number Is Telling the Truth
A thermometer doesn’t stay accurate just because it used to be. Getting dropped, bumped, or put through a major temperature swing can knock it out of alignment without leaving any visible sign that something changed. That’s exactly what makes calibration matter: you’re looking for a problem you can’t see just by looking at the thermometer.
Check and calibrate thermometers regularly, and especially after there’s a real reason to doubt the reading. Being dropped or bumped and exposure to a major temperature change are both good reasons to check one immediately. Many operations also make thermometer checks part of their normal opening procedures or verify them before using them to check in a delivery. The point isn’t that starting a shift or receiving a truck somehow knocks a thermometer out of calibration; it’s that regularly scheduled checks catch problems before a bad thermometer gets trusted.
The Ice-Point Method
This is generally the easier method, and there’s no pot of boiling water involved.
- Fill a container with crushed ice. Add just enough water to fill the spaces between the ice — you’re building a thick ice-water slurry, not a glass of cold water with a few cubes floating around in it. Stir well.
- Put the thermometer’s stem or probe into the ice water, making sure the sensing area is submerged. Don’t let it touch the sides or bottom of the container. Wait about 30 seconds, or until the reading stops moving.
- The thermometer should read 32°F (0°C). If it doesn’t, adjust a bimetallic thermometer using the calibration nut beneath the dial. For a digital thermometer, follow the manufacturer’s directions if that model can be adjusted.
The Boiling-Point Method
- Bring a pot of clean water to a full boil.
- Submerge the sensing area in the boiling water without letting the stem or probe touch the pot. Wait about 30 seconds, or until the reading stabilizes.
- The thermometer should read 212°F (100°C) at sea level. Boiling point changes with elevation, so you need to know the correct boiling point for your location before relying on this method.
The accuracy standard: a food thermometer needs to be accurate within ±2°F (±1°C). A thermometer measuring air temperature — inside a cooler, for instance — needs to be accurate within ±3°F (±1.5°C).

There’s also a small vocabulary distinction here that’s worth getting right: checking and calibrating aren’t quite the same thing. Putting a thermometer into a known 32°F ice bath tells you whether it’s accurate; that’s checking. If it’s wrong and you adjust it back to 32°F, that’s calibrating. Some thermometers can be checked but can’t actually be adjusted in the kitchen — no calibration nut, no reset option, nothing for you to fix. If one of those fails the accuracy check, you don’t shrug and keep using it because there’s nothing to turn. Pull it from service and replace it.
Checking Food Temperature (Right)
So you’ve got the right thermometer. Good. You’ve confirmed that it’s accurate. Excellent. Now where the heck do you stick it? Because a perfectly calibrated thermometer can still give you a perfectly useless reading if you put it in the wrong place.
1. Find the Cold Spot — Not the Convenient Spot
When you’re checking whether food is safely cooked, you’re looking for the coldest part of the food. That’s the part that has to reach the required temperature. Usually, that means inserting the probe into the thickest part, near the center. Not the skinny end of the chicken breast. Not the outside edge of the roast. Not the part that’s easiest to reach without moving anything.
The thickest part.
And stay away from bone, fat, and gristle. Those can heat differently than the surrounding meat and give you a reading that doesn’t accurately represent the food you’re trying to check.
2. One Reading Isn’t Always Enough
A whole turkey isn’t the same temperature everywhere. Neither is a roast. Neither is a hotel pan full of reheated lasagna. Neither is a stockpot of chili. So don’t treat one good number like it magically certifies everything around it. Large or irregular foods need multiple readings in different spots.
You’re not trying to prove that you can find a spot that’s hot enough. You’re trying to make sure you can’t find one that isn’t. That’s a very different mindset.
3. Thin Food Is Its Own Problem
Try sticking several inches of a bimetallic thermometer’s sensing area into a thin hamburger patty. You can’t. Half the sensing area is hanging out in the air.
That’s why a thermocouple or thermistor with a small-diameter penetration probe is the better tool for thin foods. The sensor is at or very near the tip, so you can actually get the sensing part where you need it. If a bimetallic thermometer is all you’ve got, insert it sideways through the food so the entire sensing area sits inside the product.
It works. It’s also a pretty good indication that you’re using the wrong thermometer for the job.
4. Give the Thermometer Time to Answer
Put the probe in the right place and wait until the reading stabilizes. Don’t stab, glance, yank.
Different thermometers respond at different speeds. The number may climb or fall for a few seconds before it settles. The number that flashes onto the screen first isn’t necessarily the temperature you’re looking for. Wait for the thermometer to finish doing its job.
5. Checking a Pot or Pan Is Different
With soups, sauces, chili, gravy, and other liquids, stir first. Hot and cold spots can develop, especially in a large pot or something being reheated. Stirring distributes the temperature before you measure it. Then put the probe into the liquid without touching the bottom or sides of the container. You’re trying to measure the food, not the hot metal underneath it.
For a large pan of something solid — lasagna, casserole, stuffing — check more than one location, especially the center and any particularly thick areas.
6. And Clean the Damn Probe
The thermometer touches food. That means the thermometer can also contaminate food.
Clean and sanitize the probe between uses whenever contamination could transfer from one food to another — especially after checking raw meat, poultry, seafood, or eggs and before checking anything cooked or ready to eat. The probe doesn’t get a food-safety exemption because it’s a piece of equipment.
Here’s how you temp food (for real)
In an actual kitchen, using a thermometer correctly comes down to this:
- Use the right thermometer for the food.
- Make sure the probe is clean and sanitized.
- Put the sensing area in the place most likely to be coldest.
- Avoid bone, fat, gristle, and the container itself.
- Wait for the reading to stabilize.
- Check another location when the size or shape of the food calls for it.
- Clean and sanitize the probe before it becomes the thing that contaminates the next food.
You’re not hunting for the magic temperature that lets you send the food out to the guest. You’re trying to find the temperature that tells you not to.
Closing Side Work

What Went Wrong
The thermometer wasn’t wrong. The cook wasn’t wrong about the temperatures he took, either. Every breast he checked really was above 165°F.
He just kept checking the wrong part of the pan.
Food doesn’t heat evenly. On a crowded sheet pan, the pieces around the outside may cook faster than the ones packed into the middle. That’s why one good temperature doesn’t necessarily tell you the whole batch is safe. Check multiple locations, and deliberately check the places most likely to be coldest — the center, the thickest pieces, the crowded areas.
But there’s another lesson hiding in what the sous chef did next. She got a bad number and did something about it. She didn’t average 148°F against the three good readings. She didn’t decide fifteen minutes was close enough. The chicken wasn’t ready, so it went back into the oven.
That’s the other half of taking temperatures: you have to be willing to act on the answer you get — even when that answer screws up the plan.
Don’t use a thermometer to prove the food is done.
Use it to find the food that isn’t.
TLDR: The Least You Need to Know
- A thermometer that’s wrong is more dangerous than no thermometer at all because it gives you a confident, specific number that can be a complete lie.
- A bimetallic thermometer has a longer sensing area that has to be inserted completely into the food. The digital probe thermometers ServSafe calls thermocouples and thermistors measure at or near the tip, making them much better for thin foods.
- Infrared thermometers are fast and contact-free, but they only read surfaces — never internal temperature.
- Checking tells you whether a thermometer is accurate; calibrating means adjusting it when it’s wrong. Some thermometers can be checked but can’t be adjusted in the kitchen.
- Check thermometers regularly and whenever there’s a reason to doubt them, especially after a drop, a hard bump, or a major temperature swing. A food thermometer needs to be accurate within ±2°F (±1°C). A thermometer measuring air temperature — inside a cooler, for instance — needs to be accurate within ±3°F (±1.5°C).
- Clean and sanitize a thermometer probe whenever contamination could transfer between foods, especially when moving from raw animal food to cooked or ready-to-eat food.
Terms Introduced in This Lesson
- Bimetallic stemmed thermometer — the familiar dial thermometer that measures through a longer sensing area in its metal stem, marked by a dimple. The entire sensing area needs to be inside the food for an accurate reading.
- Thermocouple / thermistor — the types of handheld instant-read digital thermometers ServSafe discusses. They use different sensing technology internally but, for the cook using them, both provide fast readings from a sensor at or near the probe tip.
- Penetration probe — the standard food probe used to measure internal temperature. Other probe designs can be made for liquids, surfaces, or air.
- Calibration — adjusting a thermometer to a known standard when an accuracy check shows that it’s reading incorrectly. This is different from simply checking a thermometer, because not every thermometer that can be checked can also be adjusted.
- Ice-point method — checking or calibrating a thermometer using a properly prepared ice-water slurry at 32°F (0°C).
- Boiling-point method — checking or calibrating a thermometer using boiling water, which is 212°F (100°C) at sea level and changes with elevation.