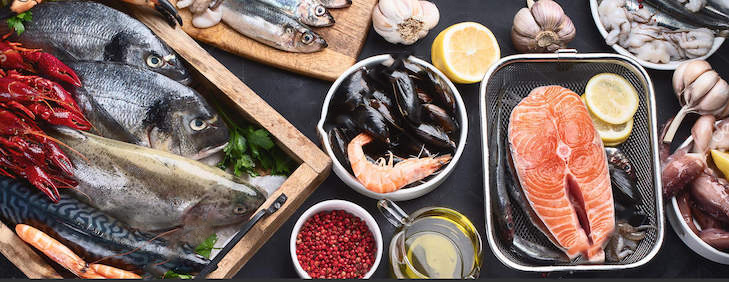
Think of mastering seafood as the ultimate culinary playground where speed, precision, and incredible flavor collide. From the satisfying sizzle of a scallops’ perfect golden crust to the artistic challenge of slicing sashimi, seafood offers a level of variety and creativity that meat simply can’t match. It’s an invitation to experiment with vibrant global flavors—think zesty ceviches, buttery lobster tails, and spicy grilled octopus—that turn every service into a high-energy masterclass. Learning to handle the ocean’s best isn’t just a career move; it’s your ticket to creating show-stopping, delicious dishes that are as exciting to cook as they are to eat.
Here’s a quick preview of what we’ll cover:
Section 1: Integrity and Quality Control
Before a single fish is dipped in batter and fried up golden brown and delicious, it must pass through a rigorous system of inspections and grading.
Inspections
- FDA: The U.S. Food and Drug Administration only monitors interstate shipments and requires processors to follow HACCP (Hazard Analysis and Critical Control Point) programs.
- USDC: The FDA does not inspect seafood when it is caught. Instead, many processors participate in the voluntary seafood inspection program conducted by the U.S. Department of Commerce. These seafood companies PAY for the right to have a USDC inspector visit their facility and smack the PUFI (Processed Under Federal Inspection) mark on the shellfish or finfish they want to sell, signifying the product is safe, wholesome, and packed in a sanitary environment as required by the National Marine Fisheries Service (NMFS)-a division of the USDC.


Grading
The National Marine Fisheries Service (NMFS) grades seafood as A, B, C, or Below Standard. These grades are determined by a specific set of sensory and physical factors.
- Grade A: The gold standard. Excellent appearance, good flavor, no odor, and zero blemishes. Only Grade A seafood is marked with a stamp and ALL high-end restaurants exclusively use Grade A.
- Grade B: Good quality but may have minor blemishes. Suitable for applications where appearance is less critical.
- Grade C: Relatively good quality, but intended for dishes where the seafood is not the visual centerpiece (e.g., stews or fillings).
How to Cook Catfish
Fun Fact: Catfish is the only seafood regulated by the USDA. Read the post below to find out why (and how to cook three amazing Catfish classics).
Section 2: How Chefs Classify Seafood
In the culinary world, seafood is broadly divided into two categories: Shellfish (no backbone, outer shell or exoskeleton) and Finfish (internal skeleton/backbone). We’ll start with the shellfish.

The Shellfish Family
Cooking mollusks is a masterclass in sensory awareness and technical precision. Because these creatures are highly perishable and prone to rubbery textures, success depends on your ability to judge freshness and manage aggressive heat (while making sure you don’t kill anyone with a bad oyster).
Mollusks: Three Culinary Categories
In a professional kitchen, you will typically work with three distinct types of mollusks, each requiring a different approach:
- Bivalves (Clams, Mussels, Oysters, Scallops): These have two hinged shells. Most are steamed just until they pop open, while scallops are prized for a high-heat pan-sear to create a golden crust.
- Cephalopods (Squid, Octopus): These lack external shells (except the nautilus). They follow the “hot and fast” or “low and slow” rule: sear them quickly for tenderness, or braise them for a long time to break down tough connective tissues.
- Gastropods (Snails, Whelks, Abalone): These single-shelled mollusks often require tenderizing via pounding or extended poaching (sometimes up to 40 minutes for large sea snails) to avoid a “chewing gum” texture. While they are TECHNICALLY seafood, we actually cook them in an entirely different section of the culinary curriculum. You can forget about them till later.
Critical Food Safety & Selection
Mollusks are “high-risk” foods. They all have the capacity to spread some pretty terrible illness and toxins… so we HAVE to be careful. Memorizing these indicators is essential for any ServSafe-certified professional:
- The “Closed Before, Open After” Rule: Live clams, oysters, and mussels should be tightly closed when raw. If one is open, tap it; if it doesn’t snap shut, discard it. Conversely, if a shell remains tightly closed after cooking, it was likely dead before it hit the heat—toss it out.
- Receiving & Tags: In a restaurant, you must keep the shellstock tags for every bag of mollusks for 90 days after the container is emptied. This is a legal requirement for traceability in case of a foodborne illness outbreak.
- Storage: Never store live mollusks in airtight bags or submerged in fresh water, which will kill them. Store them in a high-humidity environment, such as a perforated pan over ice, covered with a damp cloth.
Preparation Techniques
- Purging: Many clams and mussels contain sand. Soak them in cold, salted water for 20–30 minutes before cooking to encourage them to “spit out” grit.
- Debearding: Mussels often have a “beard” (byssus threads) used to attach to rocks. Pull this toward the hinge of the shell to remove it just before cooking.
- Gentle Steaming: Use a shallow amount of flavorful liquid (wine, aromatics, or stock). The goal is to steam, not boil, to preserve the delicate “liquor” inside the shells.
Crustaceans: Shrimp, Lobster, Crab, and Crayfish
How to Cook Shrimp
We cook shrimp a couple ways in the seafood unit. So it gets its own side quest. Read on.
Lobster

Mastering lobster is a high-stakes test of technical precision and cost management. You’ll primarily work with two categories: the True Lobster (like the Maine or European Blue), prized for its sweet, meaty claws, and the Spiny Lobster (or Rock Lobster), which lacks claws and is valued for its versatile, robust tail meat. For refined small plates, you may also encounter Langoustines (Dublin Bay Prawns or the “Norway” Lobster)—delicate, slim crustaceans that look like tiny lobsters but offer a much sweeter, more elegant flavor profile. While you CAN buy lobster frozen or canned, it’s much more common to buy it live because lobsters possess aggressive digestive enzymes that begin to decompose their own bodies almost immediately after death. Keeping them alive is the only way to ensure the meat remains firm and safe for consumption until the moment of cooking.
What’s more, lobsters naturally harbor bacteria in their flesh and shells and their death triggers a dangerous biological clock.
- Bacterial Proliferation: Once the lobster’s immune system stops functioning, bacteria like Vibrio can double every 15 minutes, rapidly reaching dangerous levels.
- Toxin Release: These bacteria can release toxins that are NOT destroyed by the heat of cooking.
- The Ammonia Sign: Spoiled lobster often emits a strong ammonia-like odor, which is a clear signal that the meat is no longer safe to eat.
Lobsters are classified by weight:
- chicken lobsters weigh approximately l pound;
- quarters lobsters weigh approximately 1.25 pounds;
- select lobsters weigh approximately l.5 – 2.5 pounds;
- jumbo lobsters weigh over 2.5 pounds.
In the industry, you’ll also hear chefs talk about Hard Shell versus Soft Shell (or “New Shell”) lobsters. Hard shells are the heavyweights—they are packed with dense meat and are great for shipping. Soft shell lobsters have just molted and are still growing into their new outfit, so-to-speak. While they have less meat inside, it is often sweeter and easier to get out of the shell.
As a student, your biggest challenge is the yield: only about 20% to 30% of that heavy lobster is actually edible meat. This means every ounce is gold. If you overcook it by even a minute, that “gold” turns into rubber, and you’ve just wasted a high-dollar ingredient. Mastering the lobster means learning to respect the price tag by using the tails for entrees, the claws for salads, and the shells for a rich, world-class bisque.

Crab
Crab is some of the most expensive “gold” in the kitchen. To master it, you first have to know your players. You’ll likely work with the sweet, delicate Blue Crab from the Atlantic—famous for its “soft-shell” phase—or the massive King and Snow crabs, whose legs are the stars of high-end seafood towers. If you’re on the West Coast, the Dungeness is your go-to for its rich, buttery body meat, while the Stone Crab is unique because we typically only harvest its dense, lobster-like claws.

But we don’t usually buy whole crabs and harvest their meat – we buy it prepackaged. We’ll purchase Jumbo Lump for a stunning cocktail (the expensive stuff) and a container of Special or Claw meat for a flavorful bisque or stuffing. Using Jumbo Lump in a dip where it just gets broken up is a “rookie move” that wastes the restaurant’s money.
Here are the common varieties you can buy at Winn Dixie.
- Colossal/Jumbo Lump: The largest unbroken pieces of white meat from the swimming legs. Use this for high-end cocktails or where the visual “wow factor” matters.
- Lump: Smaller broken pieces of jumbo lump. Ideal for high-quality crab cakes.
- Backfin: A mix of small lump pieces and body meat.
- Special: Shredded flakes from the body; best for dips, bisques, or stuffings.
- Claw Meat: Darker, more “seafood-forward” flavor. It’s the least expensive but has the most robust taste
The biggest technical trap with crab is overcooking. Most of the King and Snow crab you’ll receive arrives pre-cooked and frozen, so your job isn’t to “cook” it—it’s to gently reheat it. If you get too aggressive with the heat, that sweet, tender meat turns into rubbery strings. Finally, never forget the yield: in a whole crab, only about 15% to 20% is actual meat. This means every ounce you extract represents a massive part of your food cost. Treat every flake like a luxury, because to your bottom line, it absolutely is.

How to steam crab
Instructions
- Fill a large pot with a steamer insert with about 1 to 1 ½ inches of water, or just enough water so that the level is below the bottom of the steamer basket.
- Flavor the steaming liquid by adding sprigs of fresh herbs, smashed garlic cloves, celery, shallots, with half a lemon if desired.
- Cover the pot with a lid and bring the water to a boil over high heat.
- Remove the cover and place the steamer basket into the pot.
- Next, add the crab legs to the steamer basket, bending large king crab legs as needed to fit in the pot, and placing the snow crab or Dungeness crab cluster-side-down.
- Cover and steam the crab legs until the meat is warmed through. For king crab legs: steam for 6 to 8 minutes. For snow crab legs or Dungeness crab clusters: steam for 4 to 5 minutes. For frozen crab legs: double the cook time.
- Let the crab legs cool before cracking and serving.
Notes
- Choose high-quality crab legs. Use large, fresh or high-quality frozen crab legs. If purchasing frozen, look for legs that are free of ice crystals and freezer burn to ensure optimal taste and texture.
- Properly thaw the crab legs. If using frozen, be sure to thaw them in the refrigerator overnight. Avoid thawing at room temperature to prevent bacterial growth and preserve the crab’s delicate texture.
- Don’t overcook them. Overcooking will make the crab leg meat tough and dry. Be sure to monitor cooking times closely and remove the crab legs from the heat as soon as they are warm through. Crab legs are sold already cooked; you are simply reheating them.

The Finfish Family
Mastering Finfish: Anatomy, Fat, and Freshness
Moving from shellfish to finfish is like leveling up in a video game—it requires way more precision and better knife skills. For a chef, fish is defined by two main things: how it’s built and how much fat it has.
1. Know the Skeleton (The “Round” vs. “Flat” Rule)
The shape of the fish determines how you’ll hold your knife and how many portions you’ll get:
- Round Fish (e.g., Salmon, Bass): These have eyes on both sides of their heads and swim upright. When you “fabricate” (cut) them, you get two thick fillets.
- Flatfish (e.g., Flounder, Sole): These are bottom-dwellers that swim on their sides with both eyes on top. These give you four thin, delicate fillets.
2. Fat Content = Cooking Method
The amount of oil in the fish tells you exactly how to cook it so you don’t ruin an expensive product:
- Lean Fish (e.g., Cod, Tilapia): These have almost zero fat. If you put them on a hot grill, they’ll dry out in seconds. Stick to “moist-heat” methods like steaming or poaching to keep them juicy.
- Fatty Fish (e.g., Salmon, Tuna): These are “bulletproof” for high heat. Their natural oils keep them moist on a grill or in a pan, and they’re the best candidates for getting that perfectly crispy skin.
3. Develop Your “Freshness Radar”
Finfish spoil fast, so you can’t just trust the date on the box. You have to use your senses to spot a “bad” fish before it hits the plate:
- The Eyes: Should be clear and bulging (if they’re cloudy or sunken, it’s old).
- The Gills: Should be bright, vibrant red.
- The “Poke” Test: Press the flesh; it should spring back instantly. If your fingerprint stays there, it’s past its prime.
- The Smell: It should smell like the clean ocean. If it smells “fishy” or like ammonia, send it back!
Chef’s Tip: In a kitchen, your reputation is only as good as the ingredients you use. With finfish, there’s no way to hide “old” product, so always trust your senses over the delivery slip.
How to Cook Salmon

The “Business” of Fish: Understanding Market Forms
When you’re standing on a loading dock at 5:00 AM, you aren’t just buying “fish”—you’re making a business decision. As a chef, you have to choose: do you want to pay a lower price and do the butchery yourself, or pay a premium to have someone else do the dirty work?
Every “form” of fish has a different yield (how much meat you actually get to serve) and labor cost (how much time your team spends cutting it).
1. The “As-Is” Forms
- Whole or Round: Exactly how it came out of the water.
- The Trade-off: It’s the cheapest per pound, but it takes the most time to clean and creates the most “waste” (guts and scales).
- Dressed: The scales, fins, and internal organs are removed.
- Pan-Dressed: One step further—the head and tail are gone. It’s basically ready to seasoned and thrown in a pan.
2. The High-Volume Standards
- Fillets: These are the boneless sides of the fish.
- Why use them? They are the industry standard for fast service. Your line cooks can grab a fillet and plate it in minutes without worrying about a customer choking on a bone.
- Steaks: Cross-section slices of a large fish (like Salmon or Swordfish) that usually include a piece of the backbone.
- Wheels or Loins: These are massive, boneless “prime cuts” from giant fish like Tuna.
3. The Chef’s Dilemma: Waste vs. Flavor
Every choice is a trade-off.
- Buying “Whole” is more work, but it gives you the bones and head to make a world-class fumet (fish stock).
- Buying “Fillets” is more expensive, but it saves your staff hours of prep time.
The Bottom Line: In a professional kitchen, you don’t just cook the fish; you account for every ounce. If you buy a 10lb whole fish and only get 5lbs of meat, you better have a plan for those other 5lbs of bones!
SHORT AND SWEET LIST OF MARKET FORM TERMS
- Whole or Round: Exactly as caught.
- Drawn: Viscera (guts) removed.
- Dressed: Viscera, scales, fins, and usually the head removed.
- Fillets: Boneless pieces cut from the sides. Roundfish yield two fillets; flatfish yield four.
- Steak: Cross-section cuts, typically from large fish like Salmon or Swordfish.

Section 3: The Cold Chain: Receiving and Storage
When that delivery truck pulls up, you aren’t just a student or a cook—you are the guardian of the “Cold Chain.” This is an unbroken, temperature-controlled journey that starts in the ocean and ends on your customer’s plate. If that chain breaks for even an hour, your expensive fish turns into a health department nightmare.
1. The Delivery “Vibe Check”
Your job starts at the truck. Do not just sign the invoice and walk away!
- Check the Temp: If the fish is 41°F or higher, do not accept it. Send it back.
- The “ER” Speed: Once you accept it, move that fish to the walk-in with “emergency-room speed.” Every minute on a warm loading dock kills the quality.
2. The Finfish “Ice-to-Ice” Method
In a pro kitchen, we don’t just throw fish in a plastic bin. We use the perforated pan method:
- Place the fish in a pan with holes (perforated).
- Put that pan inside a solid pan.
- Why? This allows melting ice to drain away. If a fish sits in its own stagnant water, it “drowns” in bacteria. Keep it icy, but keep it drained.
3. Shellfish Rules (Don’t Kill the Merchandise)
Shellfish are often still alive, so you have to treat them differently:
- No Ice Baths: Never bury live lobsters or clams in ice. The fresh water or the direct cold will kill them instantly.
- The Damp Wrap: Keep them in a humid spot, covered with damp burlap or wet paper towels.
- The 90-Day Rule: Keep those Shellstock Tags! These are the “legal fingerprints” of your seafood. By law, you must keep them for 90 days after the last piece is sold. If a customer gets sick, those tags prove you bought from a safe, certified source.
Chef’s Bottom Line: Respect the biology of the ocean. Keep it cold, keep it drained, and keep your paperwork organized.

Section 4: Fabricating Seafood
Fabrication is where your knife skills meet the anatomy of the ocean, and it’s a high-stakes game of yield vs. waste. When a whole fish lands on your cutting board, your first task is scaling—using a scaler or the back of a knife to strip away those armor-like plates, working from the tail toward the head. Next comes trimming, where you snip away the sharp dorsal and pectoral fins with kitchen shears to protect your hands and create a clean profile for the plate.
The “dirty work” happens during gutting. You’ll make a shallow incision from the vent up to the gills, being incredibly careful not to puncture the internal organs—especially the gall bladder, which can leak bitter bile and ruin your expensive meat. Once the cavity is flushed clean, you move to the ultimate test: filleting. For a round fish, you’ll cut behind the gills and follow the spine in one long, smooth stroke to sweep the meat off the bone. For a flatfish, you’re aiming for four delicate fillets by following the natural “seam” down the center of its back.
Every slip of the knife is money left on the bone. Your goal is a “skeleton you can see through,” meaning you’ve extracted every possible ounce of edible protein. In a professional kitchen, we don’t just throw away what’s left, either; those clean bones and heads are the foundation for a high-quality fumet or stock. Mastering fabrication isn’t just about speed; it’s about the respect you show the ingredient by making sure nothing goes to waste.
Shellfish
Unlike finfish, shellfish do not have bones or a skeletal system. They do, however, need to be fabricated.
Mollusks, such as clams and oysters, are often served on the half shell, so it is important not to destroy the shell when shucking. Shucking is the opening or removing of a mollusk’s shell. Scrub all mollusks well under cold running water before opening them to remove sand and grit.
When fabricating lobsters, removing the meat from the shell is easier when the lobster has been partially or fully cooked. Blanching the lobster lightly in a steam bath, in boiling water, or in a hot oven is all that is necessary to make removing the meat easier.
Shrimp are cleaned by removing the shell and deveining: removing the shrimp’s digestive tract.

Section 5: Culinary Application and Doneness
Cooking Techniques
The best way to pair a fish with a cooking technique is to consider the flesh of the fish. For example, mackerel (an oily fish) cooks best with a dry-heat cooking technique, such as grilling or broiling. Prepare tuna and salmon, which contain a moderate amount of fat, using any cooking method. Very lean fish, such as sole and flounder, have the most flavor when they are poached or sauteed.
| Fish Type | Best Cooking Methods | Examples |
| Fatty Fish | Dry-heat (Baking, Broiling, Grilling) | Salmon, Mackerel, Tuna |
| Lean Fish | Moist-heat (Poaching, Steaming) or Dry-heat with fat (Sautéing) | Sole, Flounder, Cod |
| Shellfish | Quick Sauté, Steaming, or Deep-frying | Shrimp, Scallops, Lobster |
Dry-Heat Cooking Fatty fish cut into fillets or steaks are the best cuts to bake, broil, and grill. Mostfish are baked between 350°F and 400°F. Bake larger fish at the low end of this range so they cook evenly. To retain moistness, coat fish with bread crumbs, crushed nuts, or thinly sliced vegetables or meat, such as prosciutto, and bake it on an oiled or buttered baking sheet. When grilling or broiling fish, remember to oil the grill or broiler so the fish will not stick to the cooking surface.
Dry-Heat Cooking with Fat and Oil Lean finfish and shellfish are best when using dry-heat cooking with fat and oil, such as sauteing, stir-frying, pan-frying, and deep-frying. Coat fish with flour or a breading before cooking in either clarified butter or oil. Small items, such as shrimp and scallops, are extremely delicate and must be quickly sauteed, stir-fried, or pan-fried over very high heat. Larger items require lower heat for even cooking.
When deep-frying, the fish should be very fresh, the fat used to deep-fry should be of high quality, and the item should be served immediately after cooking. Breading the fish before cooking will protect it from the hot fat and provide a crispy coating. It is necessary to follow sanitation rules when working with the batter.
Moist-Heat Cooking Moist-heat cooking techniques-poaching, simmering, and steaming-are excellent ways to cook fish, especially the lean varieties. To enhance the flavor of the fish, poach it in court bouillon (cort boo-YON), a stock made of vegetables and an acid such as vinegar or wine. Also poach fish in fumet (foo-MAY), a rich fish stock made with wine, or simmer it in its own juices with a little added liquid. Often the liquid used makes an excellent base for a sauce that is then served with the fish.
Another method is poaching in olive oil or butter, which may or may not be infused with other flavorings. The principles for poaching in olive oil or butter are the same as for poaching in other liquids regarding time and temperature.
Shallow-poached fish and shellfish should be opaque. The flesh of oysters, clams, and mussels should show curling on the edges. No white deposits should show on the flesh of finfish or shellfish, as this indicates cooking at too high temperature or for too long. The finished item should be moist and extremely tender. Any stringiness, dryness, or excessive flaking indicates that the food was cooked too long or at too high a temperature.
En papillote (en paw-pee-YOTE) is one classical moist-heat cooking technique that is especially suited to fish. In this cooking method, encase the fish, herbs, vegetables, and/or sauce in parchment paper and steam in a hot oven. Fish cooked en papillote should be naturally tender. Sear thicker cuts of fish first to ensure even cooking. Modern versions of this technique include wrapping the fish in banana leaves.
Combination Cooking The combination cooking methods, stewing and braising, use both dry and moist heat. These methods have produced some very popular fish recipes over the years. Some of the best-known recipes include
- bouillabaisse (BOO-ya- base), a French seafood stew made with assorted fish and shellfish, onions, tomatoes, white wine, olive oil, garlic, saffron, and herbs
- cioppino (cho-PEE-noh), a San Francisco version of seafood stew made with local seafood; and
- jambalaya (jam-bo-LIE-ah), a Creole stew from Louisiana made with rice, shellfish, and vegetables, and sometimes andouille sausage as well
Determining Doneness
Overcooking seafood is a cardinal sin in the kitchen. Almost all finfish and shellfish are naturally tender, so take GREAT CARE to not undercook or overcook fish for tenderizing purposes. Cook all fish just until done, which is verified by using a thermometer that should read 145°F. Use these five indicators:
- Opacity: Translucent raw flesh becomes opaque.
- Firmness: Flesh springs back to the touch. Raw fish is somewhat mushy. As the flesh cooks, it becomes firmer and springs back to the touch when done.
- Separation: Flesh pulls easily away from the bone. As the fish cooks, the flesh loosens and con be effortlessly separated from the bone when done.
- Flaking: Muscle fibers begin to separate (flake) as connective tissue breaks down and muscle fibers begin to separate from each other, or flake. The fish is done as soon as flaking starts to occur.
- Temperature: Internal temperature reaches at least 145*F

Recipes

Tuscan Broiled Trout
Ingredients
- ¼ cup olive oil
- 1 clove garlic cut into thin slices
- ½ teaspoon dried sage
- ½ teaspoon dried rosemary crumbled
- 2 tablespoons white wine vinegar
- ½ teaspoon salt
- ¼ teaspoon fresh-ground black pepper
- 4 trout fillets about 1 pound total
Instructions
- Preheat the broiler. Combine the oil, garlic, sage, and rosemary in a sauce pan. Cook over moderately low heat until the garlic just starts to color, about 2 minutes. Remove from the heat and immediately stir in the vinegar, 1/4 teaspoon of salt, and the pepper.
- Put the trout fillets on a foil-lined half sheet pan. Sprinkle the fish with the remaining 1/4 teaspoon salt. Add half of the oil-and-vinegar mixture and turn to coat. Grill or broil the fish skin-side DOWN for 2 minutes. Turn and cook until just done, about 2 minutes longer for 1/4-inch-thick fillets.
- To serve, whisk the remaining oil-and-vinegar mixture and drizzle some over the hot fish. Serve with any remaining vinaigrette on the side.
Notes

How to Fillet a Roundfish
Instructions
- Before you fillet a whole fish, it should be scaled. Doing the job yourself isn’t difficult, but it’s messy because the scales tend to fly all over and you find them in weird places around the kitchen for days. Scale the whole fish submerged in water or inside a plastic bag to make cleanup easier. Hold the fish firmly by the tail and scrape the knife from the tail to the head of the fish removing the scales in a stroking motion – they should flake off quite easily.
- Rinse the fish under running water and pat dry. Position it on a cutting board with its back towards you. Using a sharp knife held behind the gills and side fin, cut straight down halfway through the fish to the backbone, being sure to include the meaty spot right behind the top of the head.

- Turn the knife parallel to the board (at a 90-degree angle to your first cut) and cut along the spine from head to tail, removing the belly flap with the fillet. You’ll need to apply a fair amount of pressure at first to break through the rib bones. As you cut, press down firmly on top of the fish to steady it.
- Finish removing the fillet by cutting all the way through the skin at the tail. Repeat steps 1 through 3 on the other side of the fish.
- Remove the rib bones and belly flap by cutting under the top of the rib bones to the bottom of the fillet at a 45-degree angle. There is some meat here, but on small fish it is minimal. (On larger fish like tuna, this fatty belly is thicker and very flavorful.)
- Finally, check for pin bones. Some fish have little bones that run along the midline of the fillet and are nearly impossible to see. To remove them, feel along the fillet to locate each bone and then pluck it out with a pair of clean needle-nose or fish pliers. Pull the bones out in the direction they are pointing, as you would a splinter.


Shellfish
Mollusks

Steamed Clams with Garlic and Butter
Ingredients
- 25 littleneck clams in shell scrubbed
- 2 tablespoons extra virgin olive oil
- 6 cloves garlic minced
- 3/4 cup white grape juice unsweetened
- 1/4 cup white wine vinegar
- 2 tablespoons butter
- 1/4 cup chopped fresh parsley
Instructions
- Wash clams to remove any dirt or sand. In a large pot, heat oil over medium heat.
- Add garlic; saute for 1 minute, or until tender. Pour in the juice and vinegar. Boil until reduced to half its original volume.
- Add clams, cover, and steam till clams start to open. Add butter, cover, and cook till most or all of the clams open.
- Discard any clams that do not open. Transfer clams and juice to a large bowl for sharing. Sprinkle with parsley. Serve.
Notes
- All clams are a special type of shellfish called a mollusks, an animal with a two-part, hinged shell. Most of the hard-shelled clams we eat are actually called quahogs (pronounced coe-hog).
- Quahogs are a species of hard-shelled clam and the one we most commonly enjoy in our chowders and po boys. All the other names for clams – littleneck, cherrystone, top neck or count neck, and quahog – are this same species of clam and just refer to how large the clam has grown
- Which type of clam to buy depends on how you want to prepare them. The clams get tougher and chewier as they get larger, making these sizes ideal for chowders, stuffing, frying, and other cooked preparations. Choose smaller sizes when quickly steaming, grilling, or eating raw.

Fried Calamari
Ingredients
- 1 pound squid slice the squid bodies into rings and reserve the tentacles
- 3 cups peanut oil or amount needed for frying
- 4 medium eggs
- 2/3 cup all-purpose flour
- 4 tablespoons semolina flour
- Fine sea salt to taste
- 1 lemon for garnish (cut into wedges)
Instructions
- Rinse the squid pieces in running water and pat completely dry with paper towels.
- In a large high-walled, heavy-bottomed pot over medium-high heat, heat several inches of oil to 350 F or until a small cube of bread dropped into the oil browns in about 30 seconds.
- Place the flour in a shallow bowl. Lightly beat the eggs in a large mixing bowl. Place the semolina in a small bowl.
- Dredge the calamari rings in the flour, shaking them to remove excess. Dip the floured rings in the egg and then in the semolina.
- Fry dredged calamari in several batches to avoid overcrowding, until crisp and lightly golden, about 1 to 2 minutes.
- Using a fine-mesh spider or a slotted spoon, transfer the fried calamari to a paper towel-lined plate to drain.
- Season to taste with salt and serve immediately with lemon wedges.
I no longer eat octopus. They are smart, emotionally sensitive, and I can’t bring myself to do it anymore. Which is sad, since grilled octopus used to be my favorite seafood. If you want to learn how to cook an octopus…. learn it from someone else.
Chef