If you have conquered the cinnamon roll—the “gateway drug” of enriched doughs—you are officially ready to step into the big leagues with Brioche Nanterre. This traditional French masterpiece is the undisputed “bridge” dough of the culinary world, sitting precisely on the border between the rustic craft of the boulanger (bread baker) and the delicate art of the pâtissier (pastry chef). Defined by its iconic “bubble top” and a golden, lacquered crust, the Nanterre is more than just a loaf; it is a versatile workhorse that elevates everything from a simple morning toast to the most decadent French toast you have ever tasted.
But make no mistake: transitioning from a standard roll to a true brioche is a major technical leap. While your typical enriched bun is soft and pillowy, a master-level brioche possesses a legendary “shred” that feels more like fine pastry than bread. To achieve this, we are pushing the fat content from a standard 20% to a luxurious, high-stakes 50%. Success here requires more than just following a recipe; it demands that you master the underlying thermodynamics and the delicate physics of a high-fat emulsion. Welcome to professional-tier baking, kiddo. It only gets more challenging from here.

I. Getting to Know Brioche: Background, History, and Cuisines
The Parisian Standard
To understand brioche is to understand the evolution of French luxury. While “brioche-adjacent” breads have been documented since the Middle Ages, the Nanterre style—that iconic rectangular loaf defined by its row of nested boules—exploded as a Parisian staple during the 19th-century golden age of the Boulangerie. It was during this era that brioche transitioned from a rustic, heavy peasant bread into the refined, “feather-light” crumb we recognize today.
Legendary chefs like Auguste Escoffier codified the richness levels we use today, from the “Poor Man’s Brioche” used for buns to the “Rich Man’s Brioche” used for fine desserts. Today, modern masters like Cédric Grolet use these same foundational principles to create avant-garde pastries that still rely on the perfect 12-to-24-hour cold ferment.

Structural & Regional Varieties
In the professional bakery, brioche isn’t just one type of bread; it is a formulaic family categorized by its “richness” (butter-to-flour ratio) and its specific regional shaping. Understanding these varieties helps a cook choose the right dough for the right application and there is no better place to start than with the guys who invented it: the French.

Brioche à Tête (Parisian Brioche)
The most iconic form of brioche, recognizable by its fluted base and small “head” (tête) on top. It is baked in a specific flared, scalloped mold. The challenge here is “docking” the head so it stays centered during the oven spring.

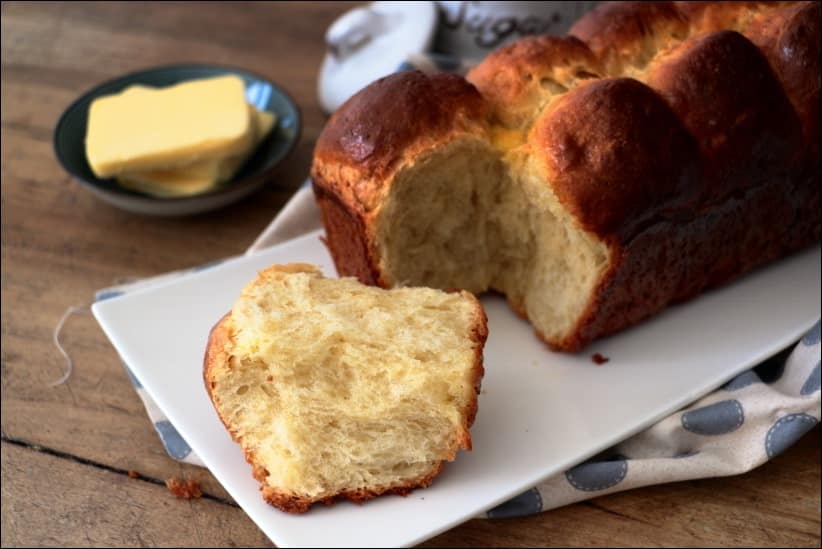
Brioche de Nanterre
This is the type of Brioche we’re trying to make today. It’s composed of two rows of small dough boules nestled together. While the dough proofs and bakes, the boules fuse, but they can be easily pulled apart by hand, showcasing the “shred” of the crumb.

Kouglof (Alsatian Brioche)
Hailing from the Alsace region, this is a bridge between French and Germanic baking. It is often less sweet but filled with raisins soaked in kirsch and topped with whole almonds. It is baked in a heavy, decorative earthenware mold.

Brioche Vendéenne
A regional specialty from the west of France. This variety is almost always braided and often flavored with orange blossom water, crème fraîche, or a touch of brandy. It is celebrated for its artisanal, rustic look and is usually finished with a heavy coating of pearl sugar.

Brioche Feuilletée (Laminated Brioche)
This is the high-water mark of technical baking. It takes a Brioche Riche dough and treats it like a croissant, laminating it with even more “fold-in” butter. The result is a bread that is simultaneously bready and flaky.
While traditional brioche is firmly rooted in French technique, the concept of a rich, egg-forward dough has evolved into a global family of “super-enriched” breads, each solving the problem of shelf-life and texture in unique ways. From the Jewish Diaspora, we see Challah and Babka utilizing high egg counts and oil to achieve a pillowy “shred” that remains dairy-free. In Italy, the towering Panettone pushes the limits of butter and yolk saturation through multi-day fermentations, while Maritozzo buns serve as a lighter, honey-sweetened vehicle for cream. Moving to Japan, the Shokupan (Milk Bread) achieves a brioche-level softness not through high fat, but through the Tangzhong method—pre-gelatinizing starches to lock in moisture at a molecular level. Finally, the Mexican Concha proves the lasting impact of French influence, pairing a soft brioche base with a crisp, shell-patterned cookie crust. Together, these varieties demonstrate that whether through fat, eggs, or starch chemistry, the goal of enriched dough remains universal: creating a bread that feels more like a luxury than a staple.

II. THE SCIENCE OF THE LOAF
To achieve a pillowy, “shredded” crumb rather than a greasy, heavy mass, we must focus on two critical “sciency” areas: the order of operations and temperature control.
1. Order of Operations: the “Gluten First” Method
In a standard enriched dough, you might mix all ingredients at once. In a professional brioche, this is a recipe for failure. Why? In most baking, fat is a “shortener.” It coats flour proteins (glutenin and gliadin) and prevents them from bonding, which gives you the crumbly texture of a pie crust. To achieve the airy, pull-apart structure of brioche, we have to flip the script. To do this, We follow the Delayed Addition method. We build a high-tension “net” of gluten using only flour, eggs, and yeast. Once that net is strong enough to hold weight, we “mount” the butter into the structure. This creates a stable emulsion where the fat is suspended within the gluten, rather than breaking it down.
The Brioche Delayed Addition method:
- The Lean Phase: We develop a high-tension, elastic dough using only flour, eggs, yeast, sugar, and salt.
- The Windowpane Milestone: The dough must pass a rigorous windowpane test before any butter is introduced. This ensures the protein “net” is strong enough to hold the fat in suspension.
- The Emulsion: Room-temperature butter (ideally 65°F) is “mounted” into the dough slowly. This is a mechanical forcing of lipids into the aqueous (egg-based) environment of the dough.
Workability: At room temperature, a 50% butter dough has the consistency of wet silk. Once chilled, the butter solidifies, allowing the dough to be handled like modeling clay for technical shapes like the Nanterre or à Tête.
REMEMBER the 78°F Rule: Human hands are 98°F. If you handle the dough too much during kneading and shaping, you will melt the emulsion before it hits the oven.
How Much Butter? The Baker’s Hierarchy of Richness
- Brioche Pauvre (Poor Man’s): Contains 20%–25% butter. This variety has enough structure to hold its shape well, making it the industry standard for high-end burger buns and sandwich loaves.
- Brioche Moyenne (Middle): Contains 40%–50% butter. This is the “Gold Standard” for braided loaves and traditional shapes, the “all-purpose” professional brioche, and the richness level of our target recipe for this post: Brioche Nanterre
- Brioche Riche (Rich Man’s): Contains 70%–100% butter. This is almost a “batter” before it is chilled. It is incredibly delicate and is often used for luxury desserts or as the base for Brioche Feuilletée (laminated brioche).

2. Temperature Control: Thermodynamics and the Cold Retard
Temperature is the baker’s most volatile, important variable when working with high-fat doughs. We have to carefully manage the temperature of the butter as it is being mounted and the temperature of the dough as it ferments. BOTH of these points of control are vital: If the friction from the dough hook pushes the mass above 78°F, the butter will begin to melt and separate from the gluten—a “broken” dough that will never achieve a proper rise. If the dough doesn’t go through a Cold Retard (a 24 hour chill at 34°F–38°F) it will be difficult to shape and never possess the correct flavor and aroma.
Why not? it’s time for a DEEP DIVE!
Deep Dive: The REASON a cold ferment makes bread taste better
While we primarily understand yeast’s purpose is to to pump out CO2 and inflate our dough, its secondary role as a metabolic factory is what truly separates a “grocery store bun” from a professional masterpiece. The primary objective of the Cold Retard phase isn’t just a rest—it’s a targeted chemical maneuver to maximize the development of esters. These organic compounds are the secret behind the complex, nutty, and almost floral aroma that defines world-class breads. By chilling the dough, we force the yeast to stop focusing on volume and start focusing on flavor.
The Molecular Magic: How Time Creates Flavor

To the untrained eye, the 24-hour chill in the fridge looks like “down time.” In reality, your dough is undergoing a high-stakes chemical transformation known as Esterification. Here is how we move from basic fermentation to professional-tier aroma:
1. The Chemical Ingredients
Think of your dough as a laboratory. As yeast works, it produces ethanol (alcohol). Simultaneously, secondary lactic acid bacteria produce various organic acids. When these alcohols and acids collide within the dough matrix, they bond to form Esters—the organic compounds responsible for the complex, “perfumed” scent of high-end bakery products.
2. The “Slow Burn” (Why Temperature Matters)
At room temperature, yeast is “noisy” and hyperactive, focusing entirely on churning out CO2 and creating volume. By dropping the temperature to a crisp 34°F–38°F, we flip the switch from quantity to quality:
- Decelerated Yeast: Fermentation slows to a crawl, preventing the dough from over-proofing while the flavor compounds build.
- Enzymatic Freedom: While the yeast naps, enzymes like amylase and protease stay awake. They relentlessly break down complex starches into sugars and proteins into amino acids, providing the raw materials for flavor.
- Acid Accumulation: Over 12 to 24 hours, subtle amounts of acetic and lactic acids accumulate, setting the stage for the final chemical reaction.
3. Unlocking the Esters
As the ethanol and organic acids linger in close proximity during the cold retard, they bond into specific, highly volatile esters:
- Ethyl Acetate: Provides fruity, sweet notes.
- Ethyl Lactate: Adds a creamy, buttery depth.
- The Big Reveal: When that cold dough finally hits the 350°F oven, these esters are “unlocked” by the heat, flooding your kitchen with the nutty, floral aroma that distinguishes a 24-hour brioche from a “quick” supermarket bread.
4. Lipids: The Flavor Vault
This is where the 50% butter content becomes a strategic advantage. In brioche, lipids (fats) act as a solvent. Because many aromatic esters are fat-soluble, the high butter content “traps” those scents inside the crumb. In a leaner bread, these aromas would simply evaporate during the bake; in brioche, the butter acts as a vault, ensuring that every pull-apart “shred” is packed with concentrated flavor.
When you head into the bakery to start executing this recipe, remember: we are not just baking bread; we are managing a delicate biological and chemical emulsion. Respect the temperatures, trust the windowpane, and never rush the chill.

III. Tips, Tricks, and Troubleshooting
To ensure you are moving from “following a recipe” to “mastering the craft,” I need you to study these tips. They will help you cross the gap between theory and the actual physical sensations you will experience at the bench and are the absolute FASTEST way to up your game.
1. “Golden” Tips for Execution
- The Freezer Shock Technique: If your kitchen is over 75°F, place your mixing bowl and dough hook in the freezer for 20 minutes before you start. Keeping the mechanical friction heat low is the only way to prevent a broken emulsion.
- Butter Pliability (The 65°F Sweet Spot): Your butter shouldn’t be “room temperature”—it should be pliable. It should bend without snapping but stay matte (not shiny). If it’s too soft, it won’t incorporate; it will just coat the dough and prevent the “slap.”
- The Windowpane Test: This is your “Go/No-Go” gauge. Before adding a single gram of butter, tear off a bit of dough, pinch it between your thumbs and index fingers, and try to stretch it into a thin, translucent membrane that you could almost read a newspaper through without it tearing. If it tears… keep kneading.
- The Double Egg Wash: For that signature “mahogany” shine, whisk your yolks with a pinch of salt and a splash of cream. The salt denatures the proteins, ensuring the wash spreads smoothly without “stringy” streaks.

Pro-Tip: Managing Friction Your mixer is a heat engine. Every minute of high-speed mixing adds about 1°F to your dough. If your kitchen is 75°F and your eggs are 40°F, you are starting at a safe baseline. If your eggs are room temperature, you will hit the “Break Point” before the butter is even fully mounted. Always use cold liquids.
2. Sensory Cues: What to Listen and Look For
- The Audible “Slap”: During the butter mounting phase, the dough will initially look like a greasy, broken mess. Do not add flour. Continue mixing until you hear a rhythmic thwack-thwack-thwack against the sides of the bowl. This is the sound of the emulsion successfully forming.
- The “Jiggle” Factor: When proofing the Nanterre, don’t just look for size. Gently shake the pan; the dough should have a uniform “jiggle” like a set custard. If it feels firm, it needs more time.
- The Mahogany Finish: Don’t be afraid of a dark crust. The high sugar and egg content mean the Maillard reaction happened fast. A deep, dark brown indicates the complex flavors from the esters have been fully unlocked. If you really want to keep the color more pale, tent the dough with aluminum foil.
3. Troubleshooting the Recipe
| Symptom | The Scientific Cause | The Professional Fix |
| Dough is greasy and won’t “slap” | Broken Emulsion: The friction heat pushed the dough above 78°F, melting the butter. | Stop the mixer immediately. Place the entire bowl in the freezer for 10–15 minutes to reset the fat, then resume on low speed. |
| The “Short” Rise / Dense Crumb | Yeast Inhibition: Either the milk/eggs were too hot (killing yeast) or the proofing room is below 70°F. | Ensure liquids are cold and proofing environment is 75°F–80°F. Brioche is heavy; yeast needs warmth to lift that much fat. |
| Tearing/Shredding on the Crust | Incomplete Gluten / Underproofing: The dough expanded too fast in the oven for its structure to hold. | Ensure a perfect windowpane before adding butter, and ensure the dough is fully “jiggly” before baking. |
| The “Head” or Boules Tipping Over | Poor Tension: The surface of the dough wasn’t tightened enough during the rounding phase. | When shaping your 16 boules, use a clean, unfloured surface to create maximum drag and tension on the “skin” of the dough. |
A Final Note on Esters and Aroma
If your finished loaf smells like “plain bread,” you likely rushed the Cold Retard. That nutty, floral, almost boozy aroma is the result of esterification. These compounds need the full 12–24 hours in the fridge to bond. If you skip the chill, you skip the flavor. Don’t do that.
IV. RECIPE
Brioche Nanterre Formulation
Ingredients
- 500 g High-Protein Bread Flour 100%
- 250 g Whole Eggs cold (50%)
- 250 g Unsalted Butter pliable at 65°F (50%)
- 60 g Granulated Sugar 12%
- 50 g Whole Milk cold (10%)
- 10 g Fine Sea Salt 2%
- 10 g Instant Yeast 2%
Instructions
The Intensive Mix (Gluten Development)
- In a stand mixer fitted with a dough hook, combine flour, sugar, salt, and yeast. Add the cold eggs and milk.
- Mix on Low for 3 minutes to hydrate the flour.
- Increase to Medium and mix for 8–12 minutes.
- Doneness Indicator: Do not proceed until the dough is smooth and passes a translucent windowpane test. The dough must be strong enough to support the incoming fat.
Mounting the Butter (The Emulsion)
- Ensure your butter is exactly 65°F. If it’s too cold, it will “chunk” the dough; too warm, and it will break the emulsion.
- With the mixer on Medium-Low, add the butter one tablespoon at a time.
- Wait until each piece is fully incorporated before adding the next.
- Once all butter is in, mix on Medium-High for 5 minutes. The dough should be glossy and “slap” the sides of the bowl. Final dough temperature should not exceed 78°F.
The Cold Retard (Non-Negotiable)
- Place the dough in a greased bowl, cover tightly, and let sit at room temperature for 1 hour.
- Transfer to the refrigerator for 12–24 hours. The cold will solidify the butter, making the dough handle like modeling clay.
Scaling and Shaping
- Divide: Scale the cold dough into 16 equal pieces (approximately 70g each).
- Pre-shape: Round each piece into a tight boule, ensuring high surface tension.
- Pan: In two greased 9″x5″ loaf pans, place the boules in two staggered rows of four (8 boules per pan).
Final Proof and Bake
- Proof: Let rise in a draft-free area at 75°F to 80°F for 2.5 to 3 hours. The dough should double in size and look “jiggly.”
- Egg Wash: Whisk one egg yolk with a splash of cream. Apply a first coat of egg wash immediately after shaping. After the final proof, apply a second coat just before the loaves enter the oven.
- Bake: Bake at 350°F for 30–35 minutes.
- Doneness Indicator: Pull the loaves when the internal temperature hits 190°
Notes
The “Broken” Dough: If the dough looks greasy and won’t come together during the butter addition, it’s likely too warm. Stop the mixer, place the bowl in the freezer for 10 minutes, and resume.
The “Short” Rise: If the bread isn’t rising, check the proofing temp. Brioche is heavy; if the room is below 70°F, the yeast will struggle to lift that much butter.

Final Boss: Panettone
So you mastered the 50% butter emulsion of the Nanterre, did you? Alright, smarty-pants, why don’t you take on the “Final Boss” of the enriched dough world: The Panettone.
If Brioche Nanterre is a bridge, Panettone is a skyscraper. Originating from Milan, this bread represents the absolute limit of what dough can physically handle before collapsing. In a professional kitchen, a Panettone quest isn’t just a recipe; it’s a multi-day endurance test of pH management and structural engineering.
The Challenge: The 100% Yolk & Butter Threshold
While our Nanterre uses a generous 50% butter and cold eggs, a competition-grade Panettone often pushes the richness to 100% or more. It utilizes an incredible amount of egg yolks—not whole eggs—to achieve its signature neon-yellow interior and “stringy” melt-in-the-mouth texture.
The Mechanics: Why It’s a “Side Quest”
1. The Lievito Madre (The Living Engine)
Unlike our Nanterre, which uses instant yeast for a predictable lift, true Panettone relies on Lievito Madre—a stiff, high-maintenance natural sourdough starter.
- The Quest: For days leading up to the bake, you must “train” the starter with frequent feedings every 4 hours to ensure the acidity (pH) is perfectly balanced. If the starter is too acidic, it will eat the gluten; if it’s too weak, the heavy dough will never leave the bottom of the tin.
2. Triple Fermentation
The process usually involves two separate doughs (Primo Impasto and Secondo Impasto).
- The First Rise: You create a starter dough that must triple in volume over 12 hours.
- The Second Mix: You then “bombard” that fragile fermented dough with even more flour, sugar, yolks, and butter. Maintaining the emulsion at this stage is like trying to mix water into a block of marble.
3. Gravity vs. The Crumb (The Hang)
Because the crumb is so saturated with fat and sugar, it is incredibly fragile when it comes out of the oven. If you leave a hot Panettone sitting upright, it will collapse under its own weight into a dense, oily brick.
- The Professional Fix: As soon as they exit the oven, Panettones are pierced with long metal skewers and hung upside down for 12 hours. This allows the crumb to set and stretch while suspended, preserving that ethereal, cloud-like loft.
The Physics: Why Does It Work?
Panettone works because of intensive gluten development. In your Nanterre, you mixed for 8–12 minutes. In a Panettone, the mechanical mixing can last up to 45 minutes to an hour. You are essentially building a high-tensile steel cable network of gluten that is strong enough to hold up a massive amount of “luggage” (the butter and fruit).
Troubleshooting the Quest
- The “Soap” Texture: If the starter isn’t managed correctly, the bread will taste like soap or vinegar. This is a failure of pH control.
- The “Butter Leak”: If the dough gets above 79°F during the hour-long mix, the butter will melt out. Pros often use refrigerated mixers or “ice jackets” on their bowls to survive this phase.