Let’s Be Real: Culinary School Isn’t Just About the Meat Anymore
For a long time, the traditional path through culinary school felt like a non-stop rotation of “Meat 101.” You learned how to sear a steak, roast a chicken, and reduce a veal demi-glace until it could coat the back of a spoon. Vegetables? They were usually an afterthought—a handful of parsley, a scoop of mashed potatoes, or maybe a few glazed carrots if the plate felt too empty. But if you’ve been paying attention to the industry lately, you know that the script has totally flipped.
In today’s top kitchens, the real flex isn’t how you handle a ribeye; it’s how you treat a radish. Mastering vegetable cookery is arguably the hardest technical challenge you’ll face because, unlike a piece of protein, plants are temperamental. They’re a wild mix of sensitive pigments, complex cell structures, and reative enzymes that are just waiting for you to look away for ten seconds so they can turn into a soggy, brown mess.

Think about the science for a second (don’t worry, we’re keeping it practical). When you’re blanching asparagus, you’re not just boiling water; you’re managing the pH levels to keep that chlorophyll popping. If your water is too acidic, you end up with that sad, cafeteria-style, olive-drab sadness stick. If you overcook it by a minute, the pectins that hold the cell walls together give up the ghost, and you’ve lost that satisfying “snap.” It turns gray. You killed the poor thing.
We’re going to start off with the basics, then dive into some of the techniques that separate the amateurs from the pros. We’ll talk about using low-temp blanching to activate enzymes that keep veggies crisp even after roasting, and how to build “plant-forward” dishes that have as much umami as a slow-braised short rib. If you want to stand out in a modern kitchen, it’s time to stop treating your veg like a side dish and start treating it like the main event.
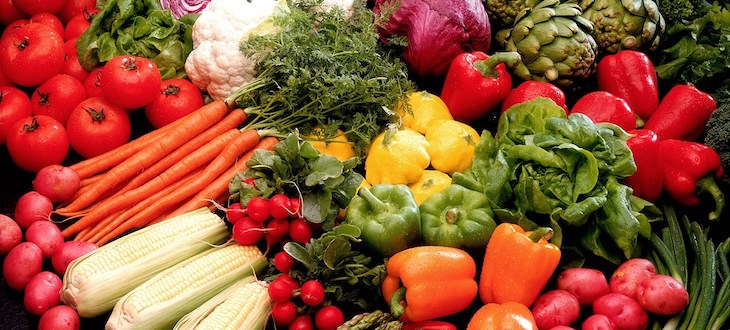
Need a refresher on all the different types of veggies, the categories they belong to, and basics about purchasing, storing, and cooking a wide variety? Check out this post:
Ready to level-up your chefing game? Read this post on how restaurant professionals cost, choose, and store their veggies.
GLAZING
Glaze vegetables for a shiny, savory-sweet finish by tossing them with fats (butter or olive oil are the most common) and sugars (honey/maple syrup/balsamic), then either roast them in the oven at 400-425*F OR you can cook them on the stovetop by melting butter/sugar in a pan, add vegetables and a little water/stock, then simmer until the liquid evaporates, leaving a shiny, syrupy coating.
Common, easy combinations include balsamic-honey, maple-soy, or orange-marmalade glazes, all of which caramelize well with vegetables like carrots, Brussels sprouts, and root vegetables.

Common Vegetable Glaze Recipes
- Balsamic Honey Glaze: 2 tbsp balsamic vinegar + 2 tbsp honey + 1 tbsp olive oil + thyme.
- Maple Glaze: 4 tbsp maple syrup + 2 tbsp olive oil + spices (cayenne, ginger, or turmeric).
- Orange Glaze: Orange juice + marmalade + mustard + cornstarch (microwaved 1 min).
- Garlic Herb Butter: Melted butter + 2 cloves garlic + sage/rosemary + ho
Brown Sugar Glazed Carrots
Ingredients
- 16 ounces carrots
- 2 tablespoons butter
- 1/3 cup brown sugar packed
- 1 cup water
- pinch cayenne pepper
- Salt & Pepper to taste
Instructions
- Combine the carrots with the butter, brown sugar, cayenne, and water in a medium saucepan. Stir to blend the ingredients thoroughly.
- Bring the mixture to a boil over high heat. Reduce the heat to medium-low and continue boiling (uncovered) for about 20 to 25 minutes, or until carrots are tender and the liquid has evaporated. Check and stir frequently to avoid scorching. Add more water, as needed.
- Season to taste with salt and pepper.

ROASTING
Roasting is a fundamental dry-heat cooking method that utilizes convection and radiation to transform raw vegetables into complex, flavorful, and textured components of a professional dish. For the advanced culinary student, mastering the roast requires more than just high heat; it requires at least a LITTLE BIT of understanding of thermodynamics, lipid chemistry, and the properties of various produce families.
1. Principles of Roasting
The Maillard Reaction
Unlike simple boiling or steaming, roasting reaches temperatures sufficient to trigger the Maillard reaction. This chemical process, occurring between amino acids and reducing sugars, produces melanoidins (brown pigments) and hundreds of aromatic compounds. For most vegetables, the reaction accelerates rapidly between 280-330*F.
Water Content and Evaporative Cooling
Vegetables possess high water content (often >90%). During roasting, energy is initially consumed by the water changing into into steam. This evaporative cooling keeps the surface temperature near the boiling point (212*F), which prevents the Maillard reaction from occurring. Only when the surface is sufficiently dehydrated can the temperature rise high enough to achieve caramelization and browning. What does that mean for you? Those veggies better be BONE DRY when they go into the oven
2. Selection and Mise en Place
Successful roasting begins with uniform preparation. In a professional kitchen, consistency in size directly correlates to consistency in cook time.
- Uniformity: Cut vegetables into uniform shapes (batonnet, paysanne, or large dice) to ensure they cook at the same rate.
- Surface-to-Volume Ratio: Smaller pieces provide more surface area for browning relative to their mass, but they also risk drying out before the interior is tender.
- Moisture Management: Wash and dry all vegetables thoroughly. Excess surface moisture leads to steaming, which yields a flaccid texture rather than a crisp one.
Step 2: Fat Selection and Smoke Points
The choice of fat affects both flavor and the safety – use the wrong oil and you could set the kitchen on fire! For roasting at temperatures of 425*F or higher, the fat must have a smoke point above the oven temperature to prevent the formation of acrid compounds like acrolein and potentially burning down the building. Let’s not do that.
- Avocado Oil: The gold standard for high-heat roasting due to its extremely high smoke point.
- Ghee (Clarified Butter): Provides rich dairy flavor without the burning risk associated with whole butter’s milk solids.
- Extra Virgin Olive Oil (EVOO): Use with caution. High-quality EVOO has a smoke point around $ 375 – 405*F; for high-heat applications, a refined olive oil or grapeseed oil is preferable.

Step 3: Pan Arrangement and Heat Transfer
To optimize heat transfer, vegetables should be roasted on a clean, dry, rimmed sheet pan.
- Avoid Overcrowding: If the pieces are too close, the steam released during the initial phase of cooking becomes trapped between them, leading to steaming rather than roasting.
- Direct Contact: Placing vegetables directly on the metal pan (instead of parchment) facilitates better heat transfer for deep browning.

5. Step 4: The Roasting Process and Staggered Timing
Different vegetable families require different roasting durations based on their density and sugar content. To achieve a uniform medley, use a staggered entry approach.

6. Step 5: Post-Roast Finishing and Service
Roasting concentrates flavors, making them heavy and sweet. Professional finishing techniques provide the necessary balance.
- Acidulation: A splash of lemon juice, balsamic reduction, or sherry vinegar cuts through the richness and brightness the profile.
- Emulsification: Toss warm vegetables in a vinaigrette or a tahini-based dressing while they are still hot; the heat allows the sauce to penetrate the porous roasted surface.
- Aromatics: Add soft herbs (chervil, tarragon, parsley) at the very end to preserve their delicate volatile oils and vibrant green color.
- Carryover Cooking: Remember that dense vegetables will continue to cook for several minutes after removal from the oven due to residual internal heat.
RECIPES

Roast Brussels Sprouts
Ingredients
- 1 ½ pound Brussels sprouts
- 3 tablespoons extra virgin olive oil EVO
- ½ teaspoon salt
- 1 teaspoon black pepper
- 1 teaspoon garlic powder
- ¼ cup parmesan
Instructions
- Preheat oven to 400
- Start 2 quarts well-salted water boiling
- Trim root bottoms and peel off any yellow leaves
- Make a small “x” in the base of each with a paring knife
- Parboil for exactly 2 minutes.
- Drain completely and chill for storage or continue cooking
- Mix in a bowl with remained of ingredients. Pour on a sheet pan lined with aluminum foil and roast for 15 minutes. Remove from oven and flip. Bake for an additional 15 minutes, until crisp with some dark brown edges and tender on the inside.
- Taste, add more salt and pepper if necessary.

BLANCHING
You’ve probably heard the term “blanching” before—you might even be well-versed on the process. But how often do you actually utilize this technique?
Blanching is one of the easiest ways to lock in the color, flavor, nutrients, and texture of broccoli and other veggies, whether you’re prepping for a stir-fry, salad, casserole, or just want a quick, healthy side dish. Blanching is also a great way to par-cook vegetables before freezing, helping to preserve their texture and color after thawing.
How To Choose The Best Broccoli
Before you get to blanching, keep an eye out for these key indicators of freshness when choosing your broccoli at the store:
- Vibrant green color: Look for broccoli with a bright green color, without any yellow spots.
- Firmness: The broccoli stalks should be firm (not rubbery) and the florets should be tight and compact.
- Moisture: Avoid broccoli with stems that are dry or cracking.

Blanched Broccoli
Instructions
- Cut the broccoli: Cut the broccoli florets into uniform pieces for even cooking. Peel, trim, and chop any tough stalks if you plan to cook them

- Boil water: Bring a large pot of salted water to a rolling boil. You'll want the water to be salty—about 1 to 2 tablespoons of salt per gallon to help season the broccoli and maintain its color.
- Cook the broccoli: Add the broccoli to the boiling water and cook for 2 to 3 minutes (less for florets and more for stalks), or until the pieces turn bright green and are tender-crisp when you pierce them with a knife.
- Drain the broccoli: As soon as the broccoli turns bright green and is at your desired tenderness, drain well.
- Shock in ice water: Quickly (and carefully!) transfer the cooked broccoli to a large bowl of ice water. This stops the cooking process and locks in their color and texture.
- Drain: After the broccoli is cool to the touch, drain in a colander to remove excess liquid. Jiggle the colander gently to release any excess water.
- Dry: If you are going to be refrigerating the blanched broccoli for more than a day, store it DRY. Arrange the blanched veggies on a half sheet pan lined with paper towels to remove excess moisture before using. If necessary, pat dry with paper towels.


MISCELLANEOUS RECIPES
Tennessee-Style Collard Greens with Smoked Ham Hocks and Bacon
Ingredients
- 6 slices of bacon
- 1 large onion chopped
- 3 clove garlic minced
- 2 to matoes chopped
- 2 smoked ham hocks
- 1 lb collard greens thoroughly washed, dried, and cut into 2 inch pieces
- 3 cup chicken broth
- 1½ tsp red pepper flakes
- 2 tbsp cider vinegar
- 1 tbsp brown sugar
- 1 tsp sea salt or to taste
- 1 tsp black pepper freshly ground
Instructions
- Add bacon to a large pot and cook over medium-high heat until crisp. Remove from the pot, crumble, and return to the pot.
- Add onion and cook until tender, about 5 minutes.
- Add garlic, and cook until just fragrant.
- Add collard greens and fry until they start to wilt.
- Add chicken broth, tomatoes, ham hocks, sea salt, black pepper, red pepper flakes, cider vinegar, and brown sugar
- Reduce heat to low, cover, and simmer for 45 minutes or until the greens are tender.
- Taste and adjust salt and pepper.
Baked, Stuffed Artichokes
Ingredients
- 1 artichokes washed, drained, trimmed, and cored
- juice of 2 lemons divided (about 1/4 cup)
- 1/3 cup unsalted butter
- 3 tablespoons shallots finely chopped
- 1 ½ tablespoons garlic minced
- ⅓ cup vegetable stock
- 1 ½ cups fresh breadcrumbs
- ¼ cup Italian parsley washed, dried, finely chopped
- 2 tablespoons Parmesan cheese finely grated, plus more for topping
- EVO for drizzling on top
- sea salt and freshly ground black pepper to taste
Instructions
Prep Artichokes
- Fill a steamer pot with a few inches of water, and place a steamer basket on top. Cover the pot and bring the water to a boil. Turn the heat to low and let it simmer.
- Use a Chef’s knife to cut off about 1-inch from the top of each artichoke, and enough off of the bottom to form a nice base. Remove any especially tough outer leaves and discard them. Then use kitchen scissors to cut off the sharp tips of the leaves.
- Using your hands, carefully pull the leaves away from the middle of the artichoke — just enough so that you can see down to the choke. Now use a spoon to reach down and gently scrape away and discard all of the fuzz, to reveal a clean heart. Drizzle about 1 tablespoon of the lemon juice inside and over each one.
- Place the artichoke, stem-end up, in the steamer basket, cover, and steam until they are almost tender, about 15 minutes. Check for doneness by pulling off an outer leaf — it should come off fairly easily. Set them aside to cool or refrigerate overnight.
- Preheat the oven to 375 degrees F.
Make Stuffing
- Melt the butter in a large sauté pan over low-medium heat. Let it simmer until it begins to brown, about 3 minutes. Add the shallots and garlic and cook until soft, about 3 minutes. Pour in the remaining lemon juice and the vegetable stock. Stir and let this simmer on low heat for about 4 minutes. Add the bread crumbs and parsley, stir to blend and remove from the heat. Season to taste with salt and pepper. Stir in parmesan cheese and reserve.
Assemble and Bake
- Place the artichokes, sitting on their bases, in a baking dish.
- Use a spoon and/or your hands to carefully fill the center of each artichoke with the stuffing — fill it to maximum capacity! (If you think there’s too much stuffing, don’t worry just pack it in.) Then fill all of the spaces between the leaves as much as possible. Sprinkle the top of each one with 1 tablespoon of the Parmesan. Drizzle with EVO.
- Place the stuffed artichokes in preheated 375 degree F oven and bake until the breadcrumbs are golden and the cheese has melted, 15 to 20 minutes (if allowed to cool), 25-35 minutes (if refrigerated overnight).
Gazpacho
Ingredients
- About 2 pounds ripe red tomatoes cored and roughly cut into chunks
- 1 Italian frying cubanelle pepper or another long, light green pepper, such as Anaheim, cored, seeded and roughly cut into chunks
- 1 cucumber about 8 inches long, peeled and roughly cut into chunks
- 1 small mild onion white or red, peeled and roughly cut into chunks
- 1 clove garlic
- 2 teaspoons sherry vinegar
- 1 teaspoon Lime juice
- 1/2 teaspoon ground cumin
- 1 pinch dried oregano
- 1 pinch cayenne pepper
- 1 teaspoon Worcestershire sauce
- ½ cup extra-virgin olive oil more to taste, plus more for drizzling
- Salt & black pepper to taste
Instructions
- Combine tomatoes, pepper, cucumber, onion and garlic in a blender or, if using a hand blender, in a deep bowl. (If necessary, work in batches.) Blend at high speed until very smooth, at least 2 minutes, pausing occasionally to scrape down the sides with a rubber spatula.
- With the motor running, add the vinegar and 2 teaspoons salt. Slowly drizzle in the olive oil. The mixture will turn bright orange or dark pink and become smooth and emulsified, like a salad dressing. If it still seems watery, drizzle in more olive oil until texture is creamy.
- Strain the mixture through a strainer or a food mill, pushing all the liquid through with a spatula or the back of a ladle. Discard the solids. Transfer to a large pitcher (preferably glass) and chill until very cold, at least 6 hours or overnight.
- Before serving, adjust the seasonings with salt and vinegar. If soup is very thick, stir in a few tablespoons ice water.
Tomato Jam
Ingredients
- 1 ½ pounds ripe, concassed tomatoes peeled, cored, seeded, and chopped
- 1 cup sugar
- 2 tablespoons lime juice freshly squeezed
- 1 tablespoon grated ginger
- 1 teaspoon ground cumin
- ¼ teaspoon ground cinnamon
- ⅛ teaspoon ground cloves
- 1 teaspoon salt
- 1 fresno chili or other red peppers stemmed, seeded and minced
Instructions
- Combine all ingredients in a heavy medium saucepan, Bring to a boil over medium heat, stirring often.
- Reduce heat and simmer, stirring occasionally, until mixture has consistency of thick jam, about 1 hour 15 minutes. Taste and adjust seasoning, then cool and refrigerate until ready to use.
- CCP: Store safely for 7 days